The website creation is an attempt in centralizing my digital presence. This website is probably the biggest project and endeavor I have taken upon because of the aggregration of knowledge, content, and developing methodical processes and the overall infrastructure of how the website will be deployed. I had to augment my understanding by re-familiarizing myself with HTML and CSS code, docker compose, and bash scripting in cojunction to other skills. This project was very intrincate because the intent of this website it designed to be multi-purpose. I spend much time working on personal project or tasks, some of those first time projects have massive learning curvatures and there is much time for research. I am coming to the understanding and importance of recording and documenting those projects especially if it is an iterable project. The idea and process of developing and building my own website was an inchoate, it just required some brain power allocation. The intention of the website is multi-factorial of where it will house my projects tutorials, programming repository, to provide an adequate and thorough professional digital profile. It is important to mention this project was done on my own accord and there was no use of AI involved through out the process. This was strictly a beneficial project of which I wanted to vet the learning process myself.
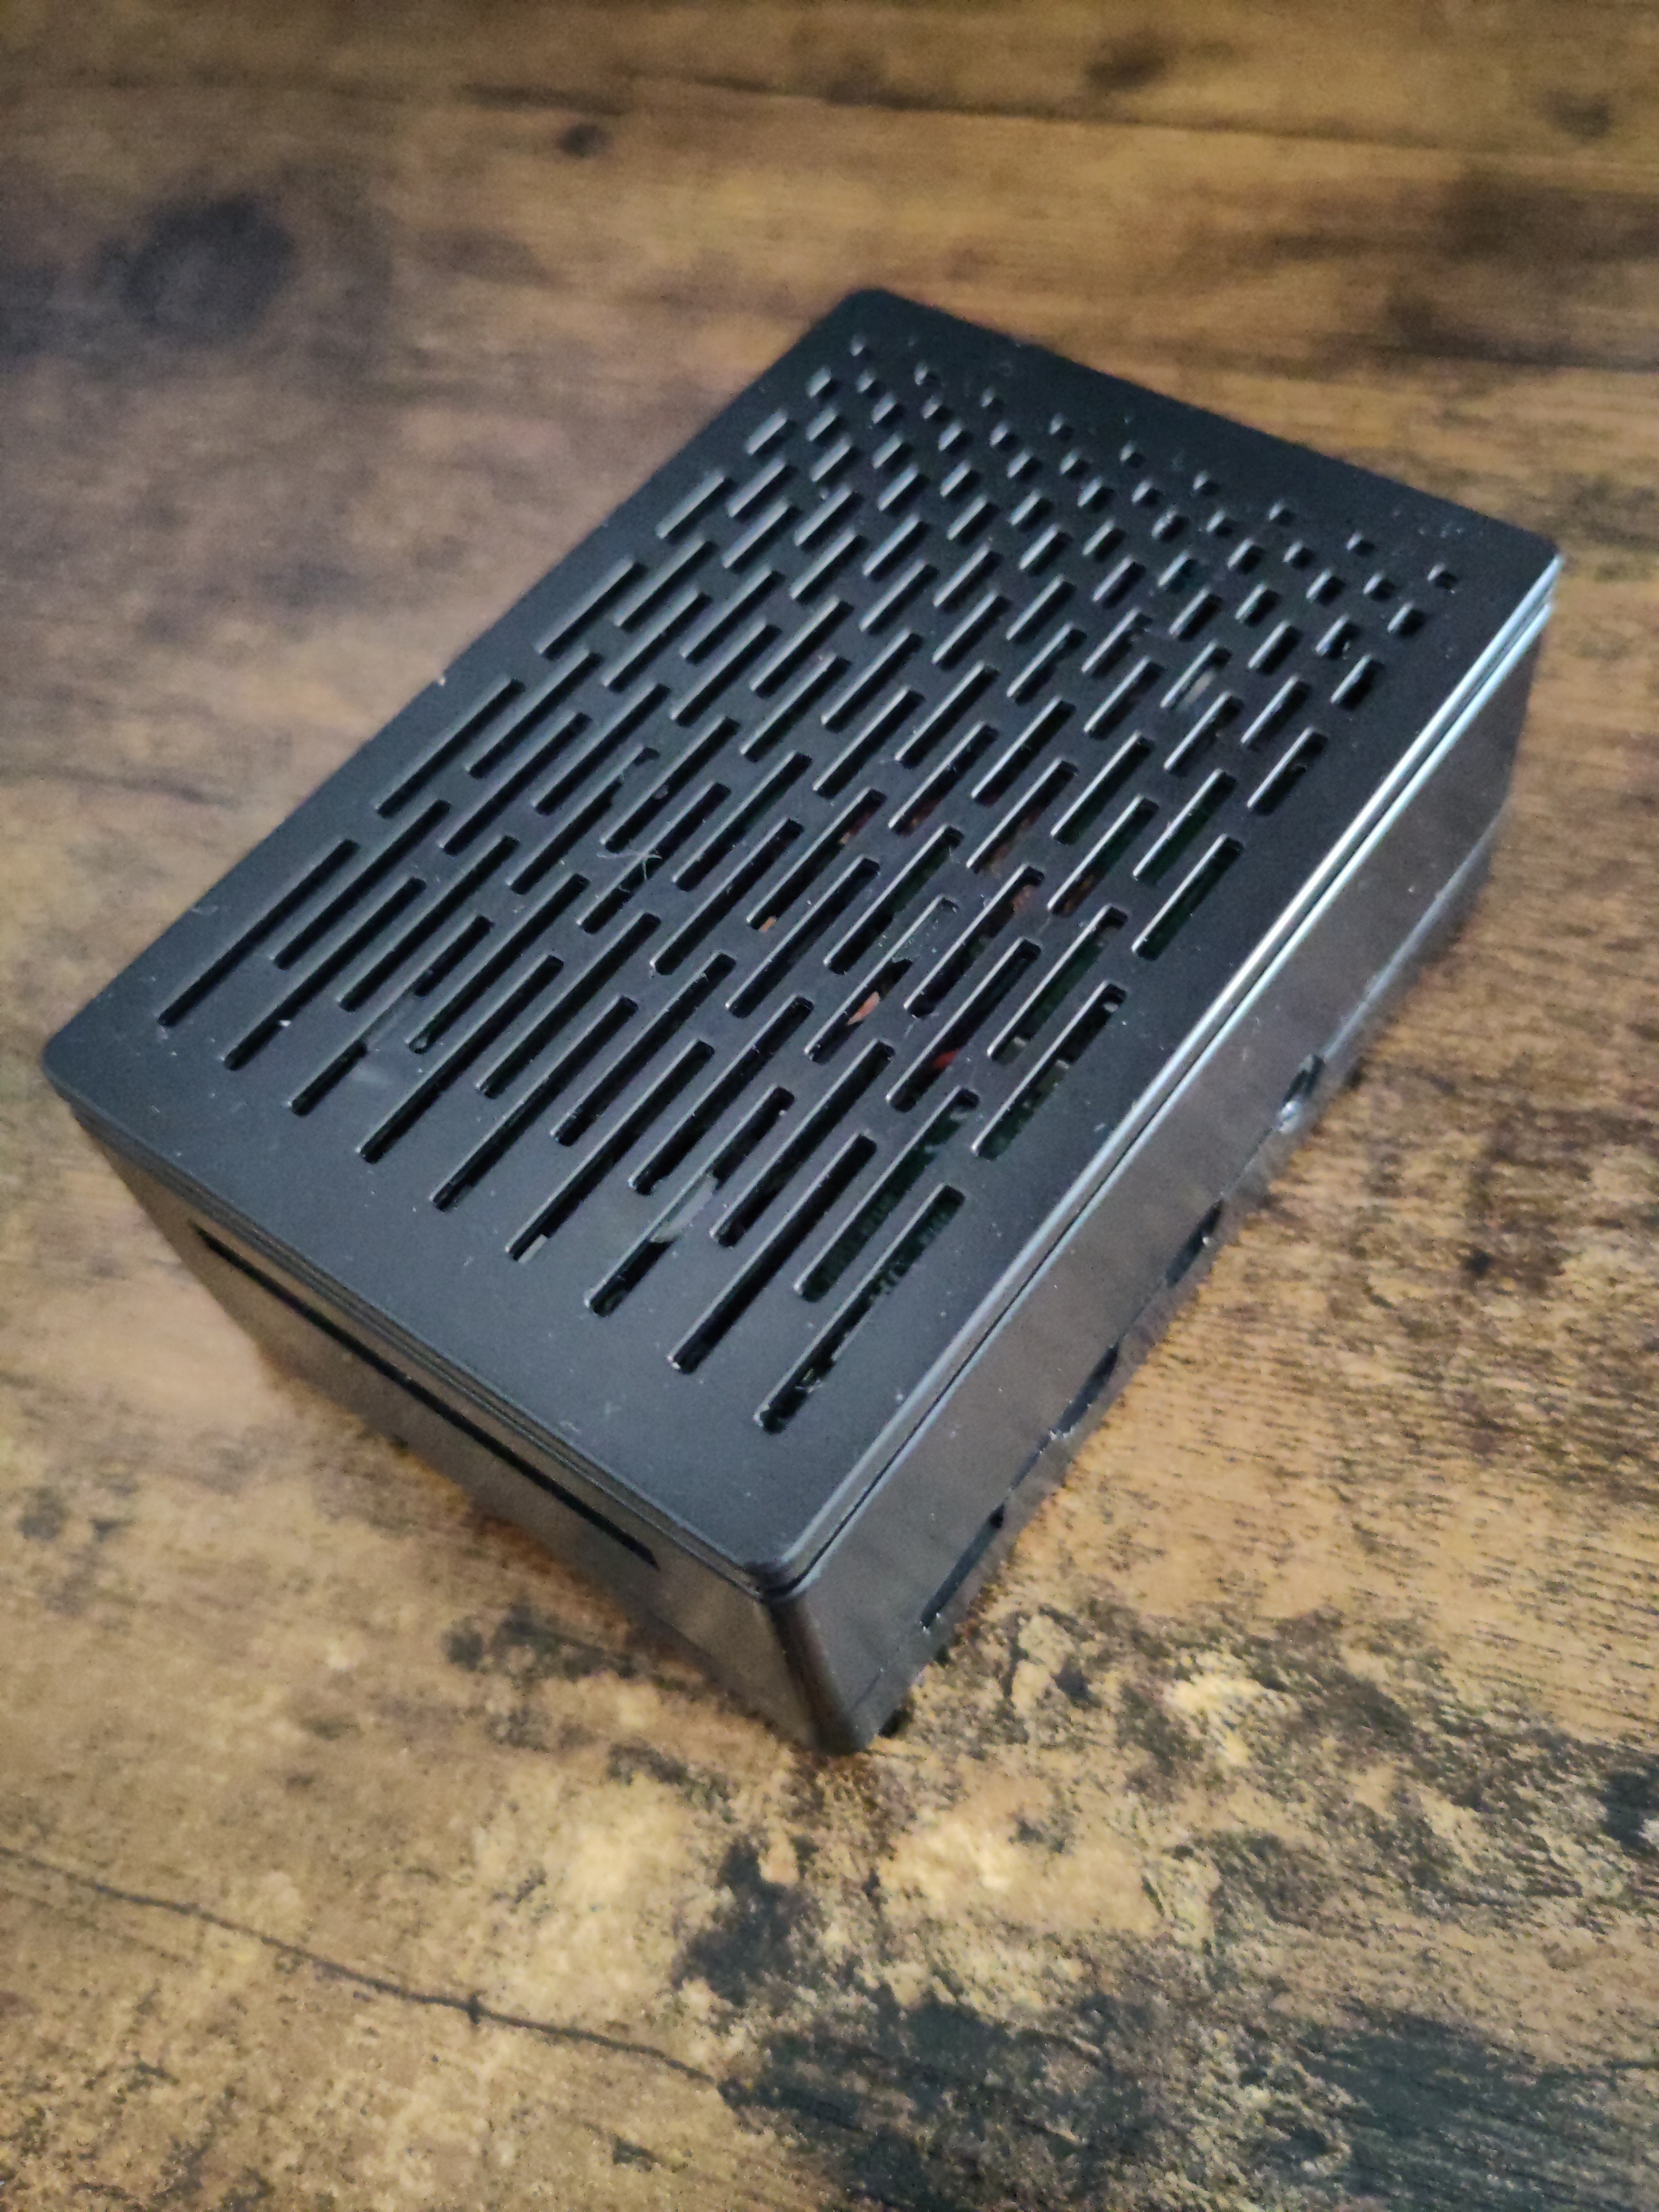
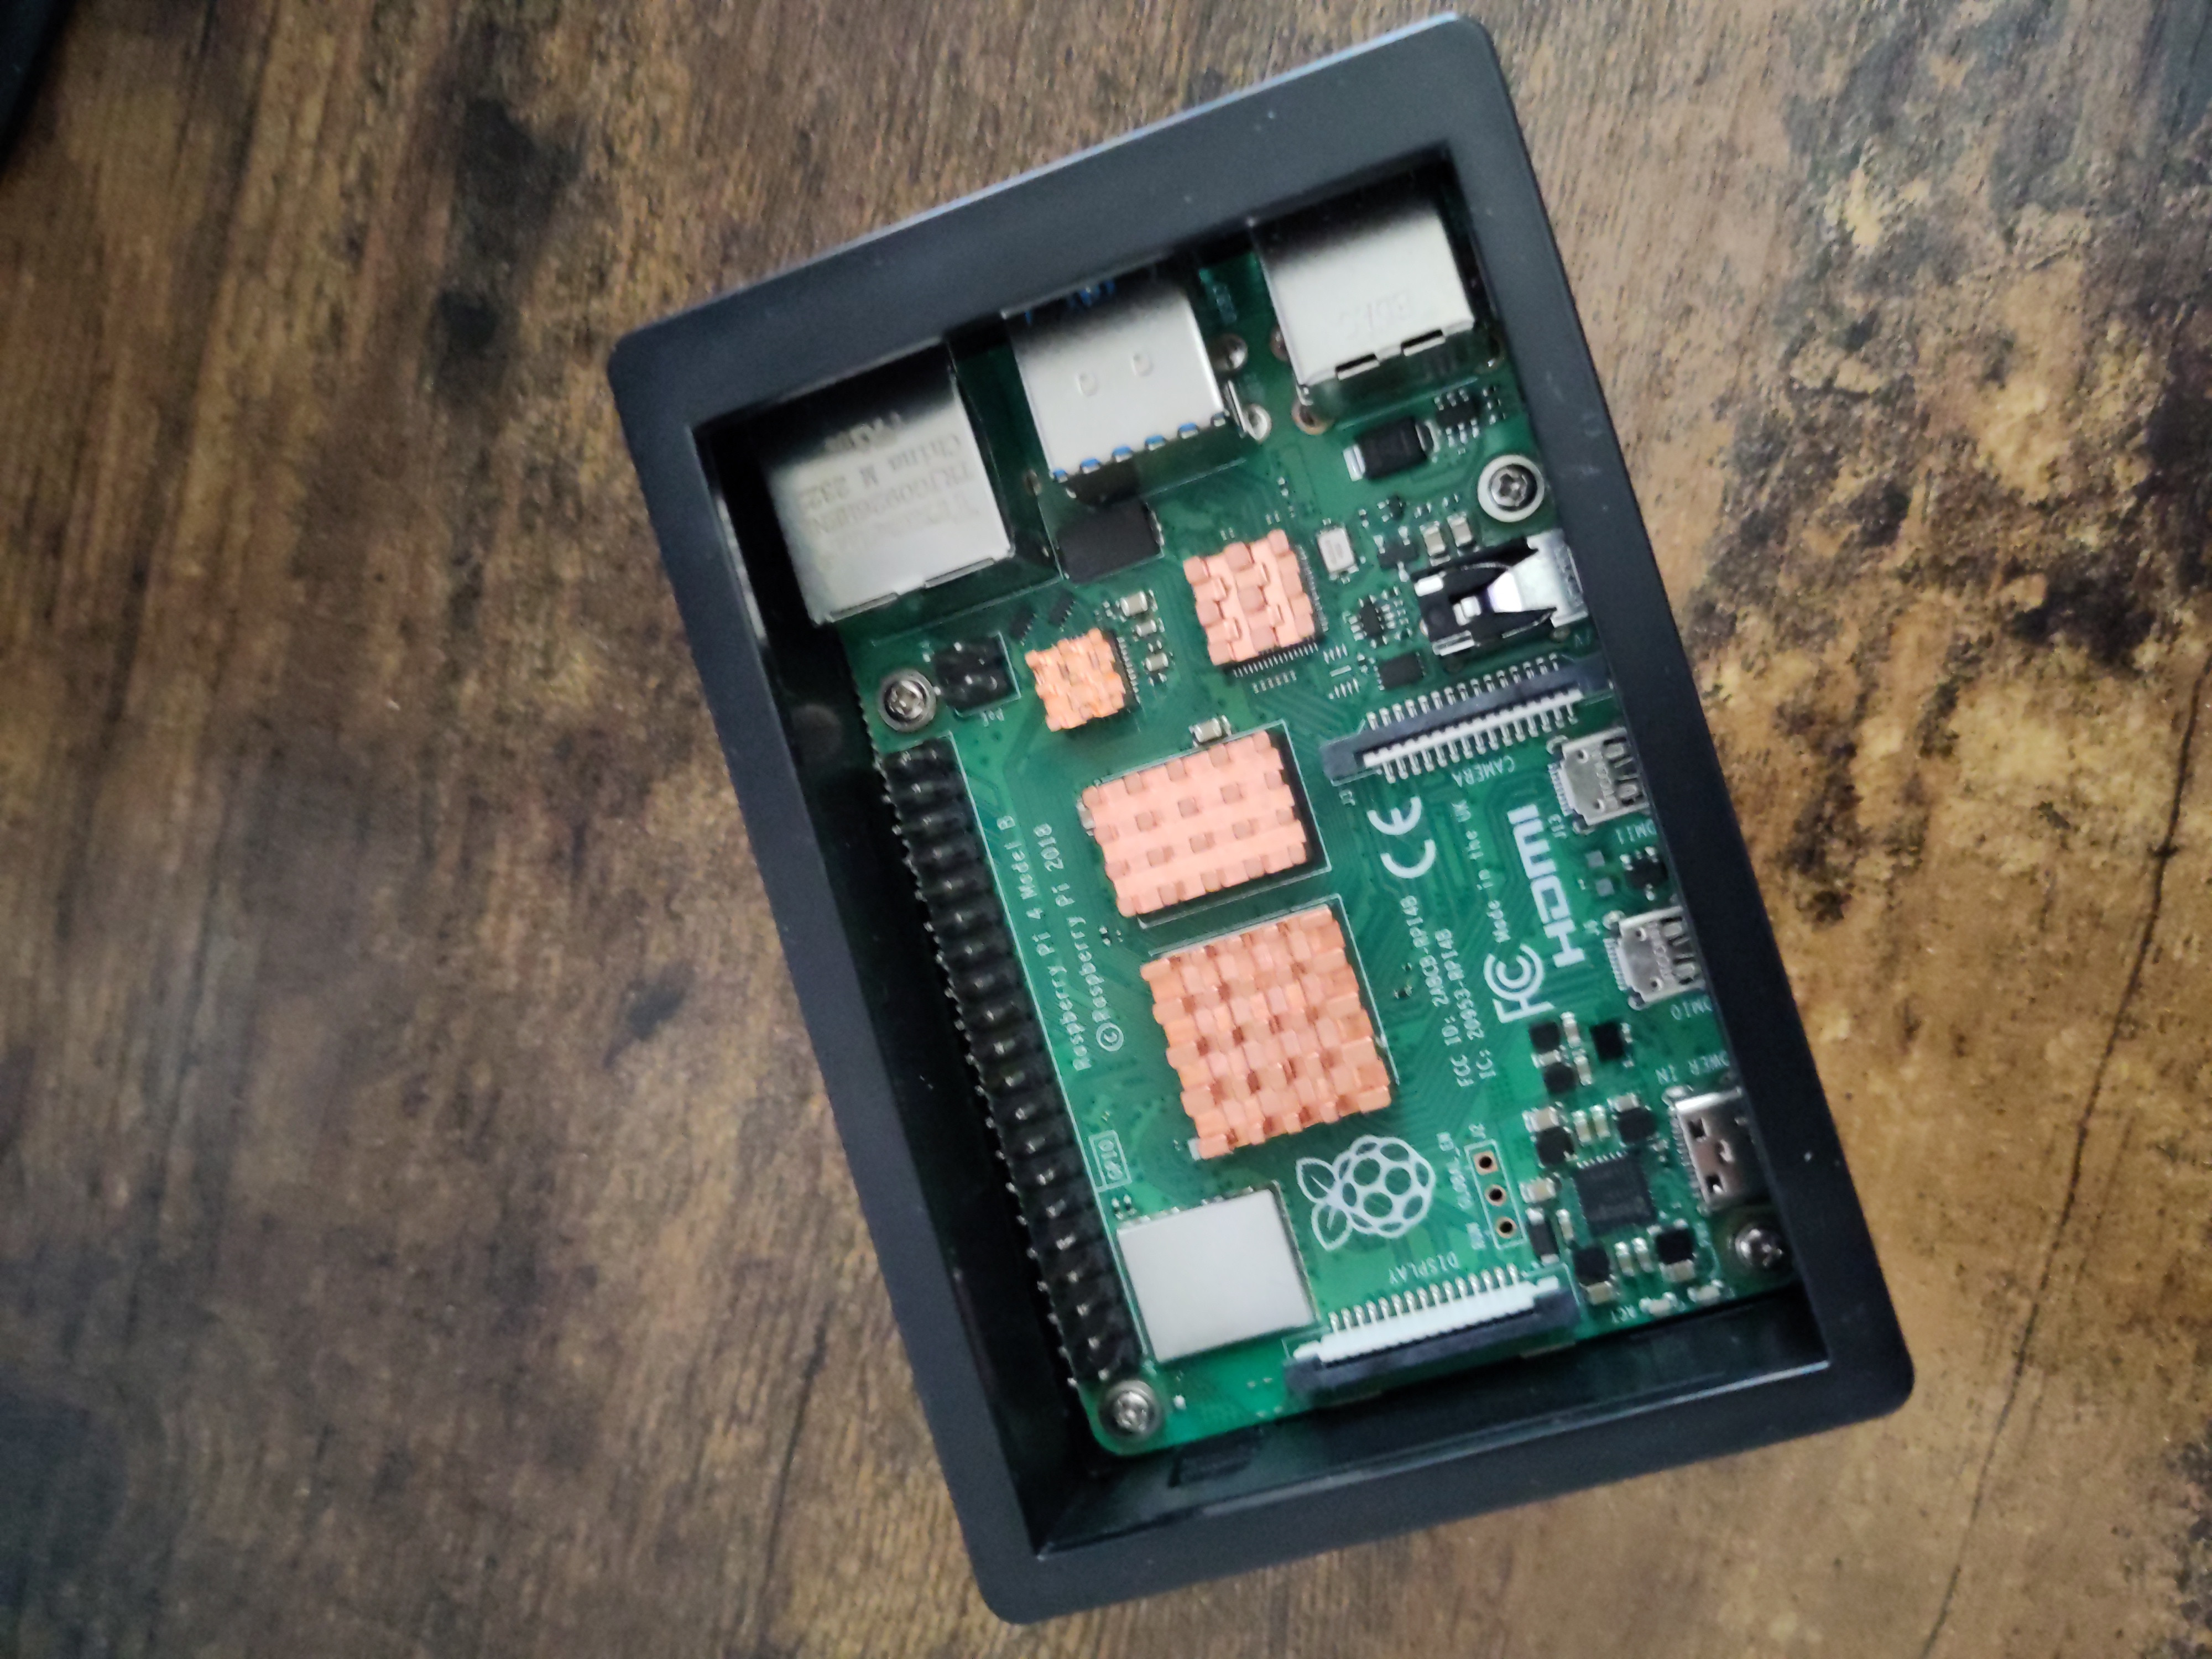
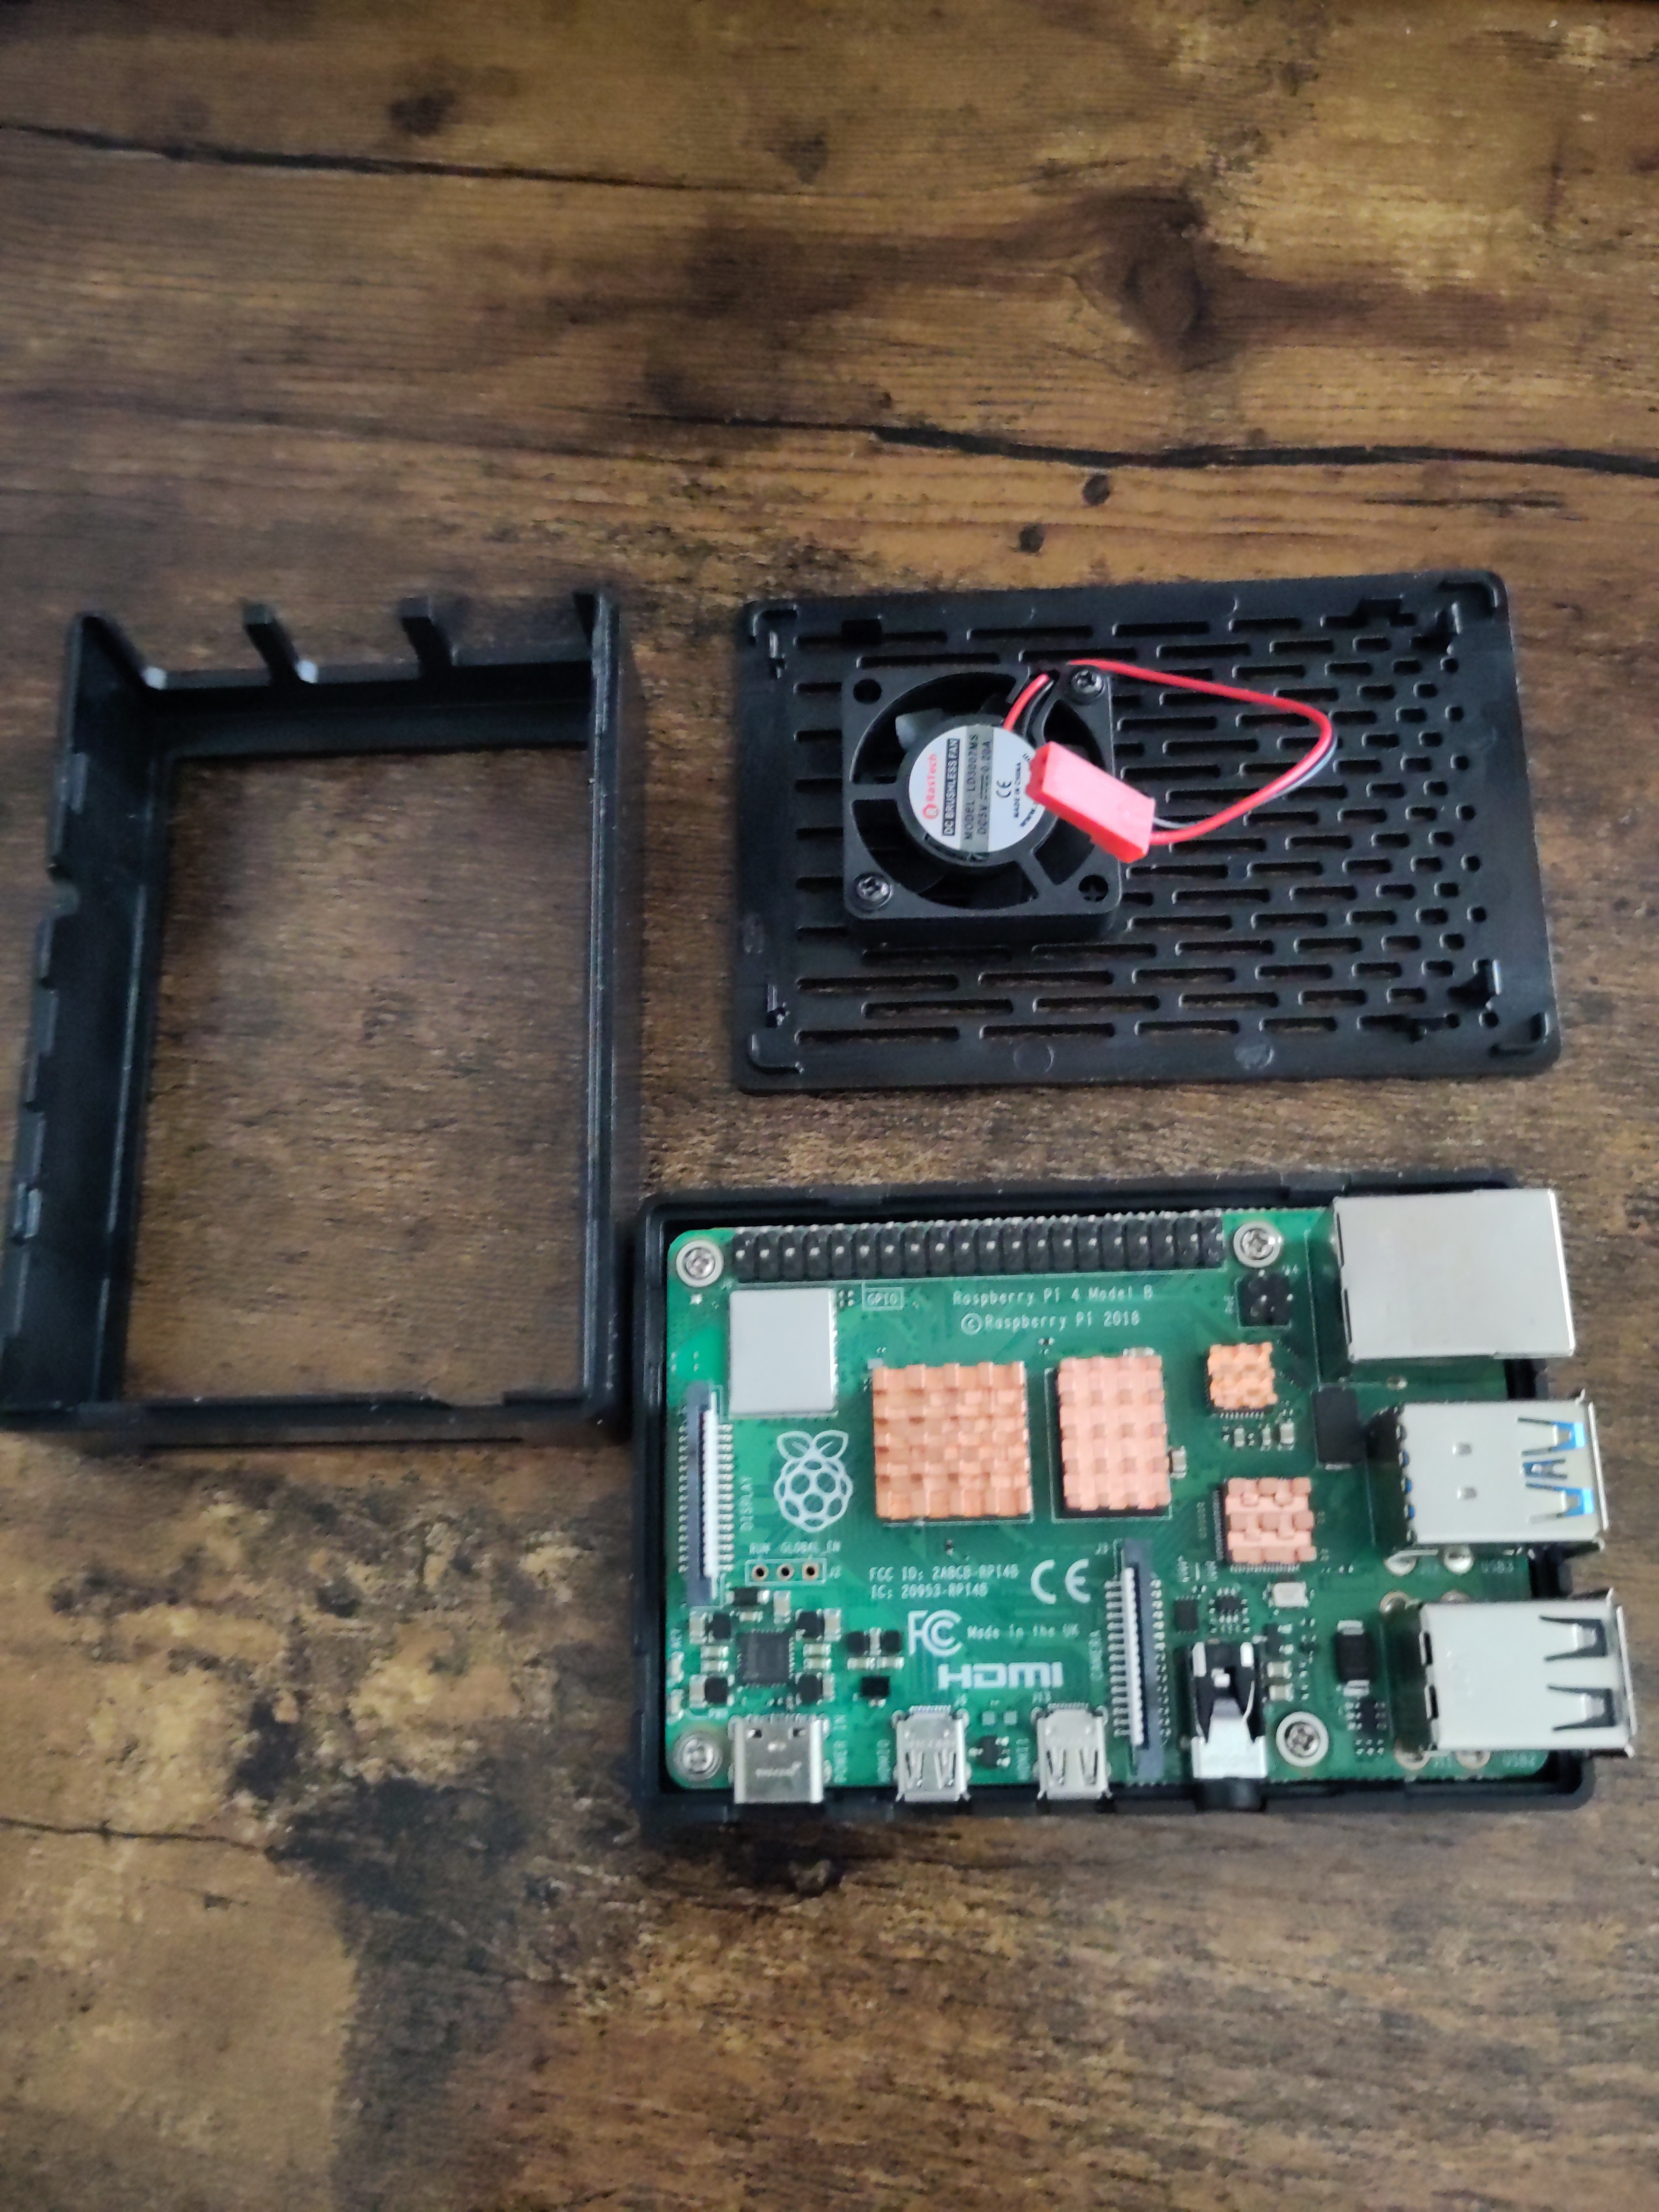
This is my first major project involving web development and the usage of HTML and CSS. I have learned the basics of HTML and CSS on my own accord, but never took on any serious projects involving the coding languages. This website was coded out of a basic text editor with the use of web browser to visually inspect the code throughout the process. Simultaneously, I had to aggregrate a series of documents, photos and complete a series of projects to serve as a the structural backbone of this project. Another area of focus is the hardware and technical know-how of approximating hardware specification and how to weave it the specified device into the network and navigate the multiple different way of setting up an operating system with multiple different aspects to take into account such as network mapping, infrastructure, security and the method of website. I decided for modularity and simplicity to utilize a Raspberry PI 4 that is an ARM-64bit based CPU. This website is self-hosted on my own infrastructure using Fedora Linux and Docker compose with several other software applications and programs. In essence, I built my own miniature web server. This endeavor is causing me to learn much in reagard many different subjects that are being interwoven in order to bring this into fruition. Also, I wanted take on this endeavor because I do enjoy tinkering. This project has also caused me to understand about the inner workings of a website and how the overall infrastructure internet works by acquiring a domain and installing monitoring systems. I am also tasked with making the web server operate autonomiously. The automation corresponds to ensuring the devices continiously updating the system, powering on and off and security and monitoring configurations.
Project:Starter Replacement
Project Purpose: Personal/Required
Time Frame: February 2026 - May 2026
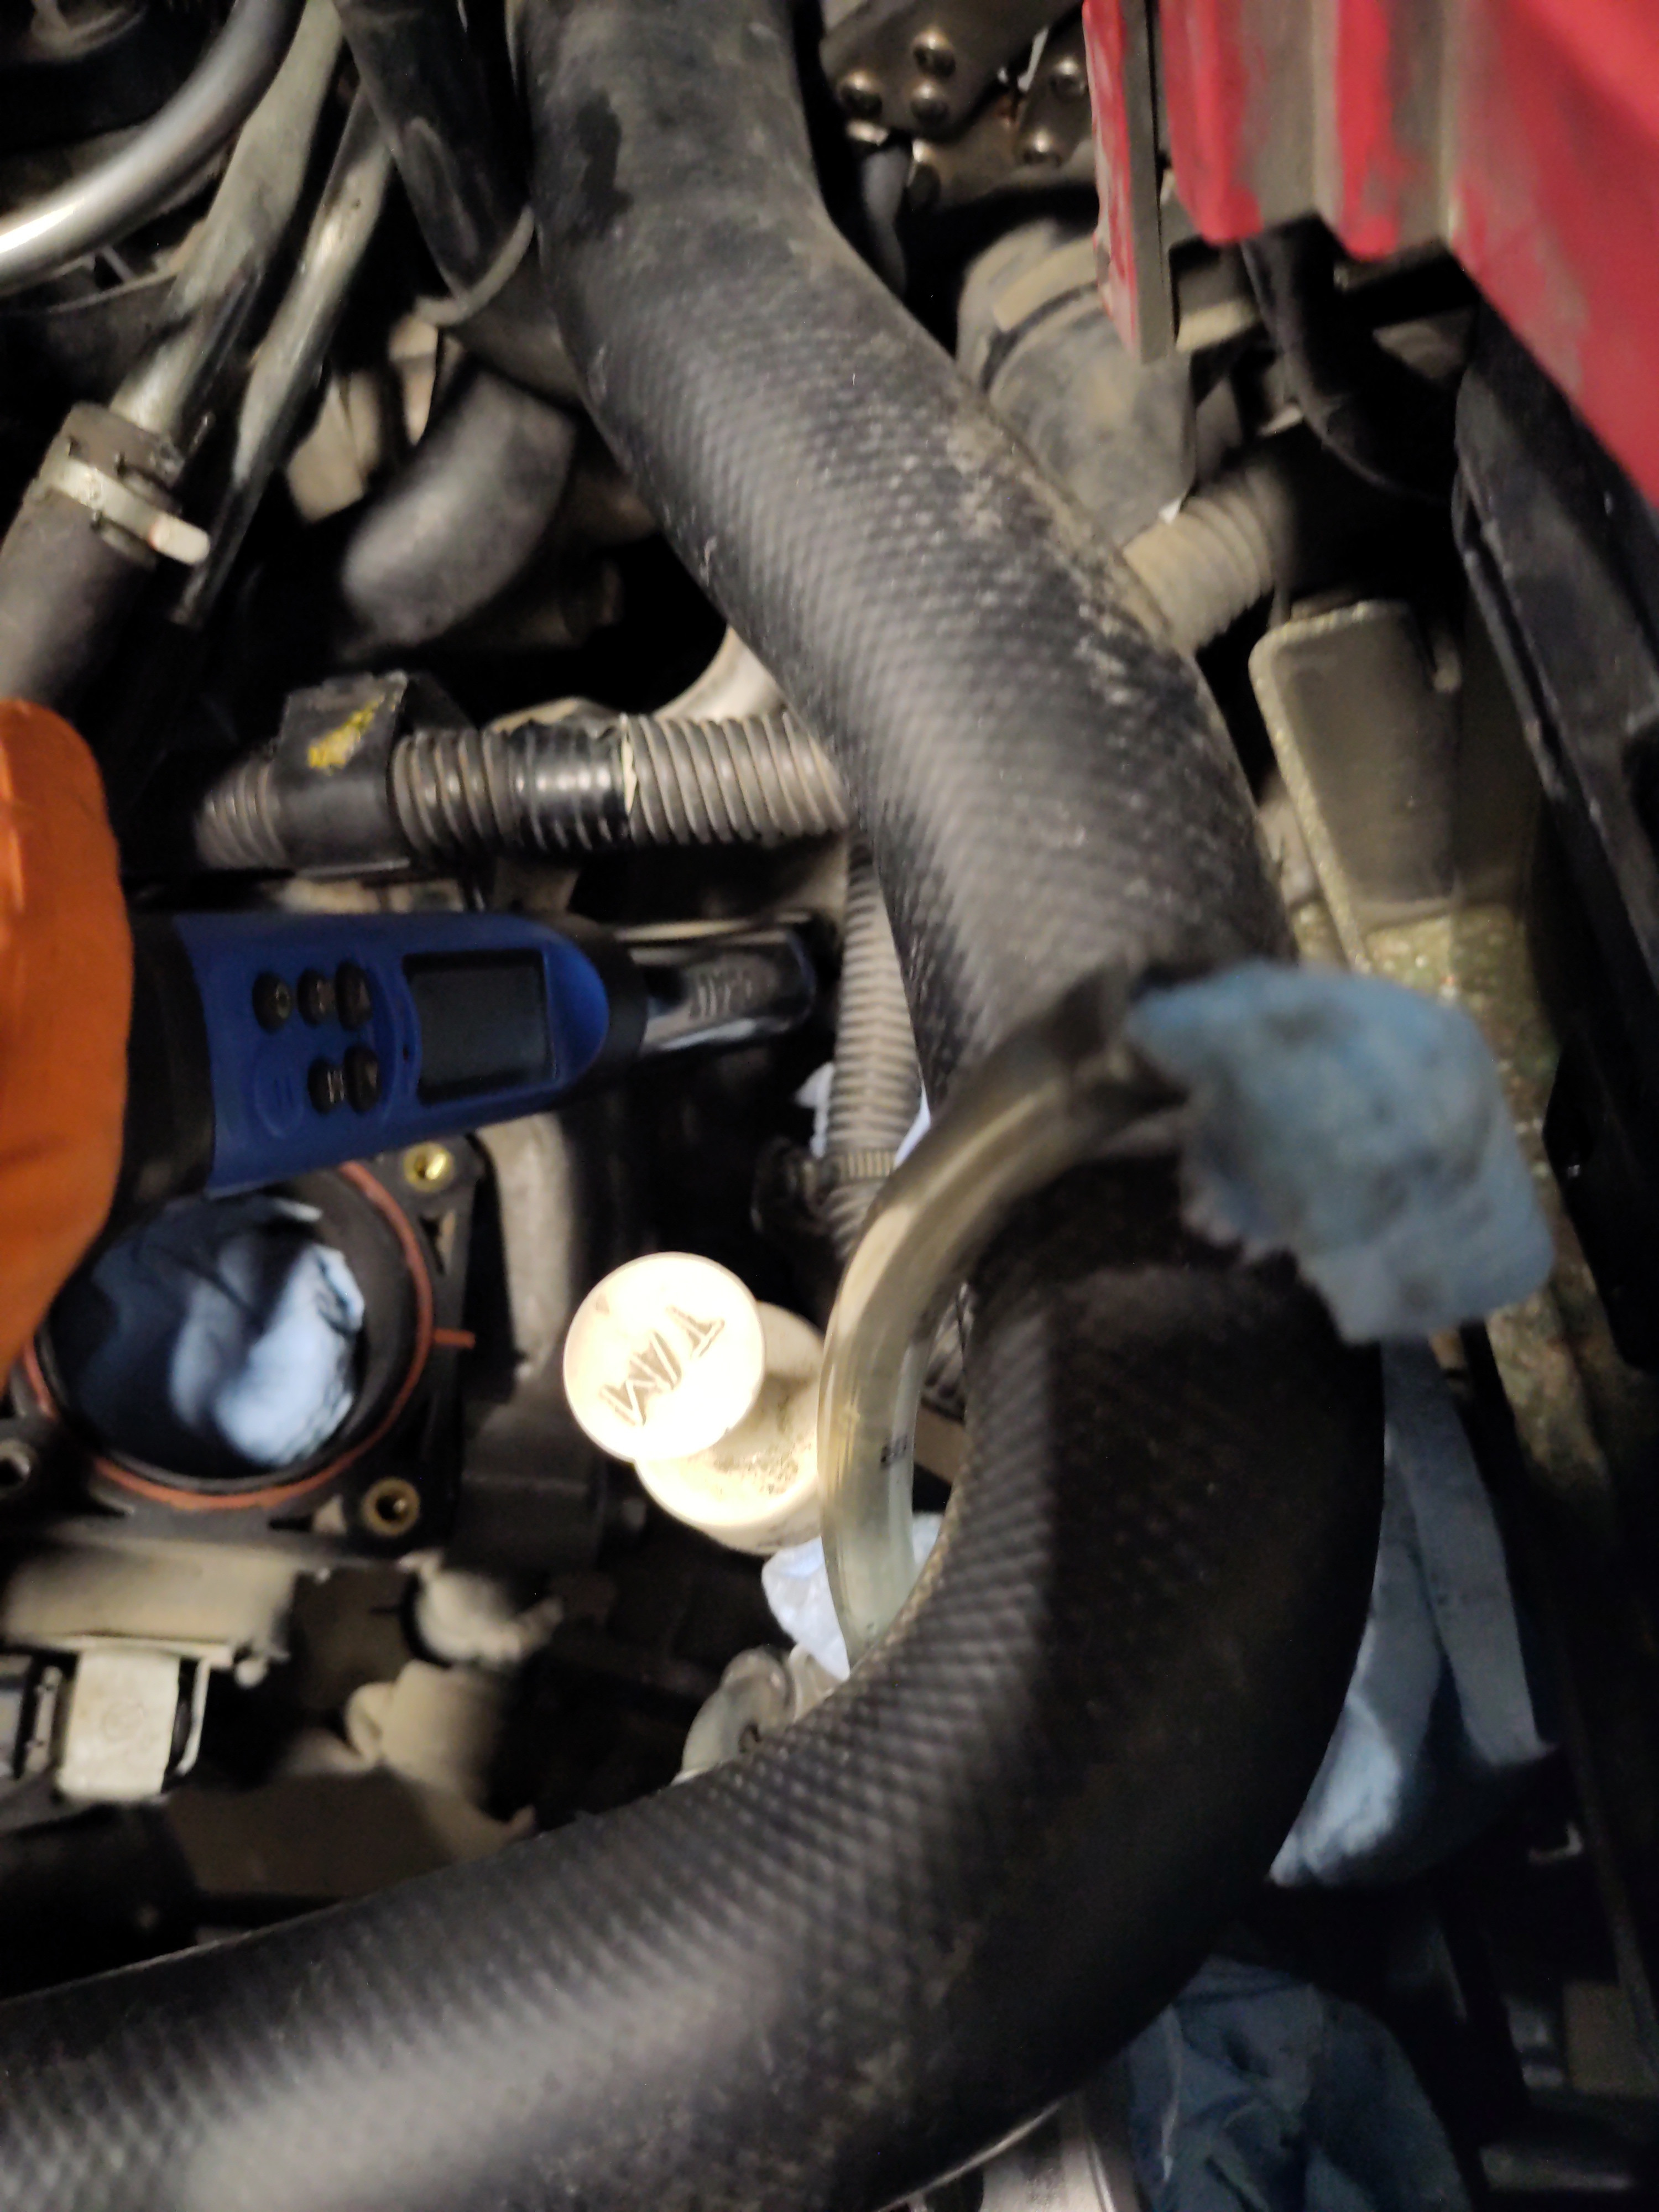
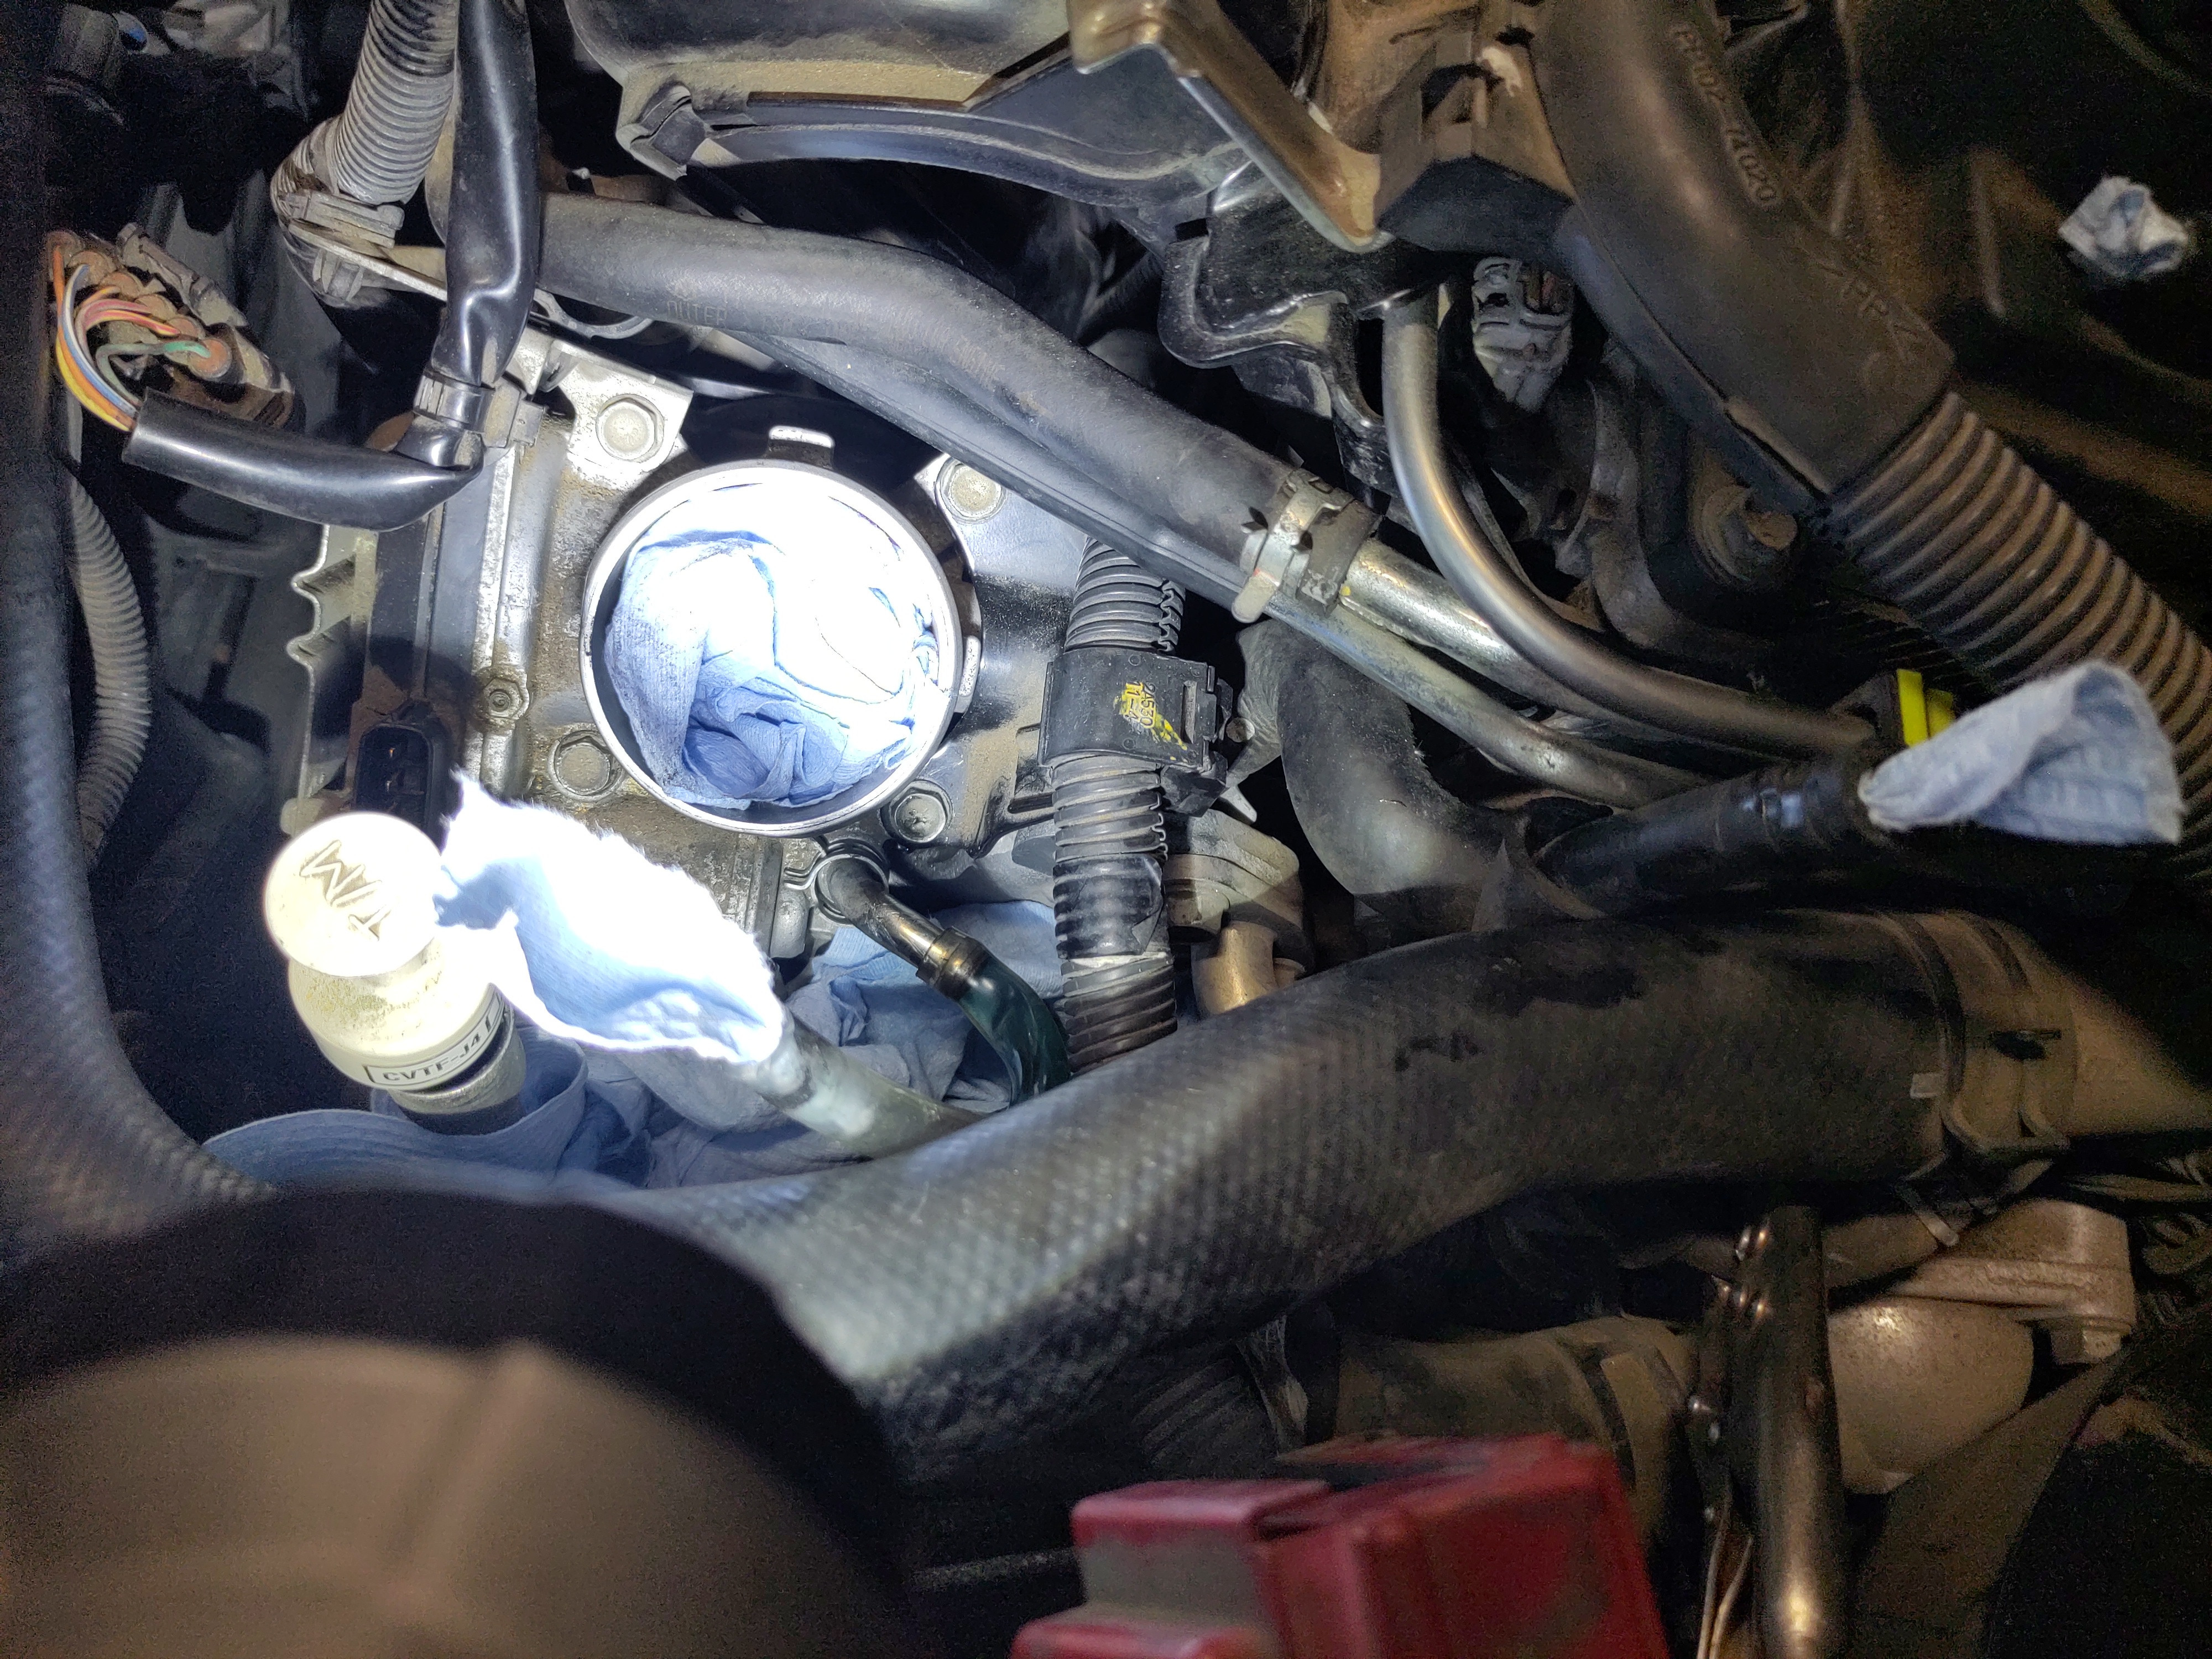
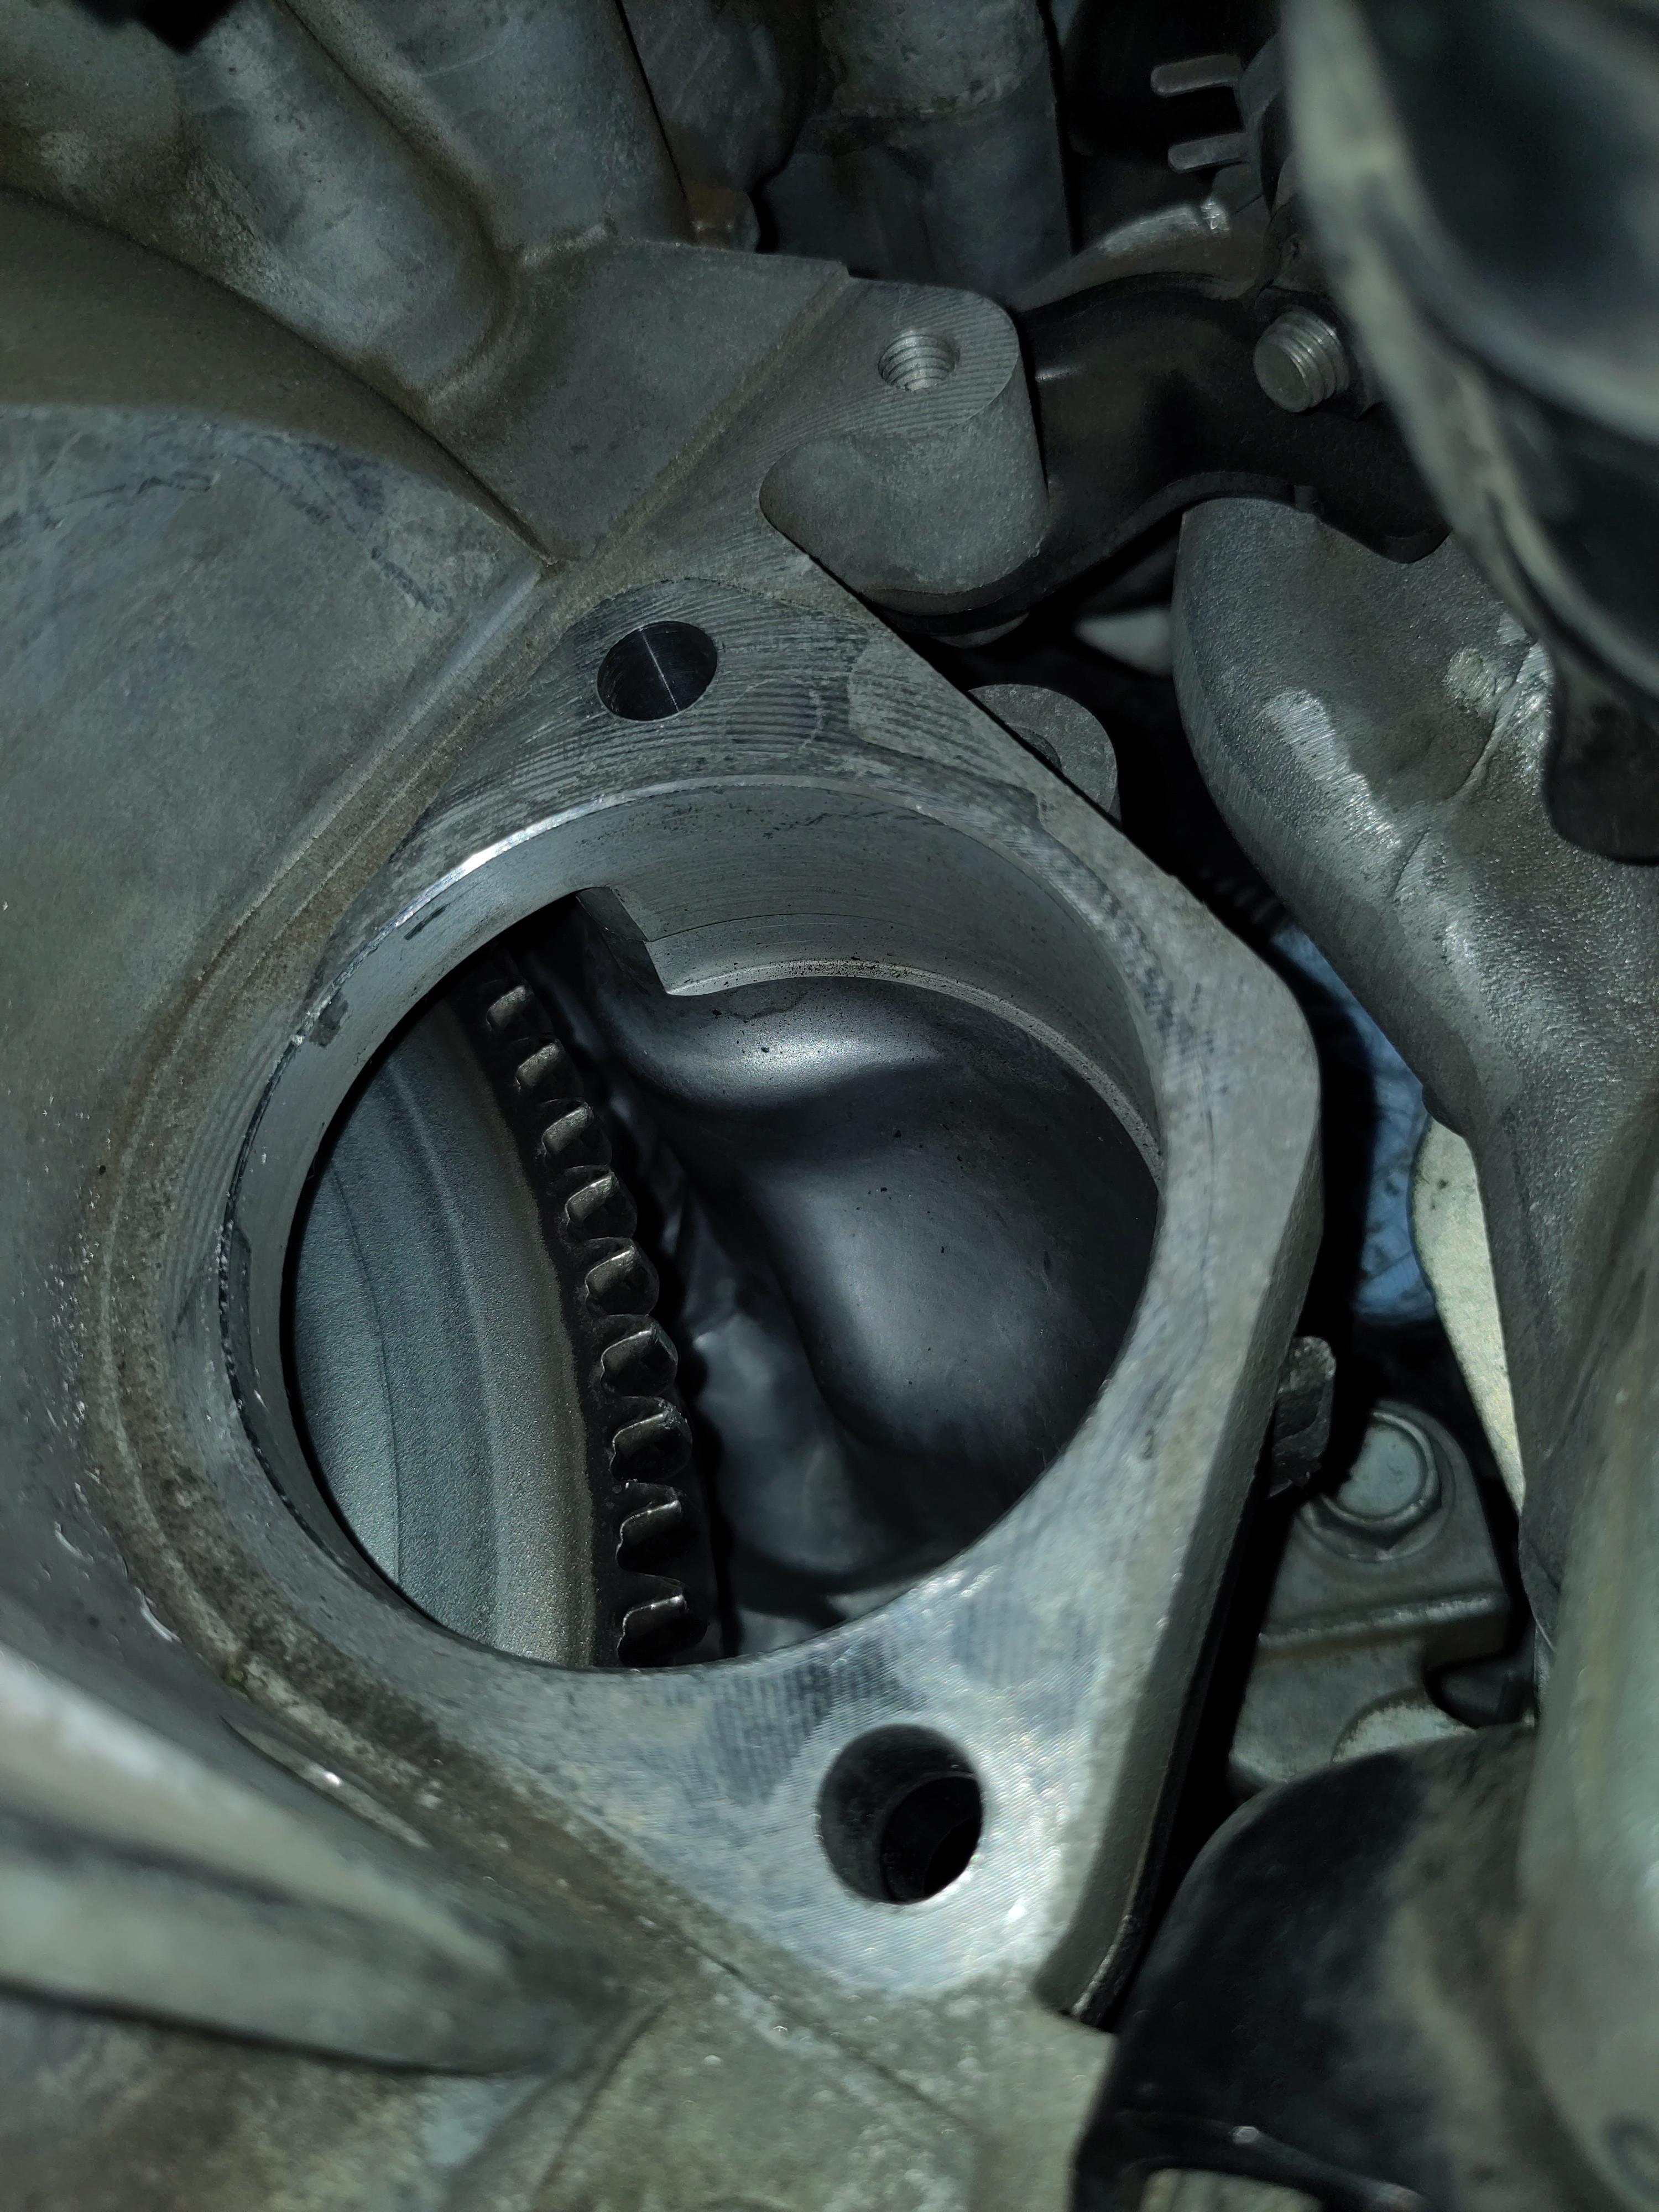
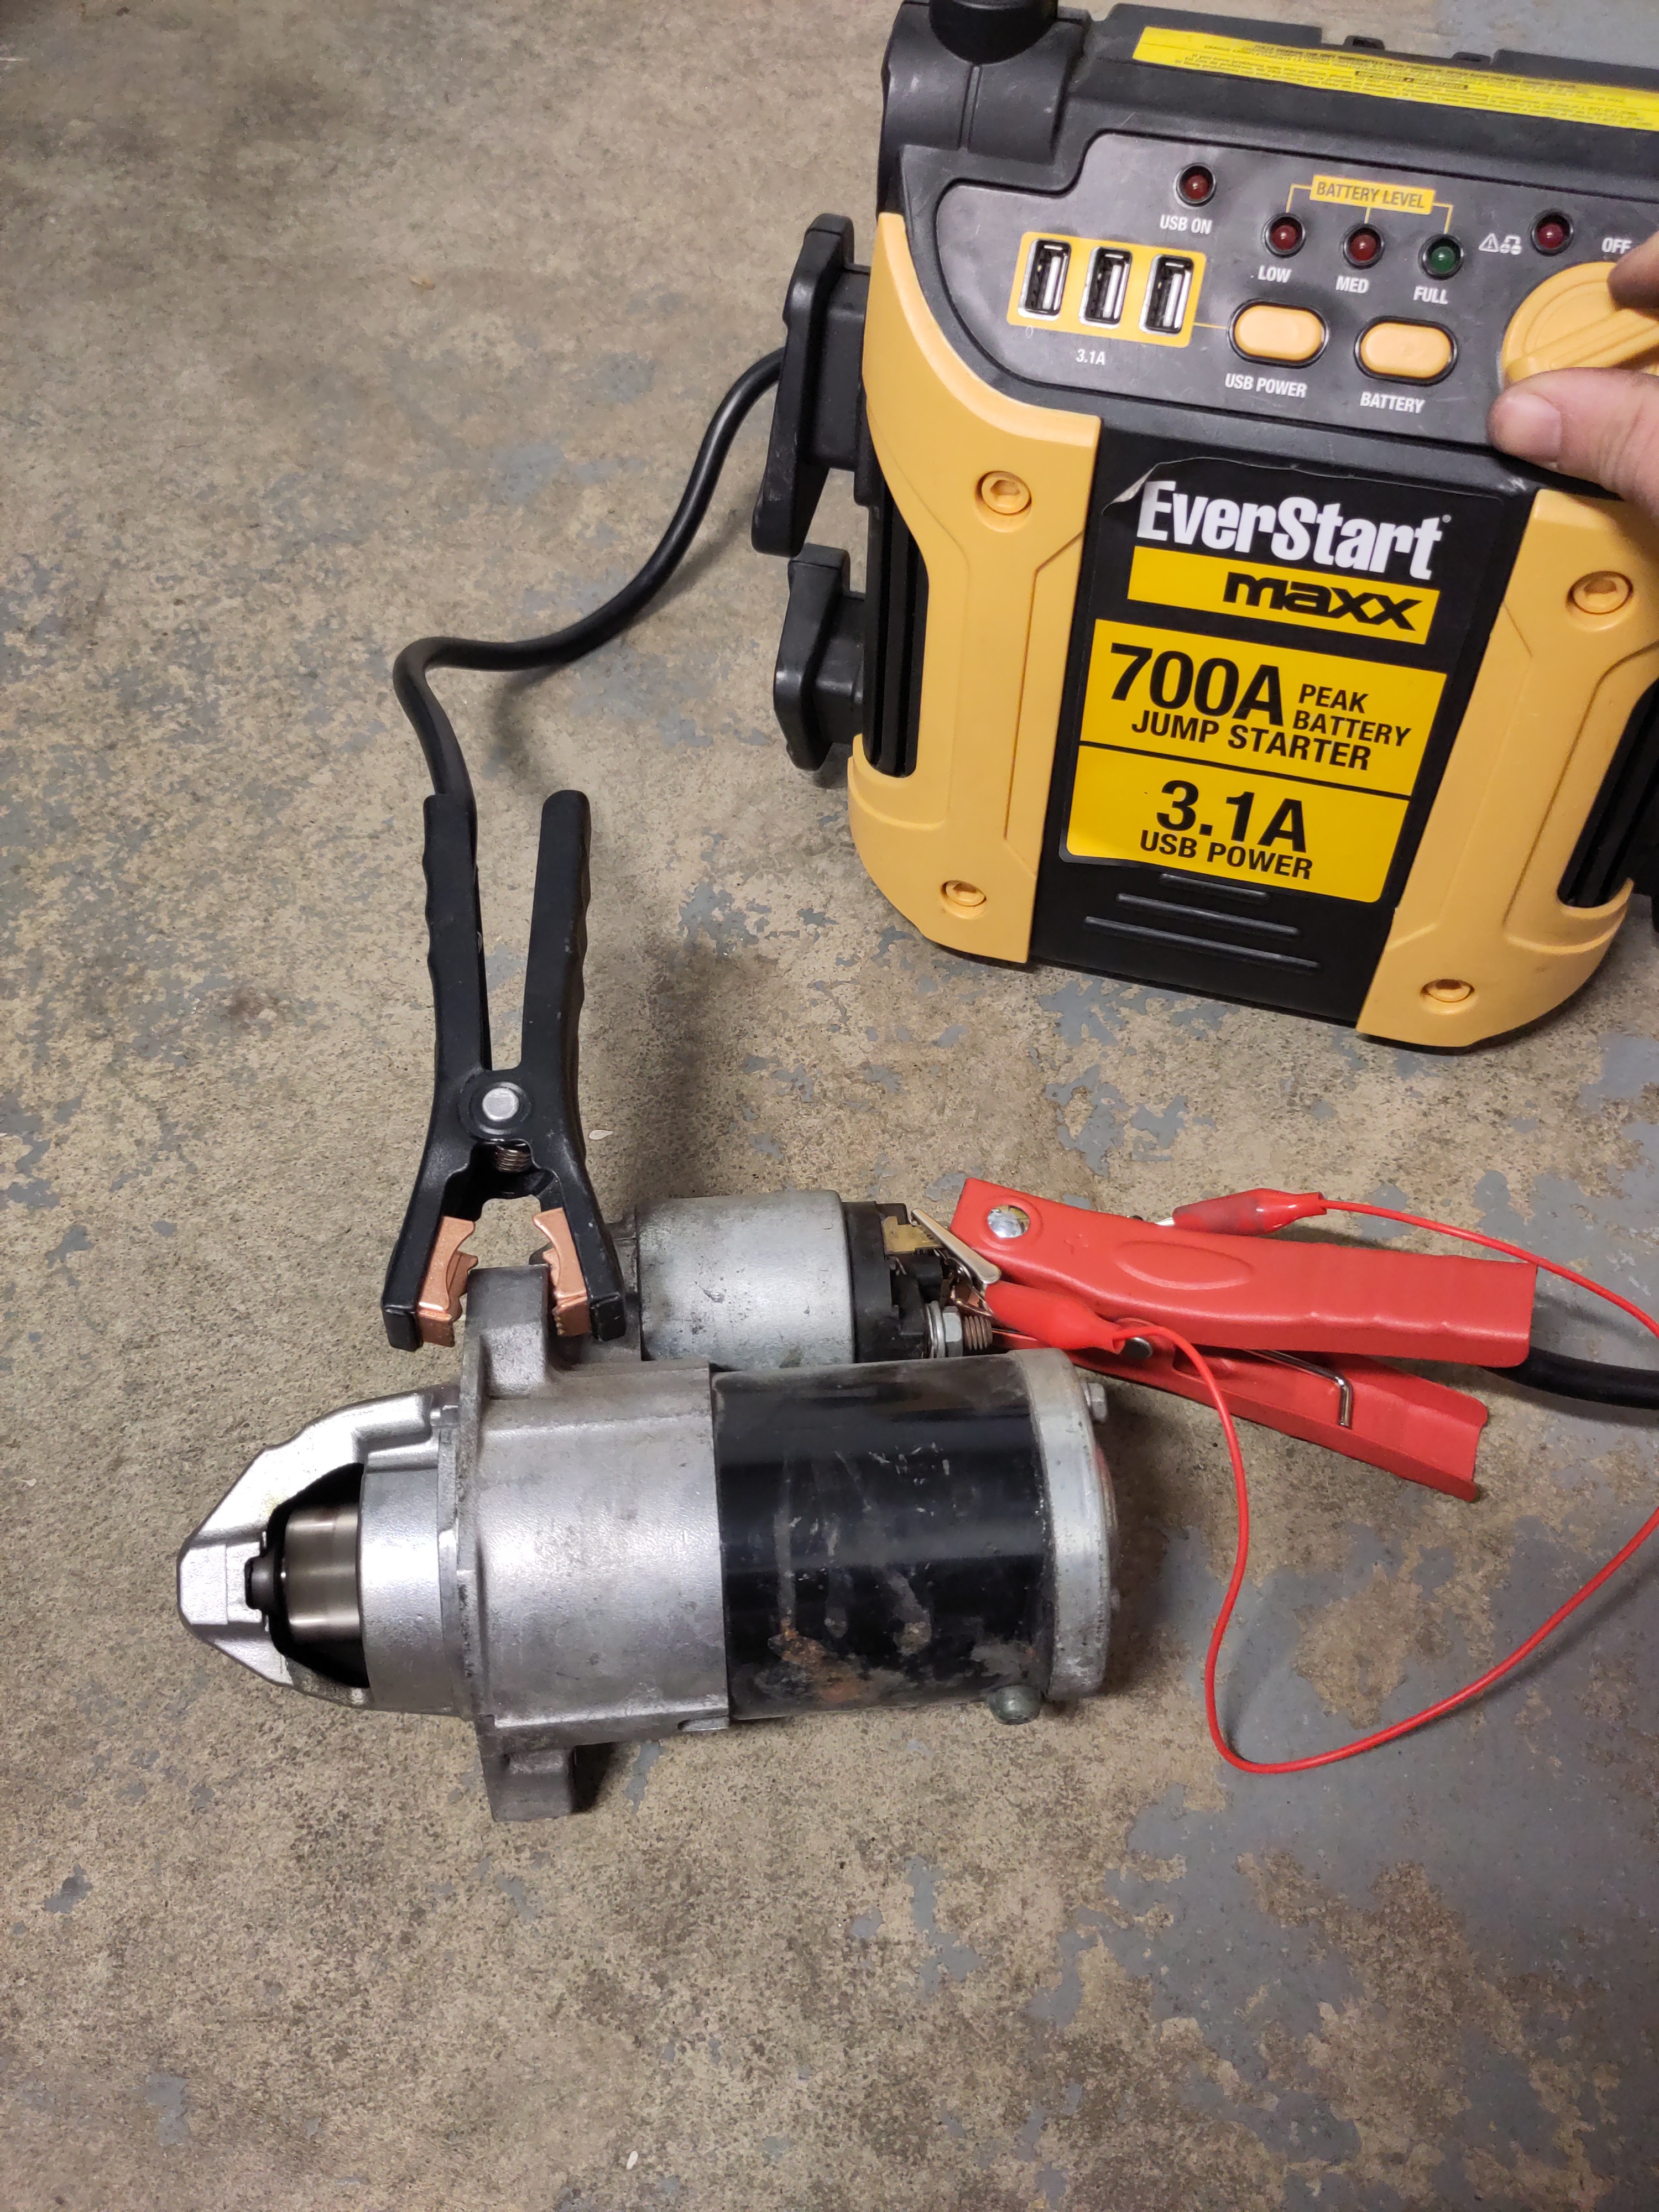
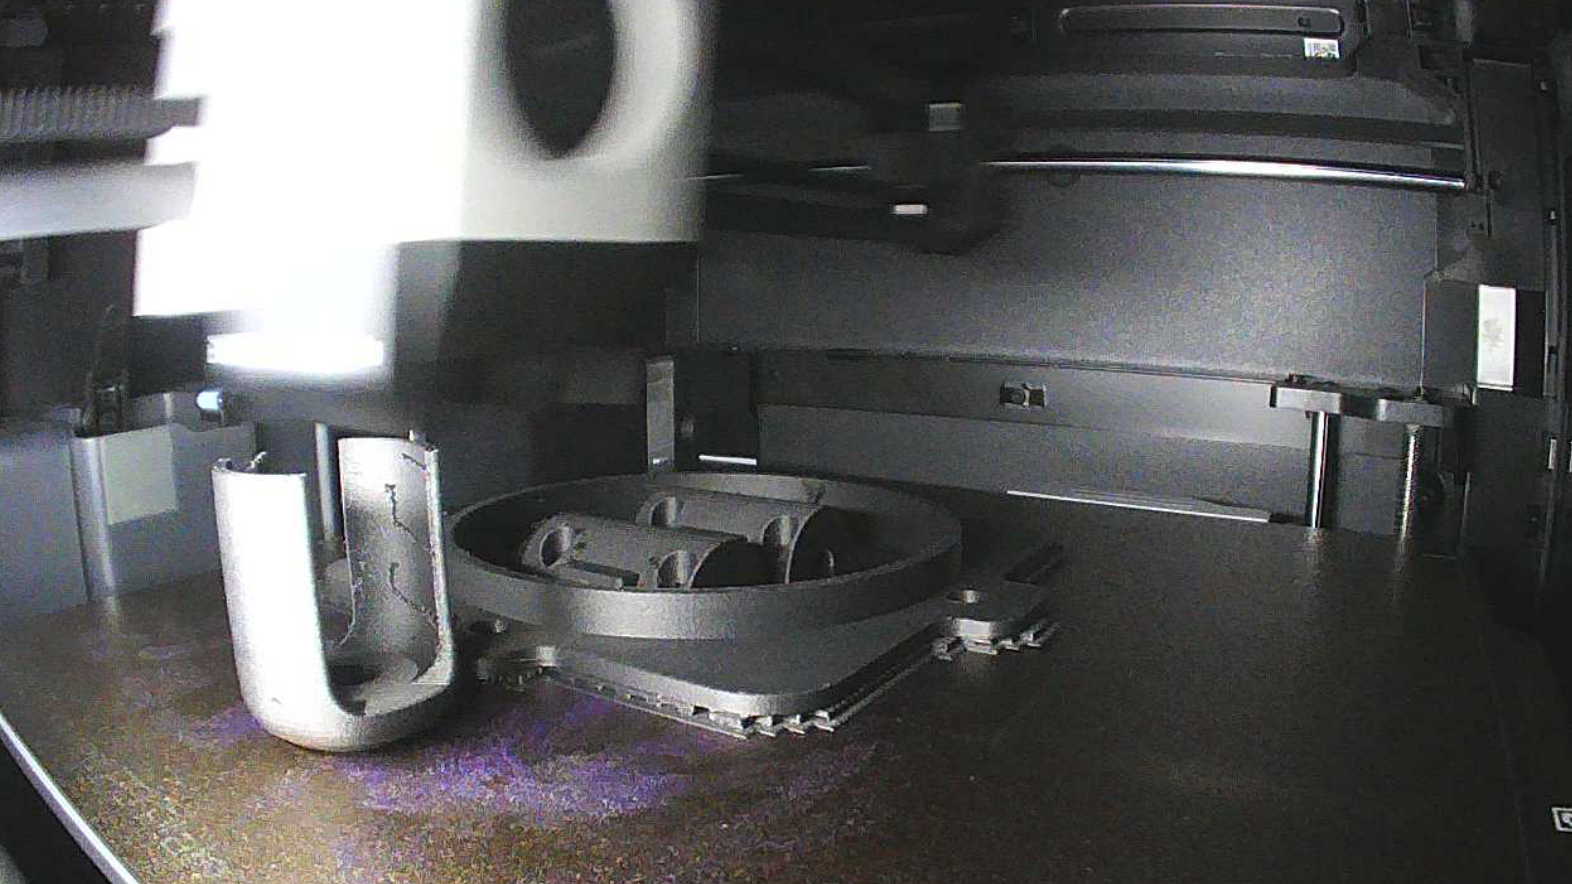
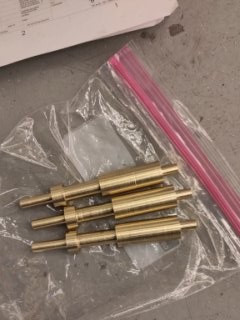
The starter replacement was a project conducted on my personal vehicle. The car was inoperable at the time, there was some plug and play projects and this was one of them. The vehicle had no indication of diagnostic codes being illuminated from the engine light nor the ECM. This was a perplexing occurrence at the moment of time because the vehicle was always in good operation and maintenance. The focal point of this project was diagnose the vehicle further by testing to see if the original starter was malfunctioning. The project lead to the further understanding of testing and troubleshooting mechanical and electrical systems in the vehicle. There certain engineering principles being applied such as thermodynamics and electromagntism and the conversion of the electrical energy being converted into mechanical energy. There were a series of questions ascertaining and concerns not just from a performing the task, but in engaging cognition and trying understand the vehicles's subsystems inner operation. The project was documented and many photos were taken as well to ensure the tutorial and documentation was comprehensive. I did take on the endeavor the extrapolating on how to test and under the inner operation and functionality of the starter with it basic engineering design and composition.
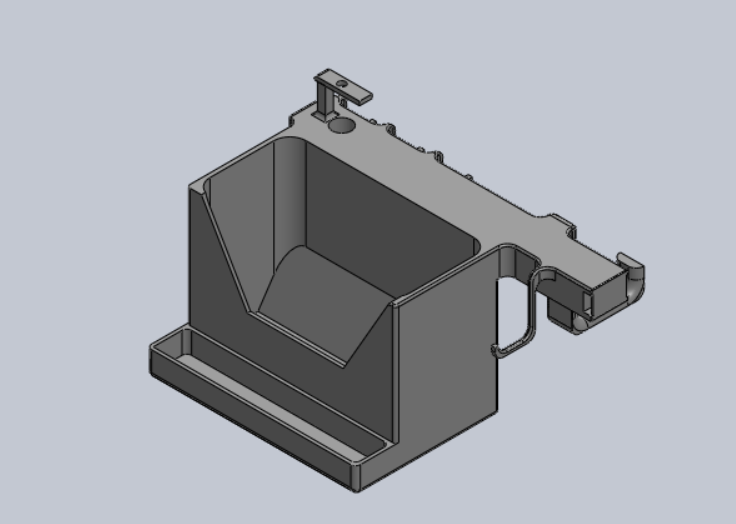
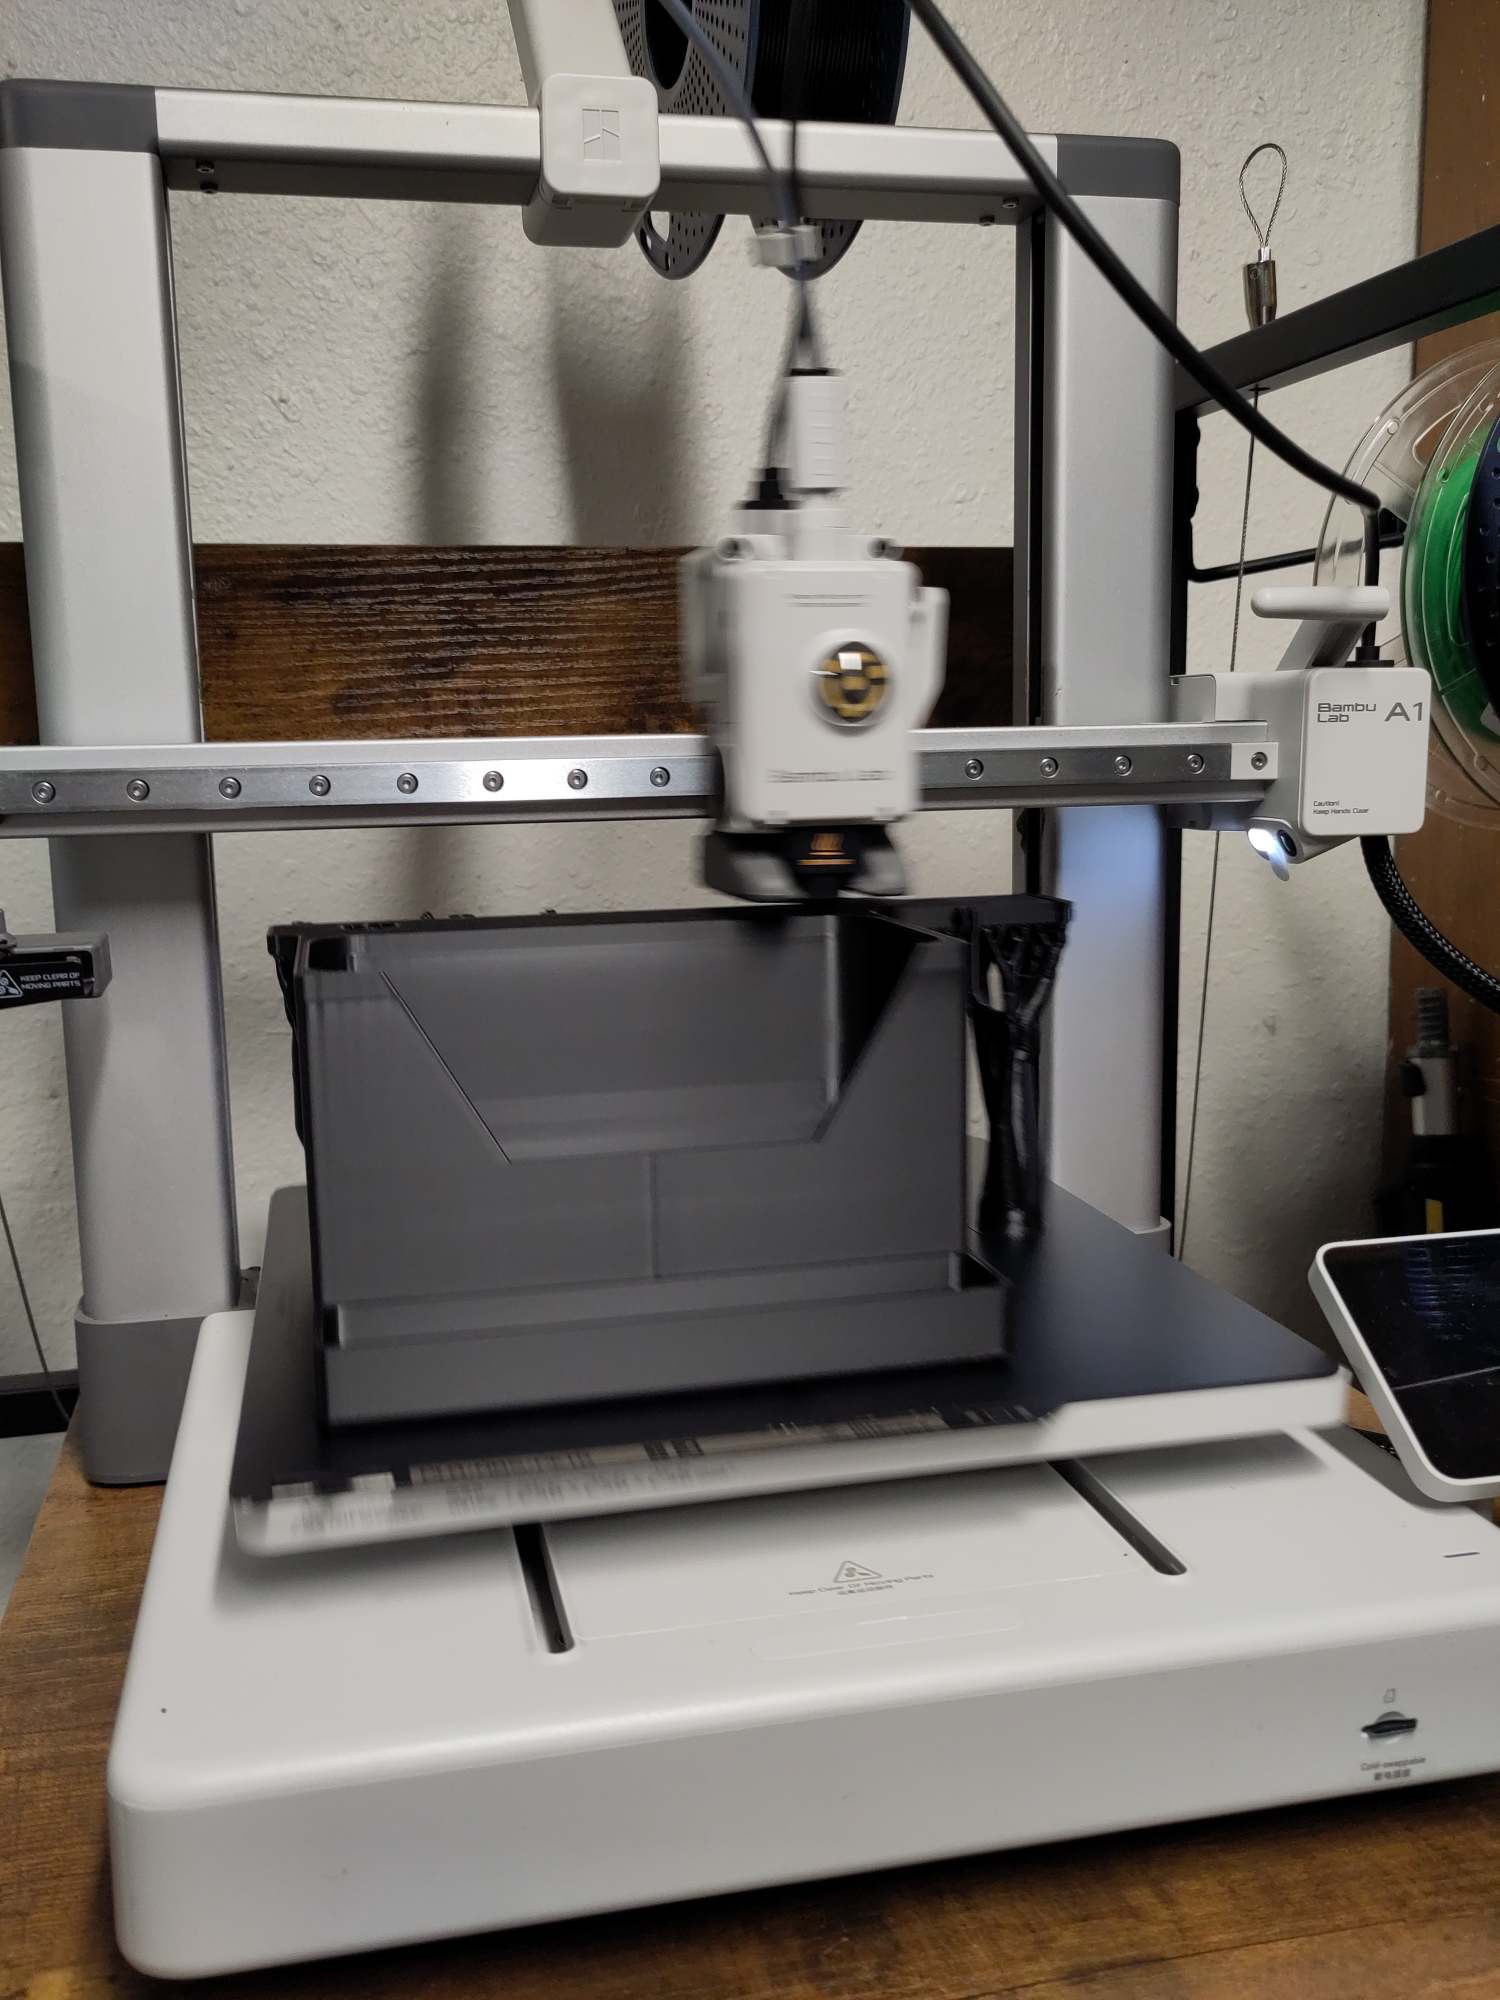
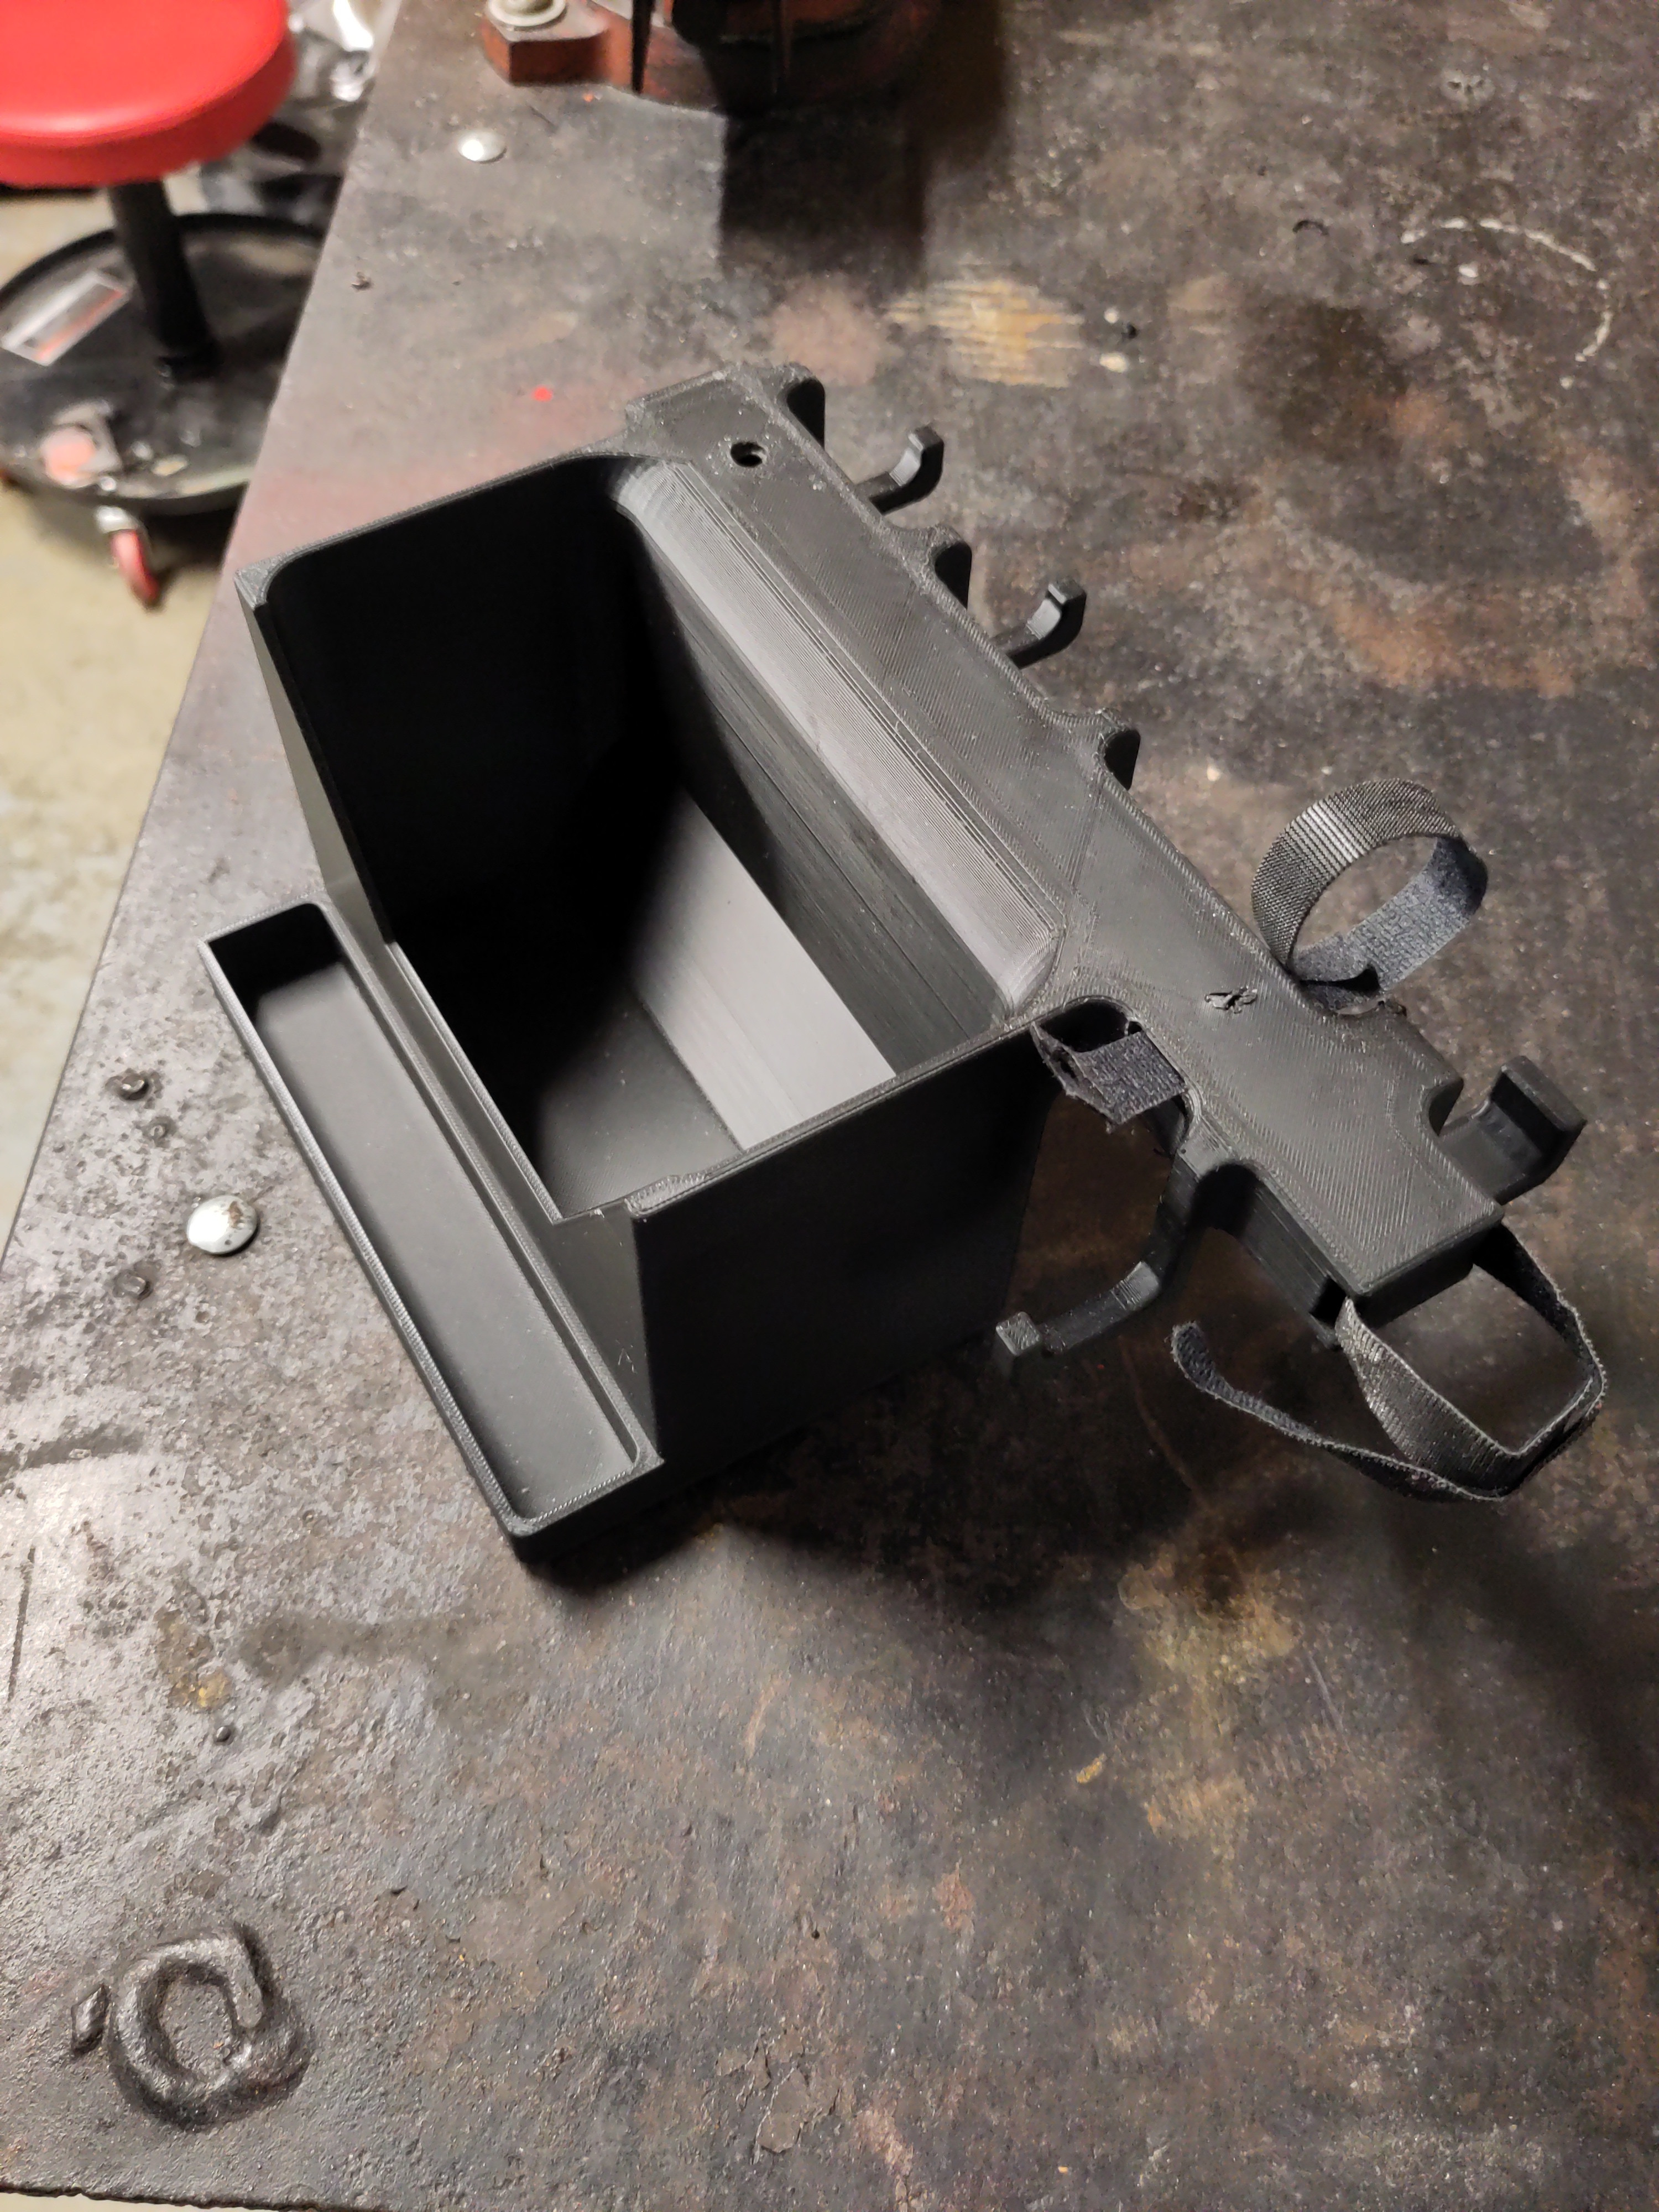
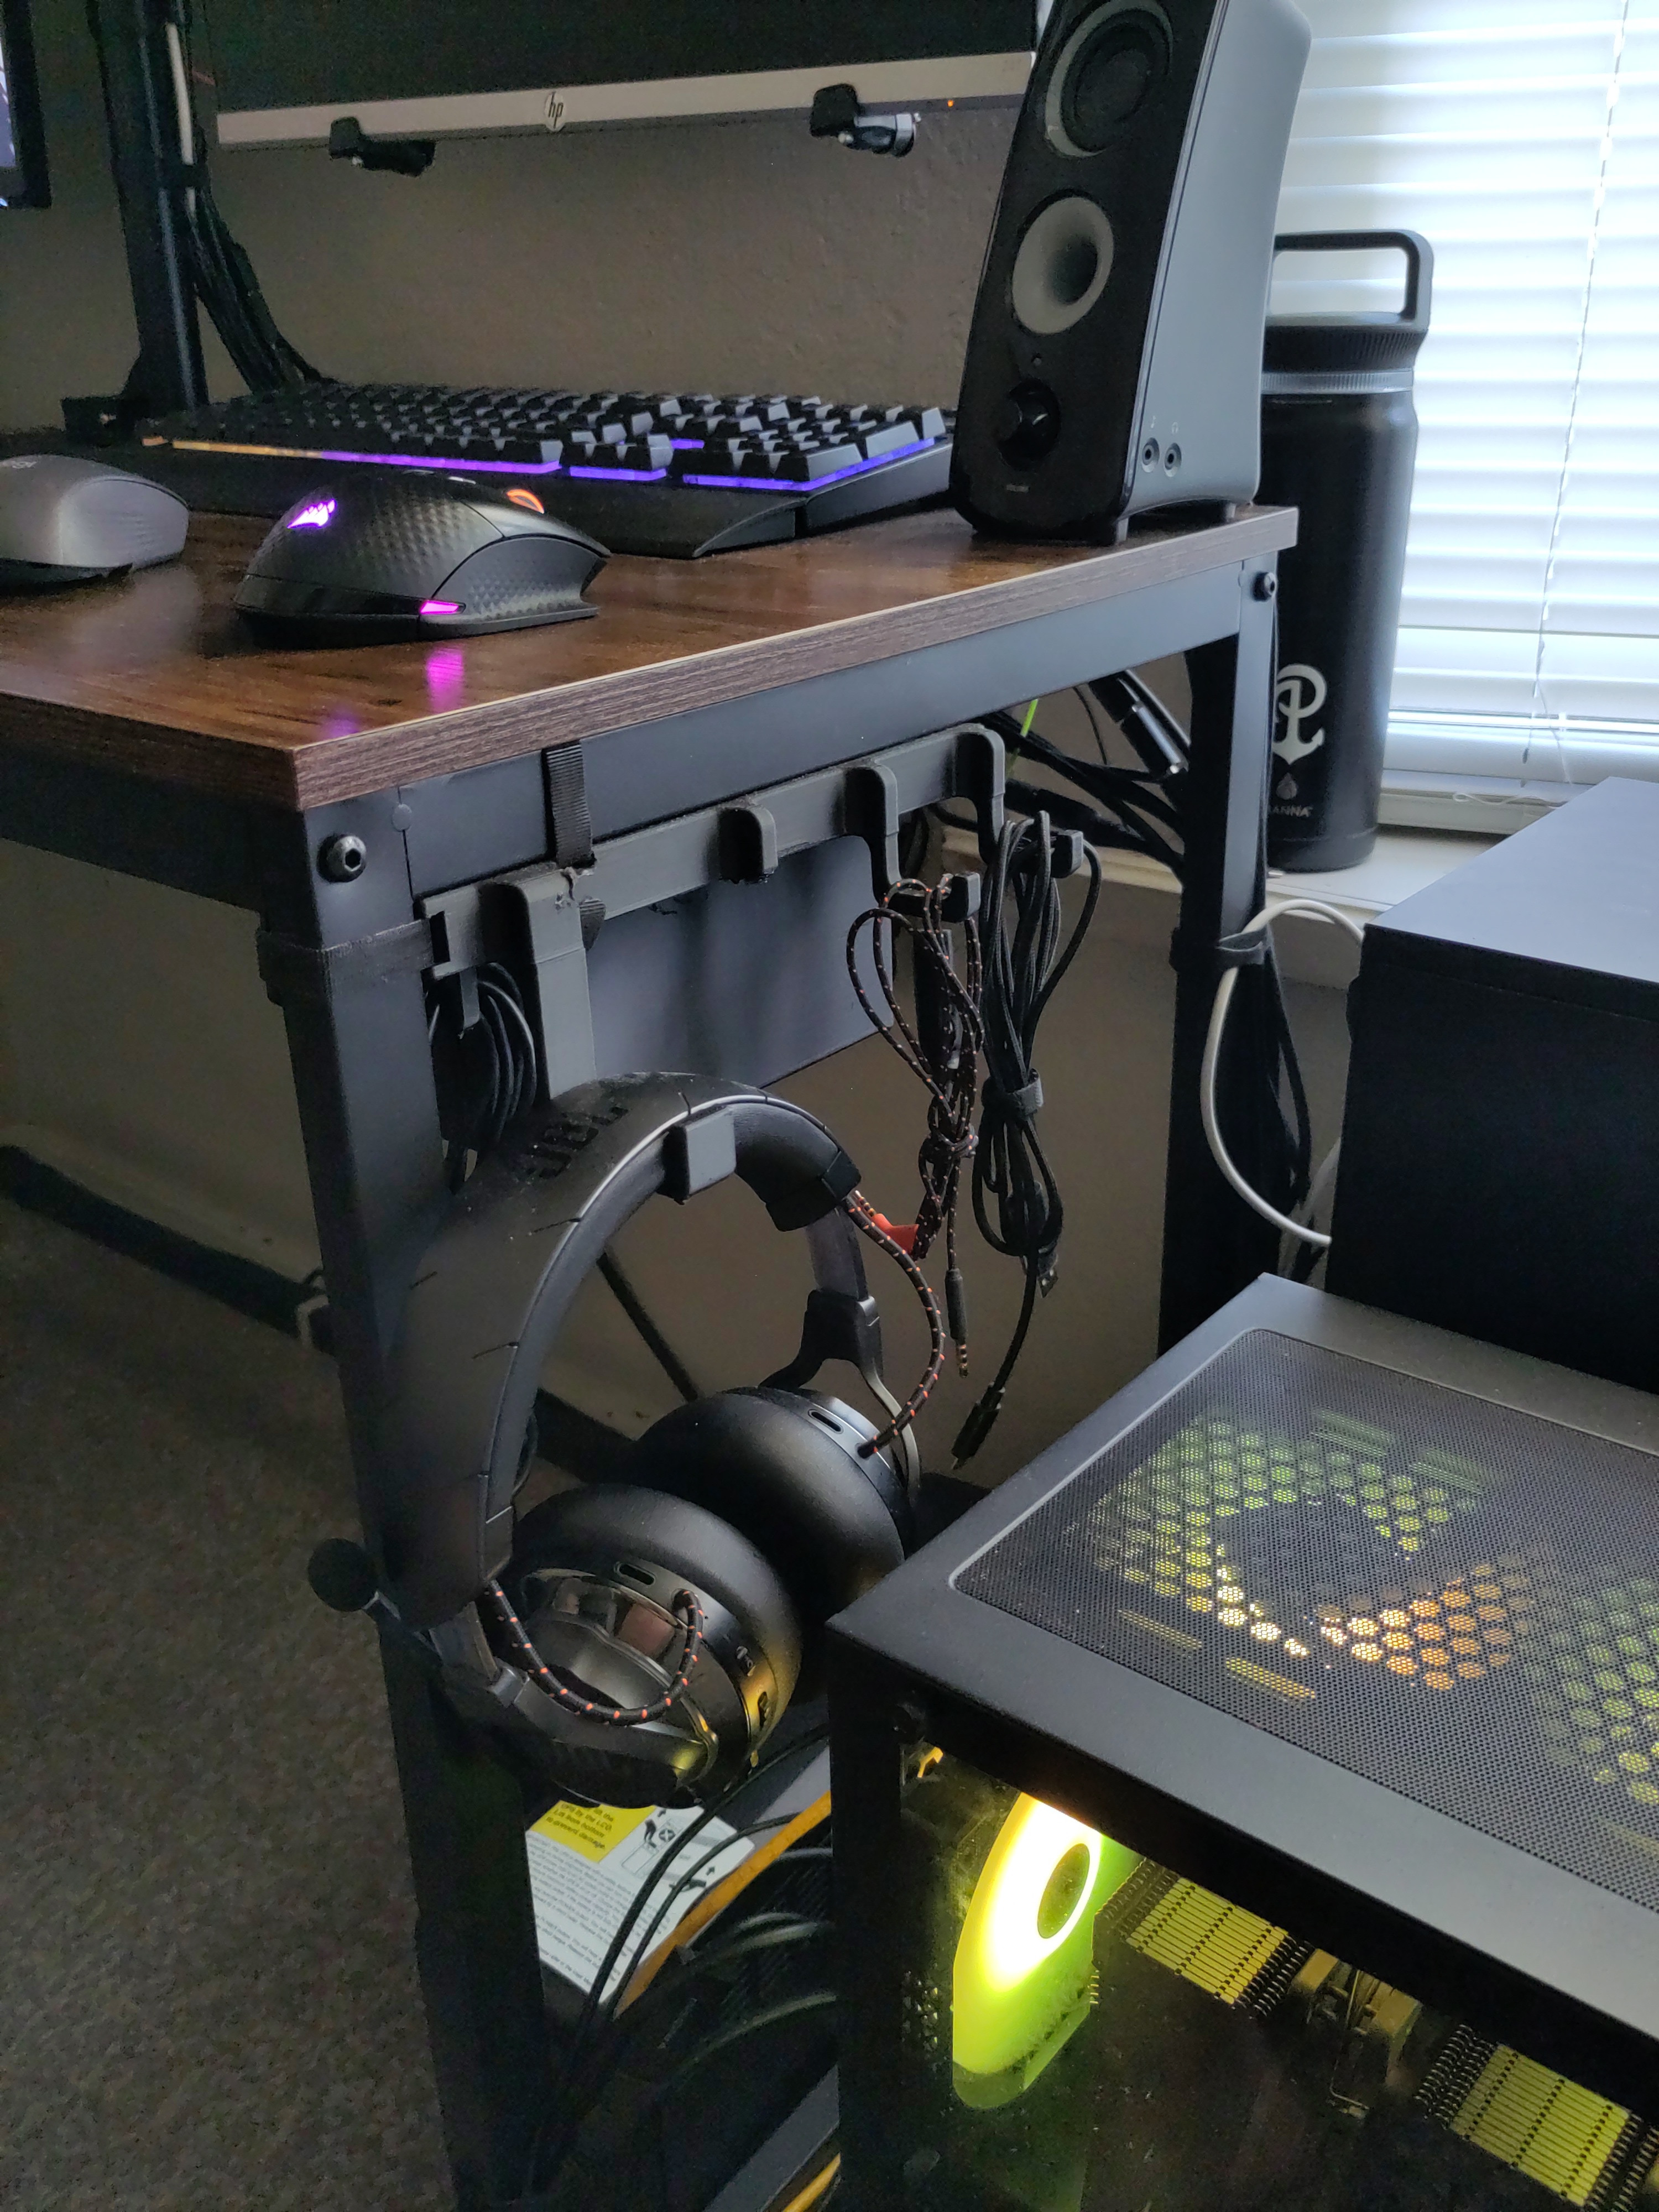
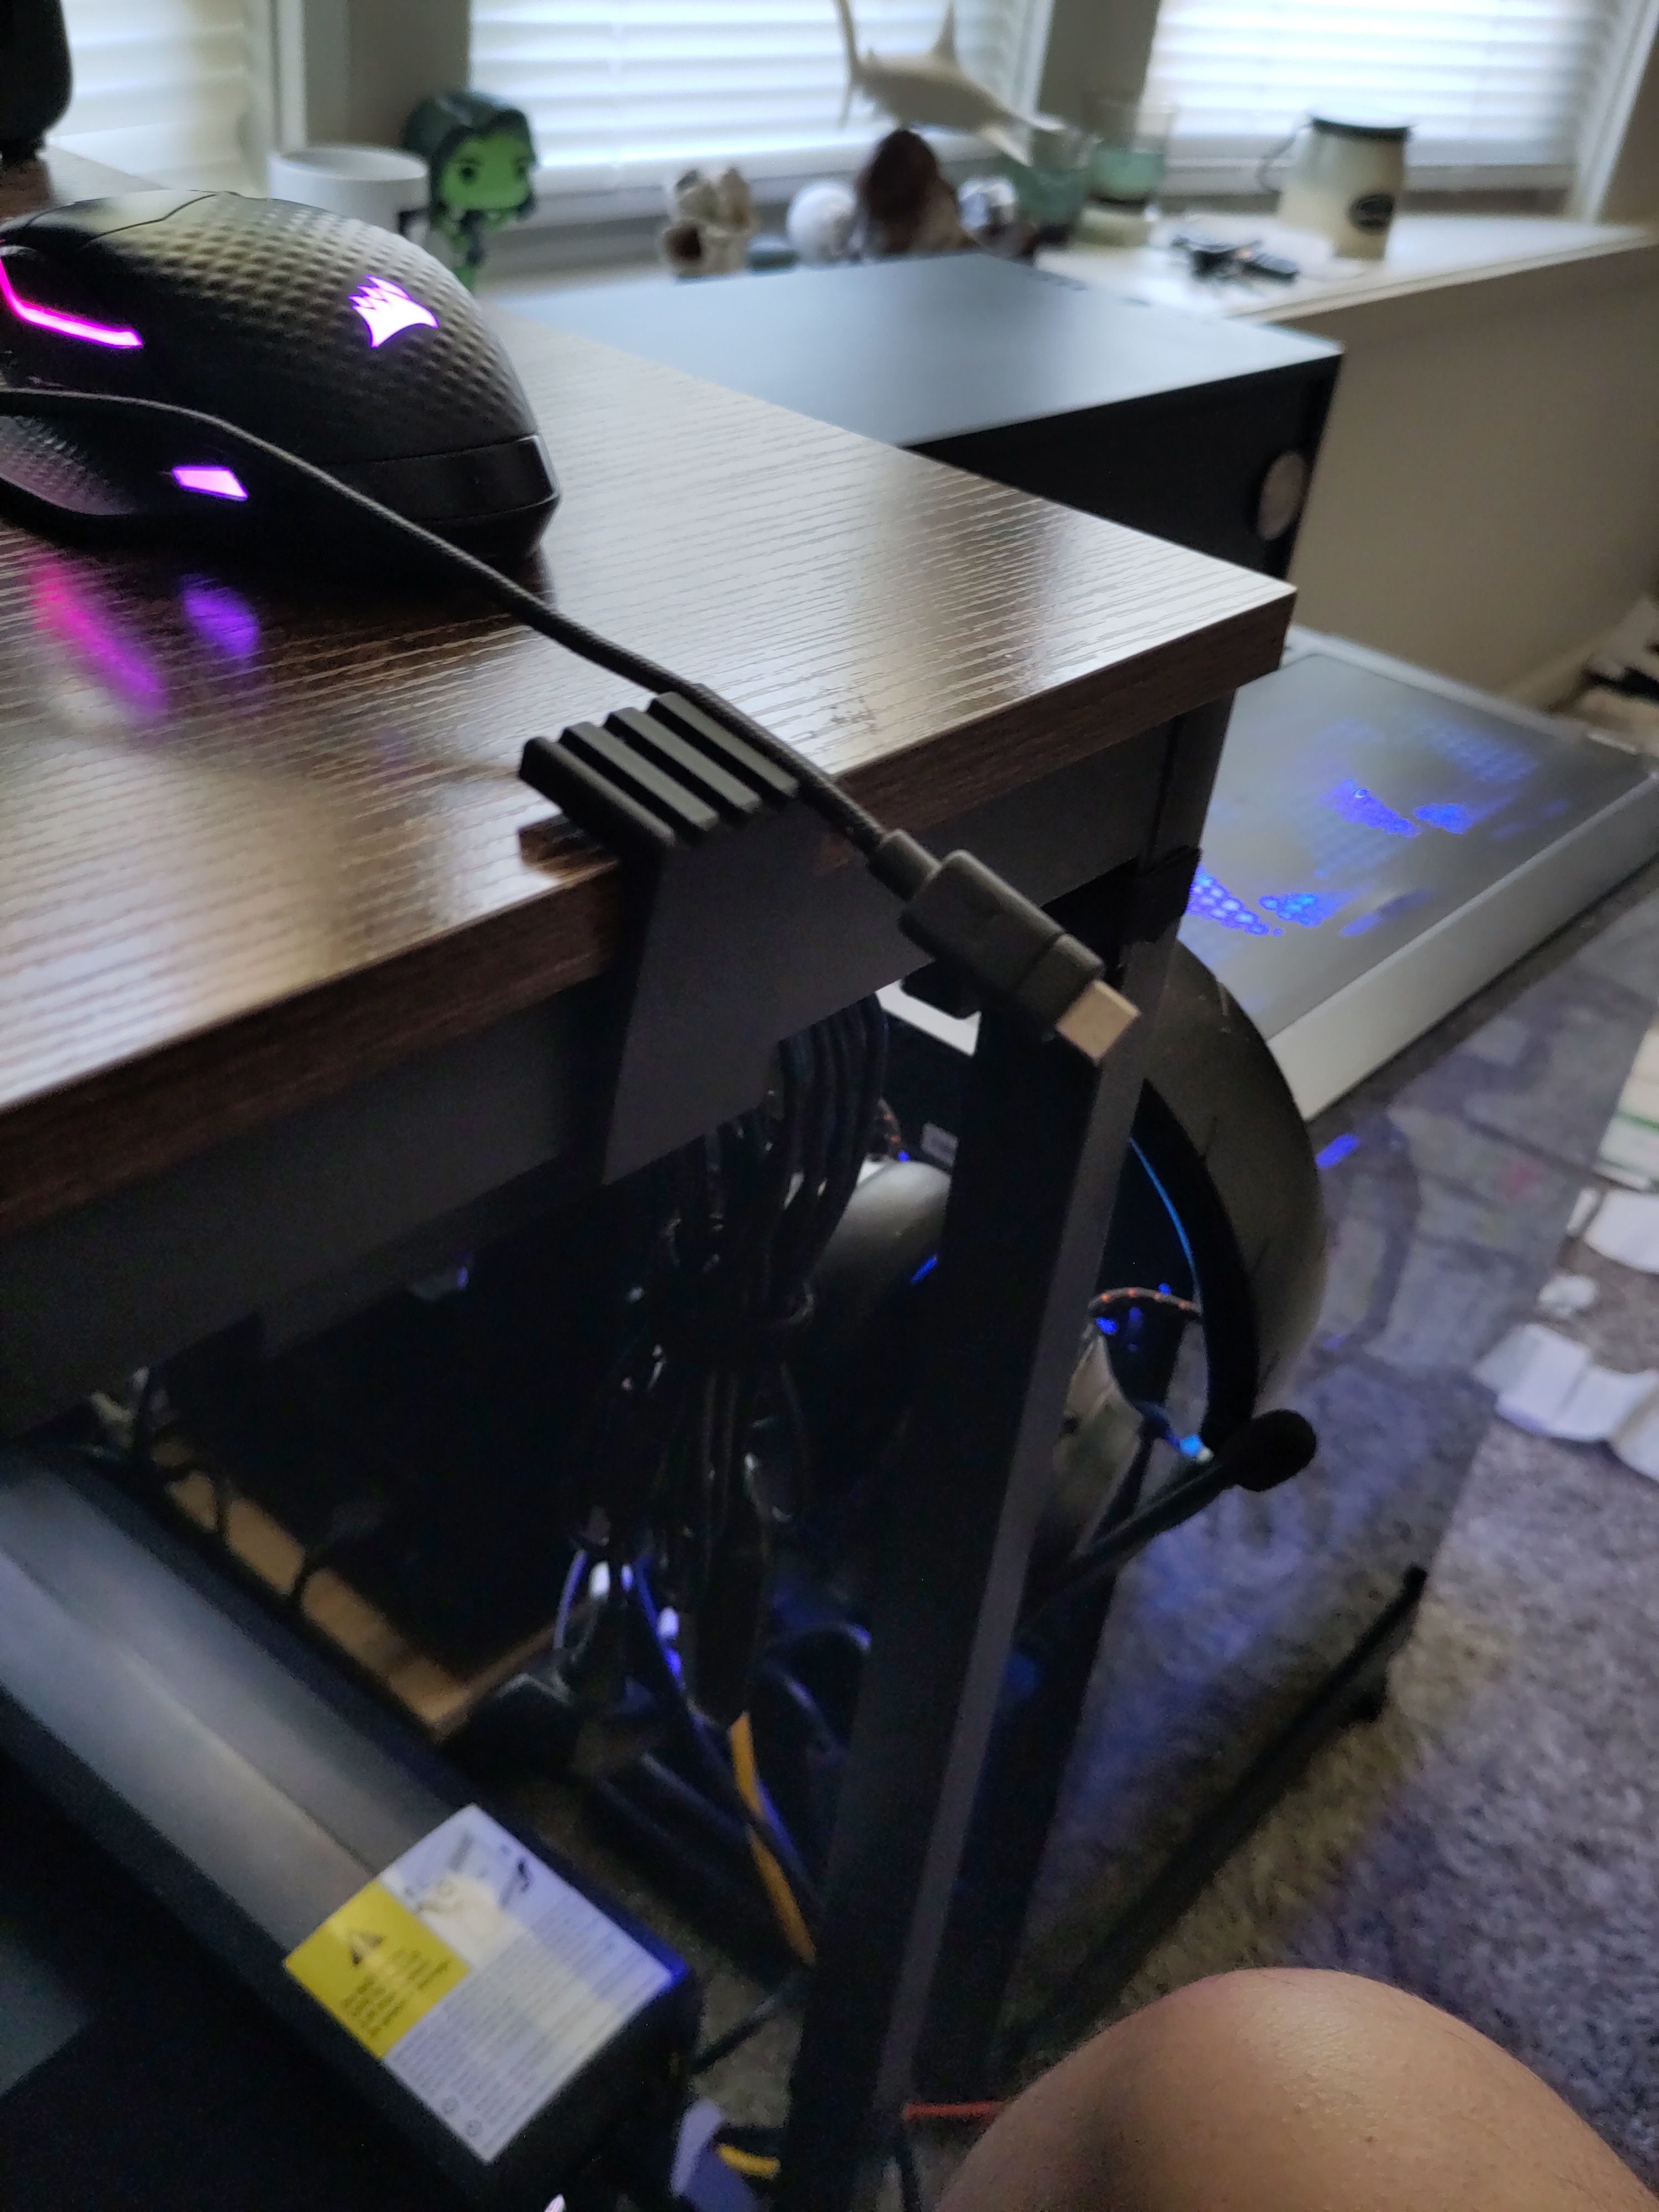
I spend an adequate amount of time at my desk working and engaging in various different computerized projects or activities. I like to keep my work area organized and I realized have a storage problem. In general, my work area is very clean and minimalistic and provided the given conditions of the work area; storage already scarce. I have several items such as headphones, extra wires, flash drives and a gaming controller orbiting around my work area and do not have a designated place to be stored. I thought to myself, it would be beneficial to have specificed storage area near my computer for those items. I began to brainstorm of what would be ideal, and I began to search online for product that would appease the need, but then I came to the conclusion "I have access to CAD software and a 3d printer with filament. Why don't I design my own which can be a customized fit." The acknowledgment of the problem caused me to assess the issue at hand and to formulate my own solution. The design of the storage container was specifically built the loose items with some additional storage capacity. There is a bin to house the gaming controller, there is four small hooks to hold coils of wire, one big hook to hold the headphones and a smaller storage bin to hold the flash drives or other miscellaneous objects. There were some discrepancies needing to be addressed such as the orientation, mounting, 3D printing configurations and material considerations. Upon the initial design, I decided the orientation would strictly be dependent on orientation and placement of the the storage container. The positioning of the storage container would be next to the desktop computer for convenience and would be mounted by using a hardware that is already securing the desk together along with creating a groove to the initial design to support up the other end of the storage container. The placement of the storage container would hang from the frame of the desk using the provided hardware and a velcrow strap. The bin storing the gaming controller would contain the most weight, and due to design, the weight distribution was another consideration to factor in. The two heaviest objects are the gaming controller and the headphones, so the design was factored in where both would be places on opposite sides and were diagonally placed to also mitigate any leaning or to mitigate oscillation if there was an external object to bump into it. The first version had some serious design flaws especially during the 3d printing process. The initial design had some fairly idealistic features such as the hooks not being properly dimensioned. Simulataneously, the armature for the storage container fastening the bolt to the desk had an inadequate design and material support. When mounting and testign the first iteration. My desk chair bumped into the storage container causing the armature to shear. The photo above will illustrate the problems with the first version and the printing discrepancies. The second version, the dimensions of the hooks were increased, and the mounting issues were addressed and there was another groove implemented into the design in order to further secure the container. After the discepancies were addressed. There were some 3d printing configurations needing to be furhter extrapolated on and to research out. Once all of cognitive reasoning was ascertained, the second iteration was printed. The second print did have a blemish but it would suffice the need. As of now, it is being used and till this point is an adequate design.
Project:Desk 3D printing Objects
Project Purpose: Personal
Time Frame: February 2026 - March 2026
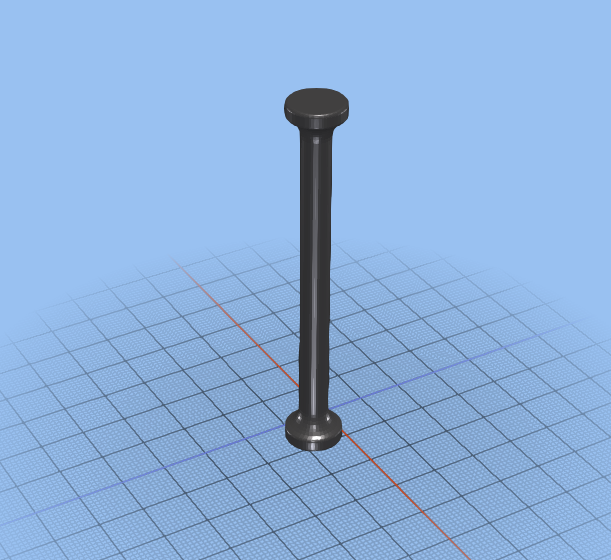
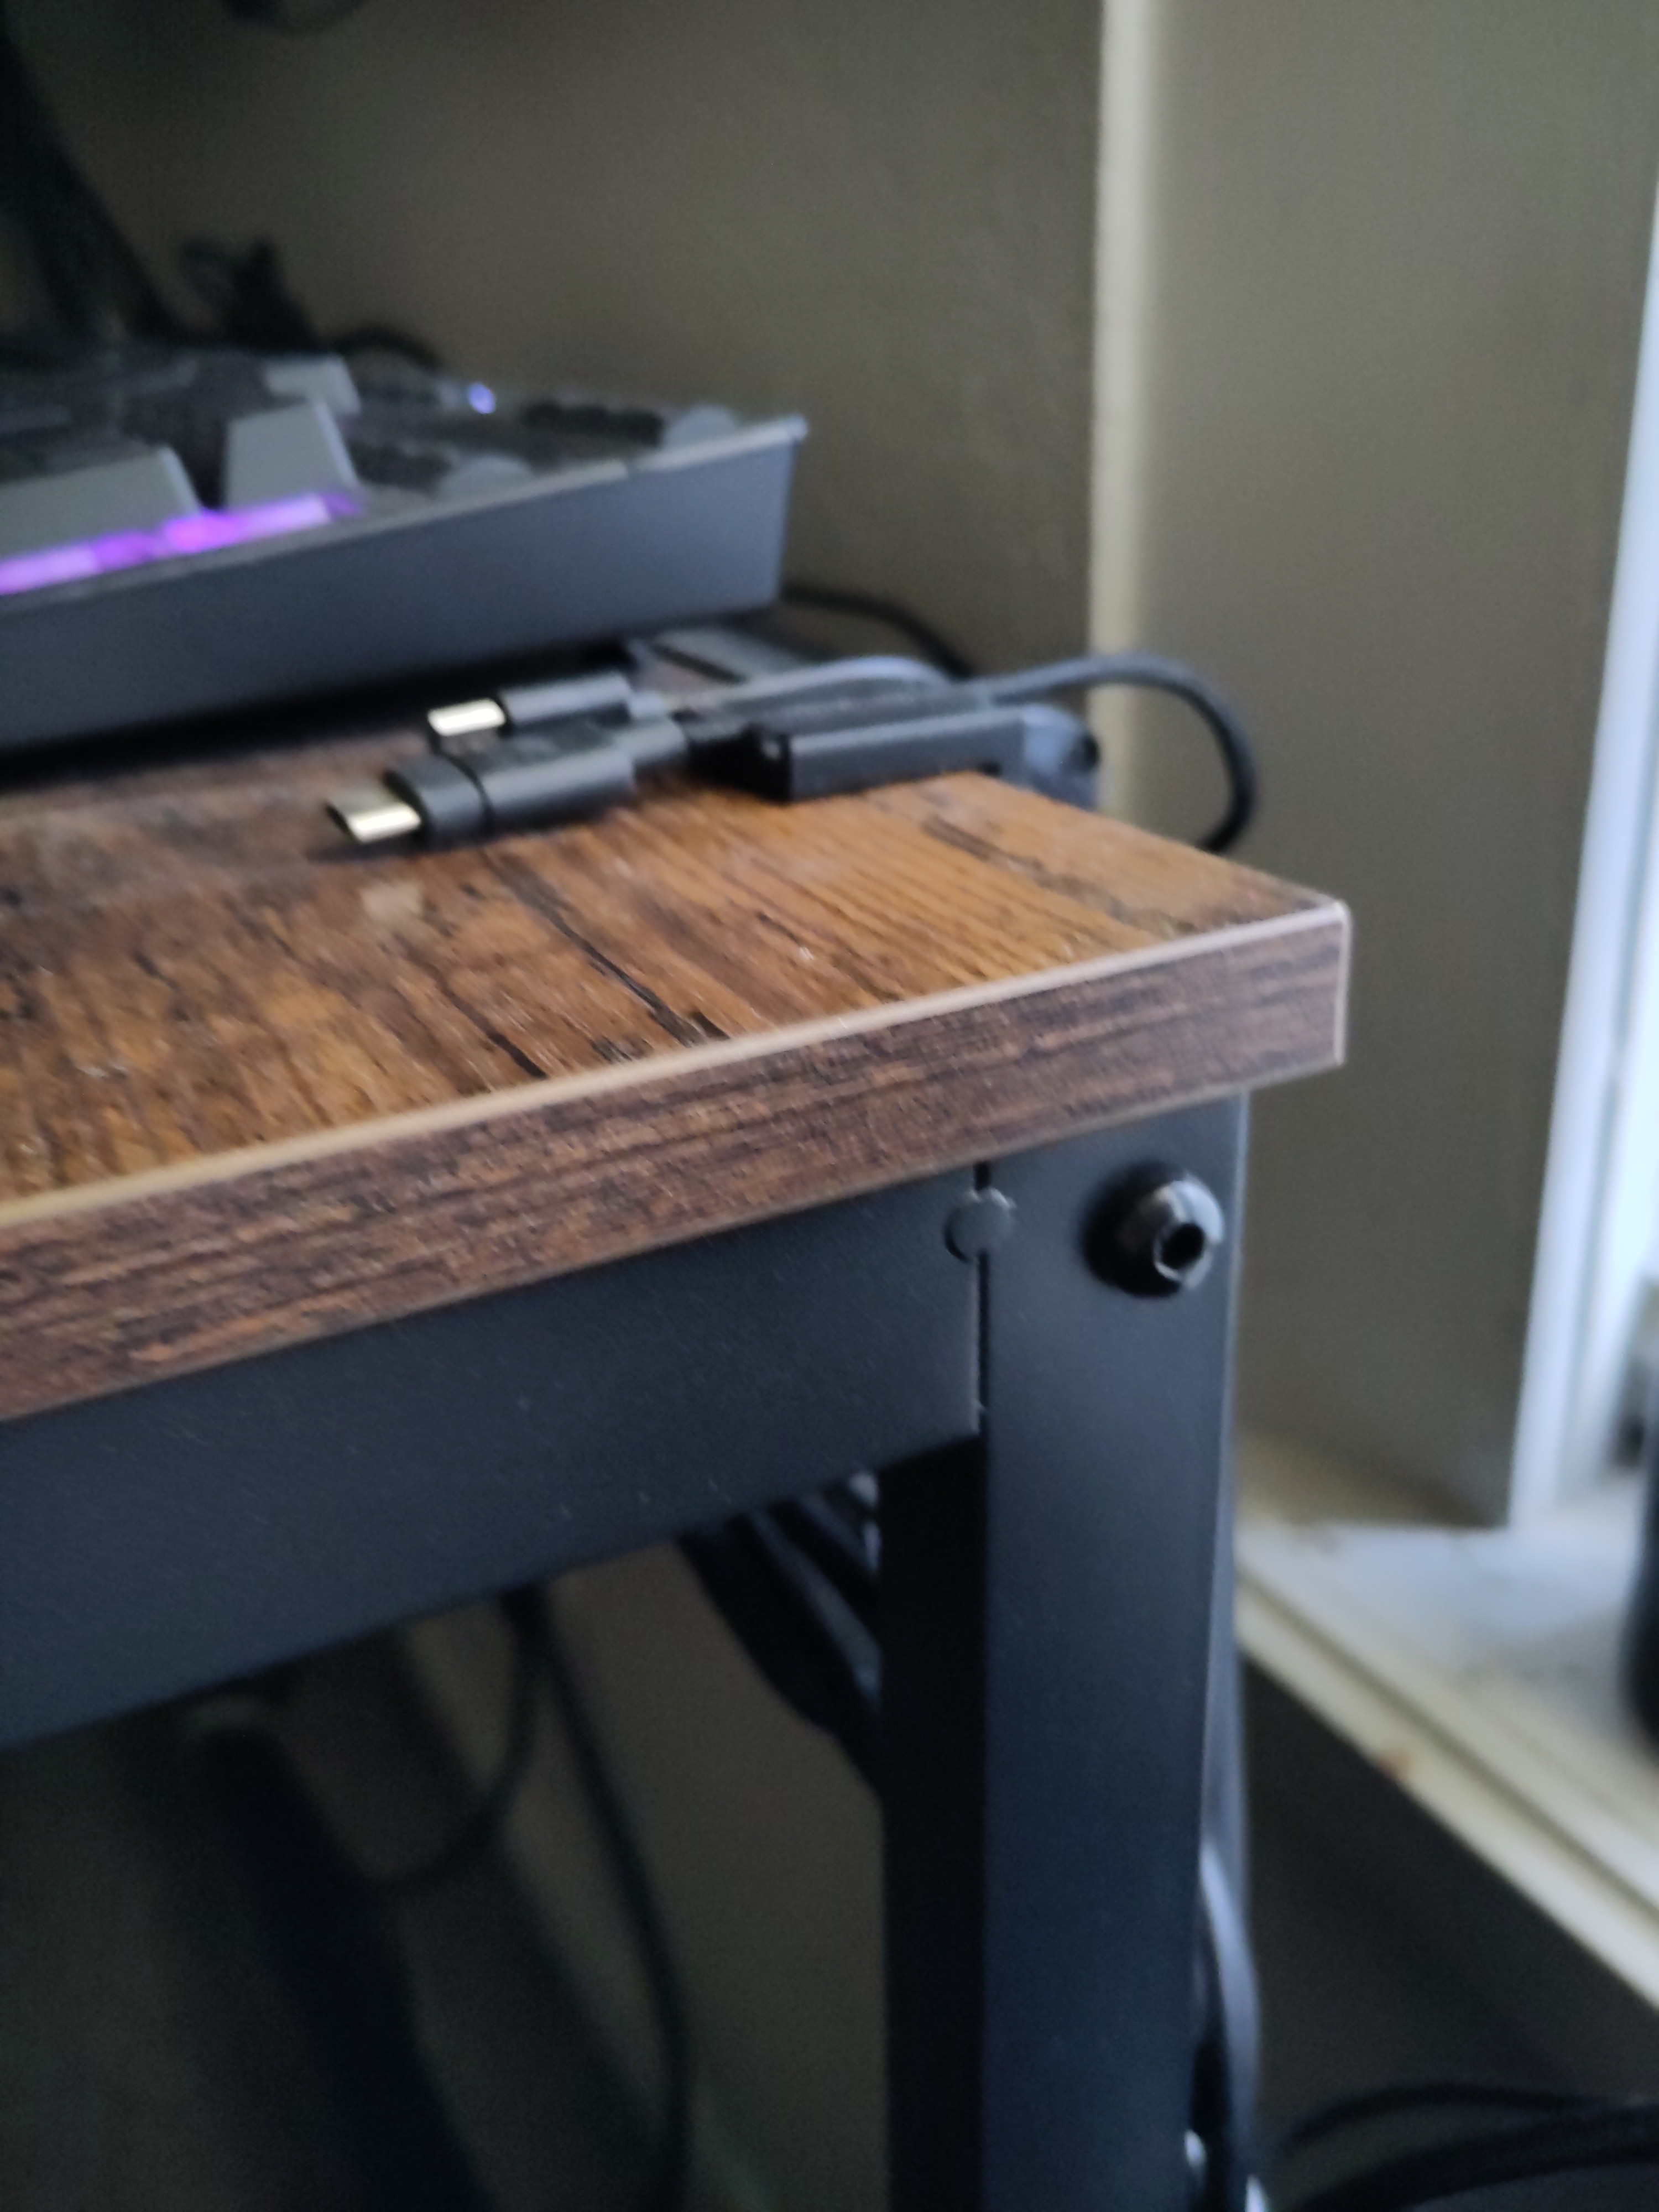
There are two different products. I spend much time at my work station and with it comes ideals for improvement. The two projects of which I designed and built scrictly improve my work area. I wanted design a stand with specific dimensions that would be able to support my GPU inside of new desktop. The GPU stand is depicted in the first two photos above. Its intent is to offset the weight distribution of the graphics card so it would maintain a stable connection over time.
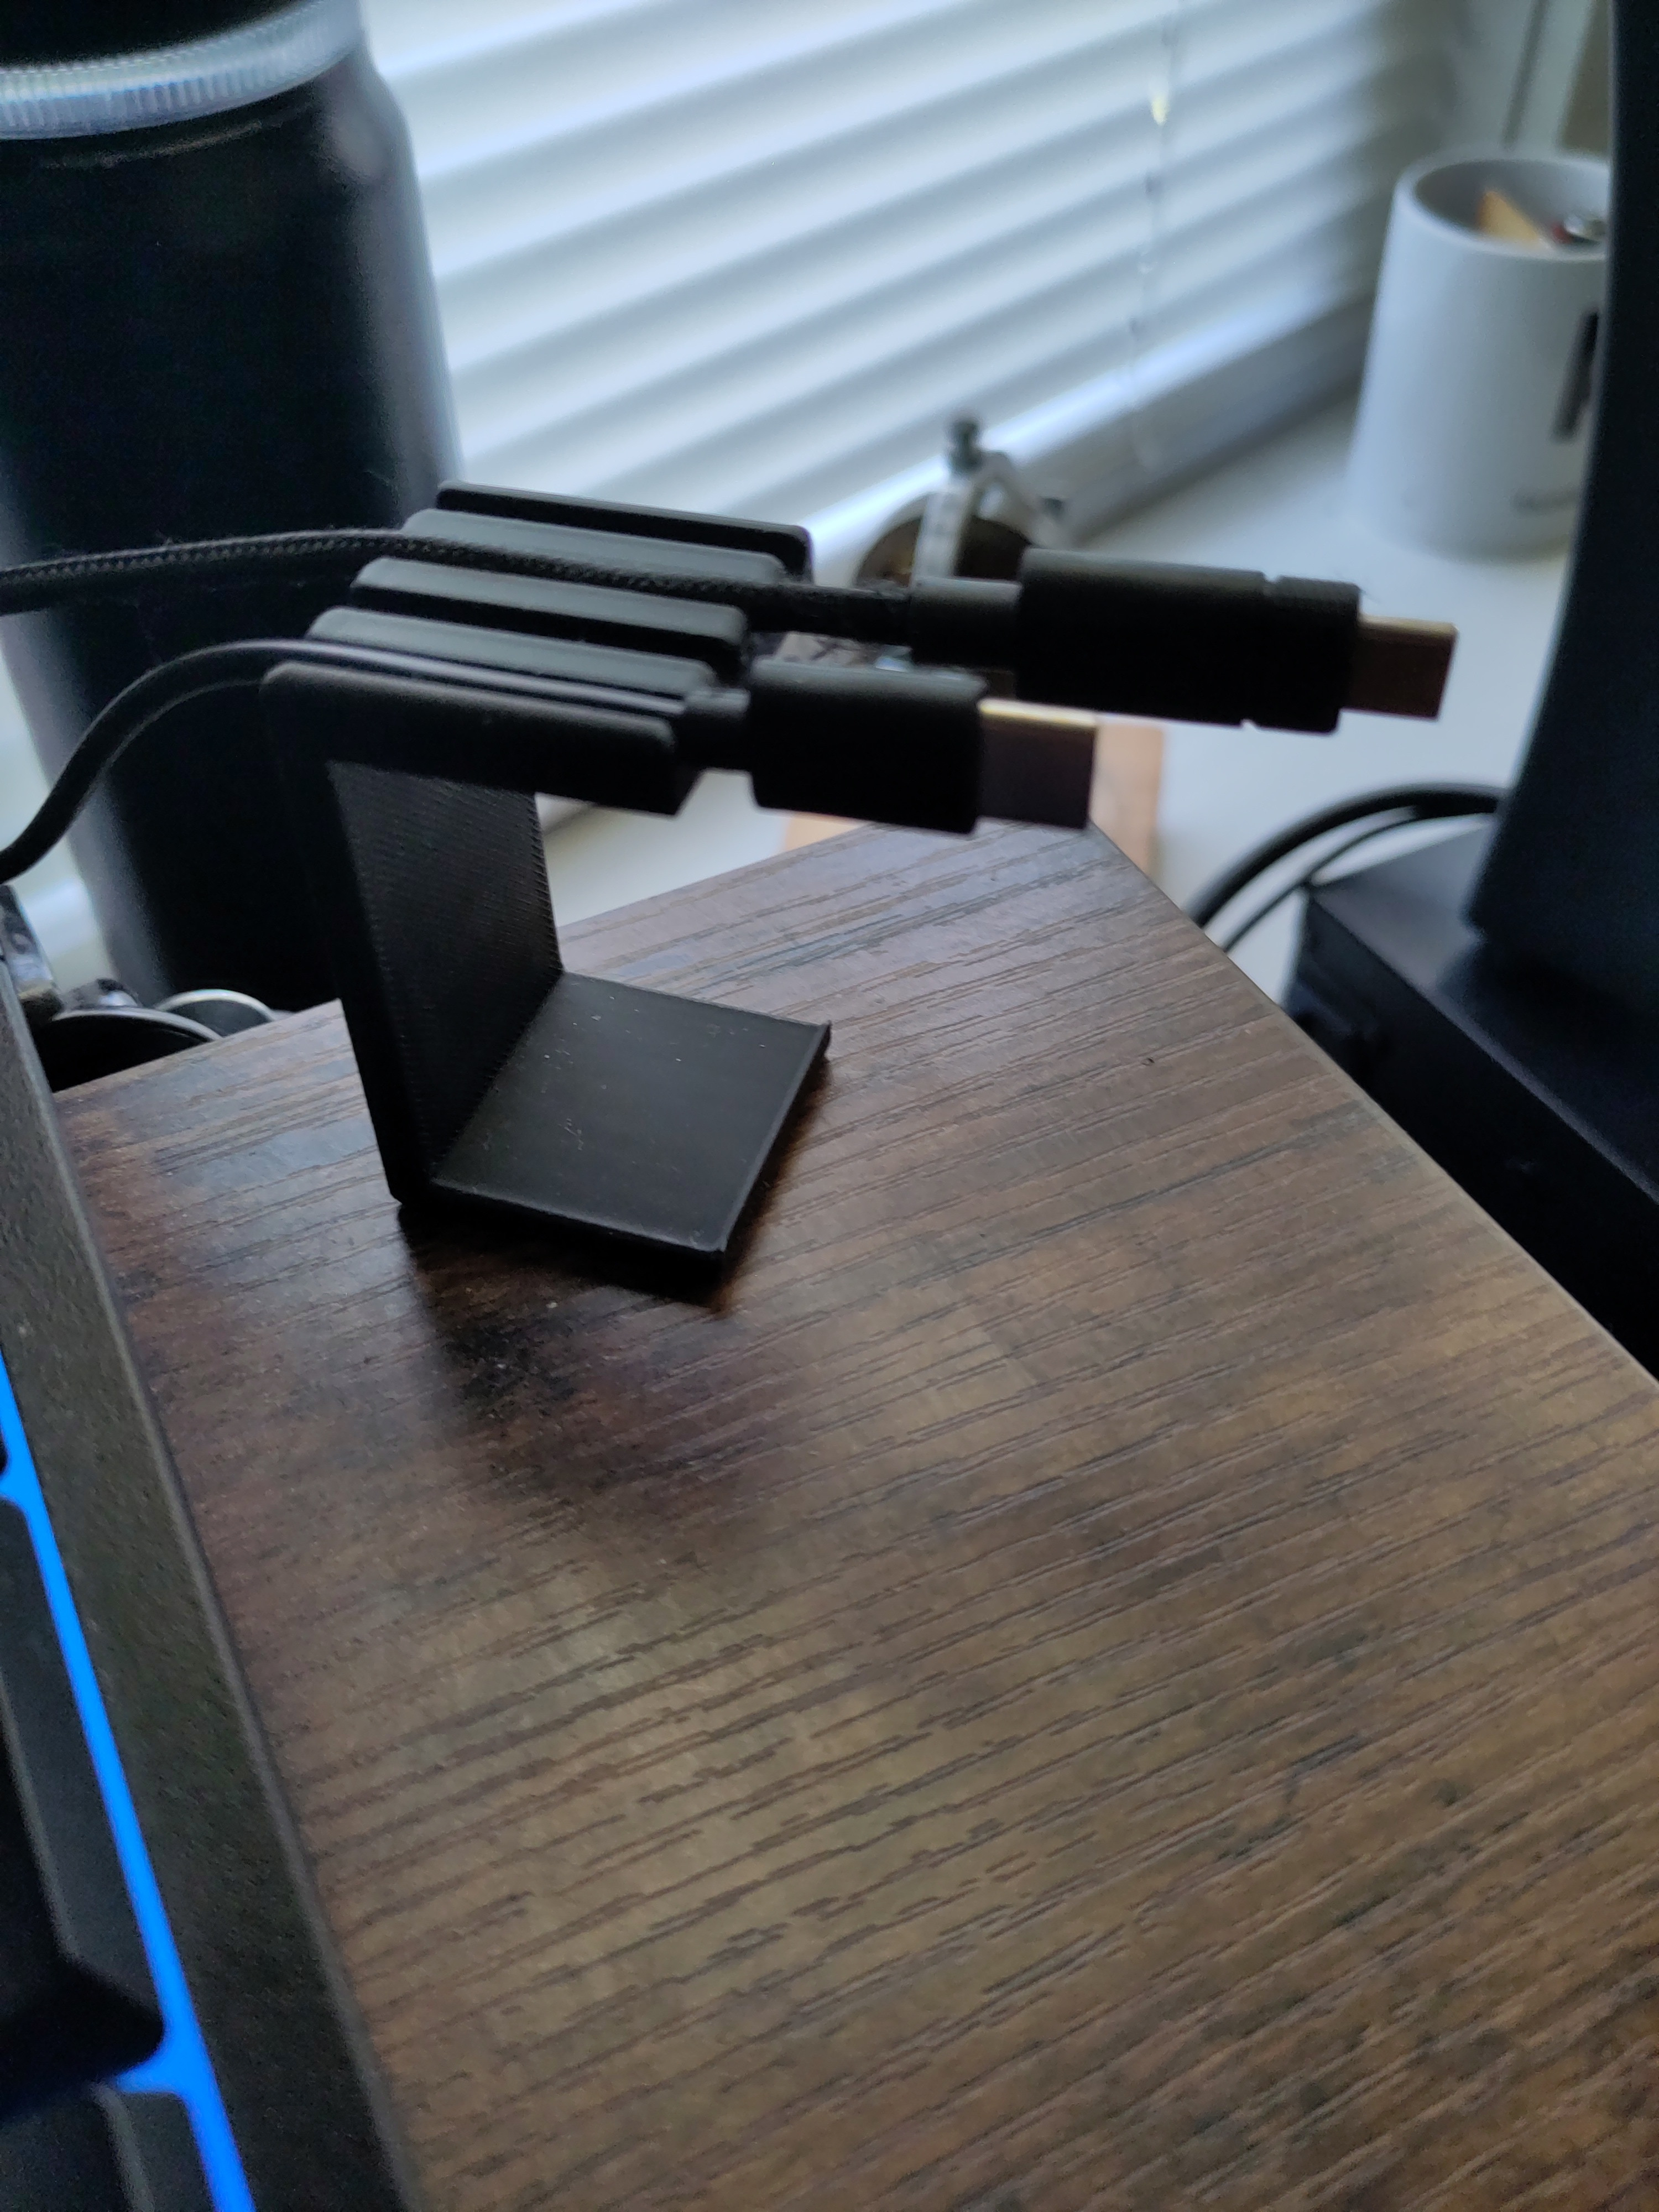
The next three photos illustrate the design of a easily mountable wire holder and organizer. It took two different iterations achieve an adequate and everyday use design. I appreciate organization and this product would further quell the desire to maintain a well-organized work station. The first iteration dimensional issues, but overall functionality was attained. The second iteration just had to take into account tolerances.
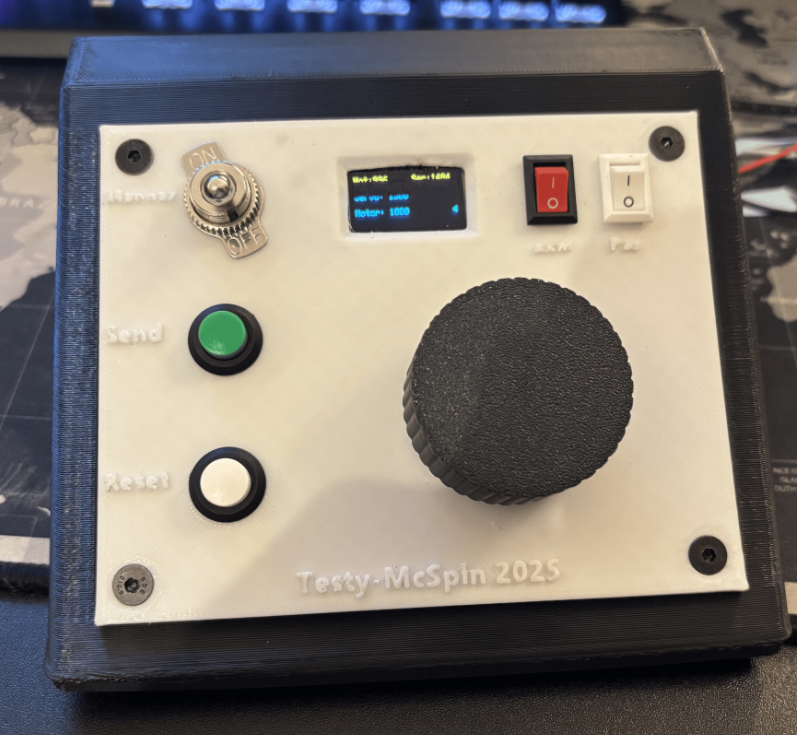
Project:Circuitry Development
Project Purpose: Learning about Electronics/Circuitry and Practical Programming
Time Frame: January 2026
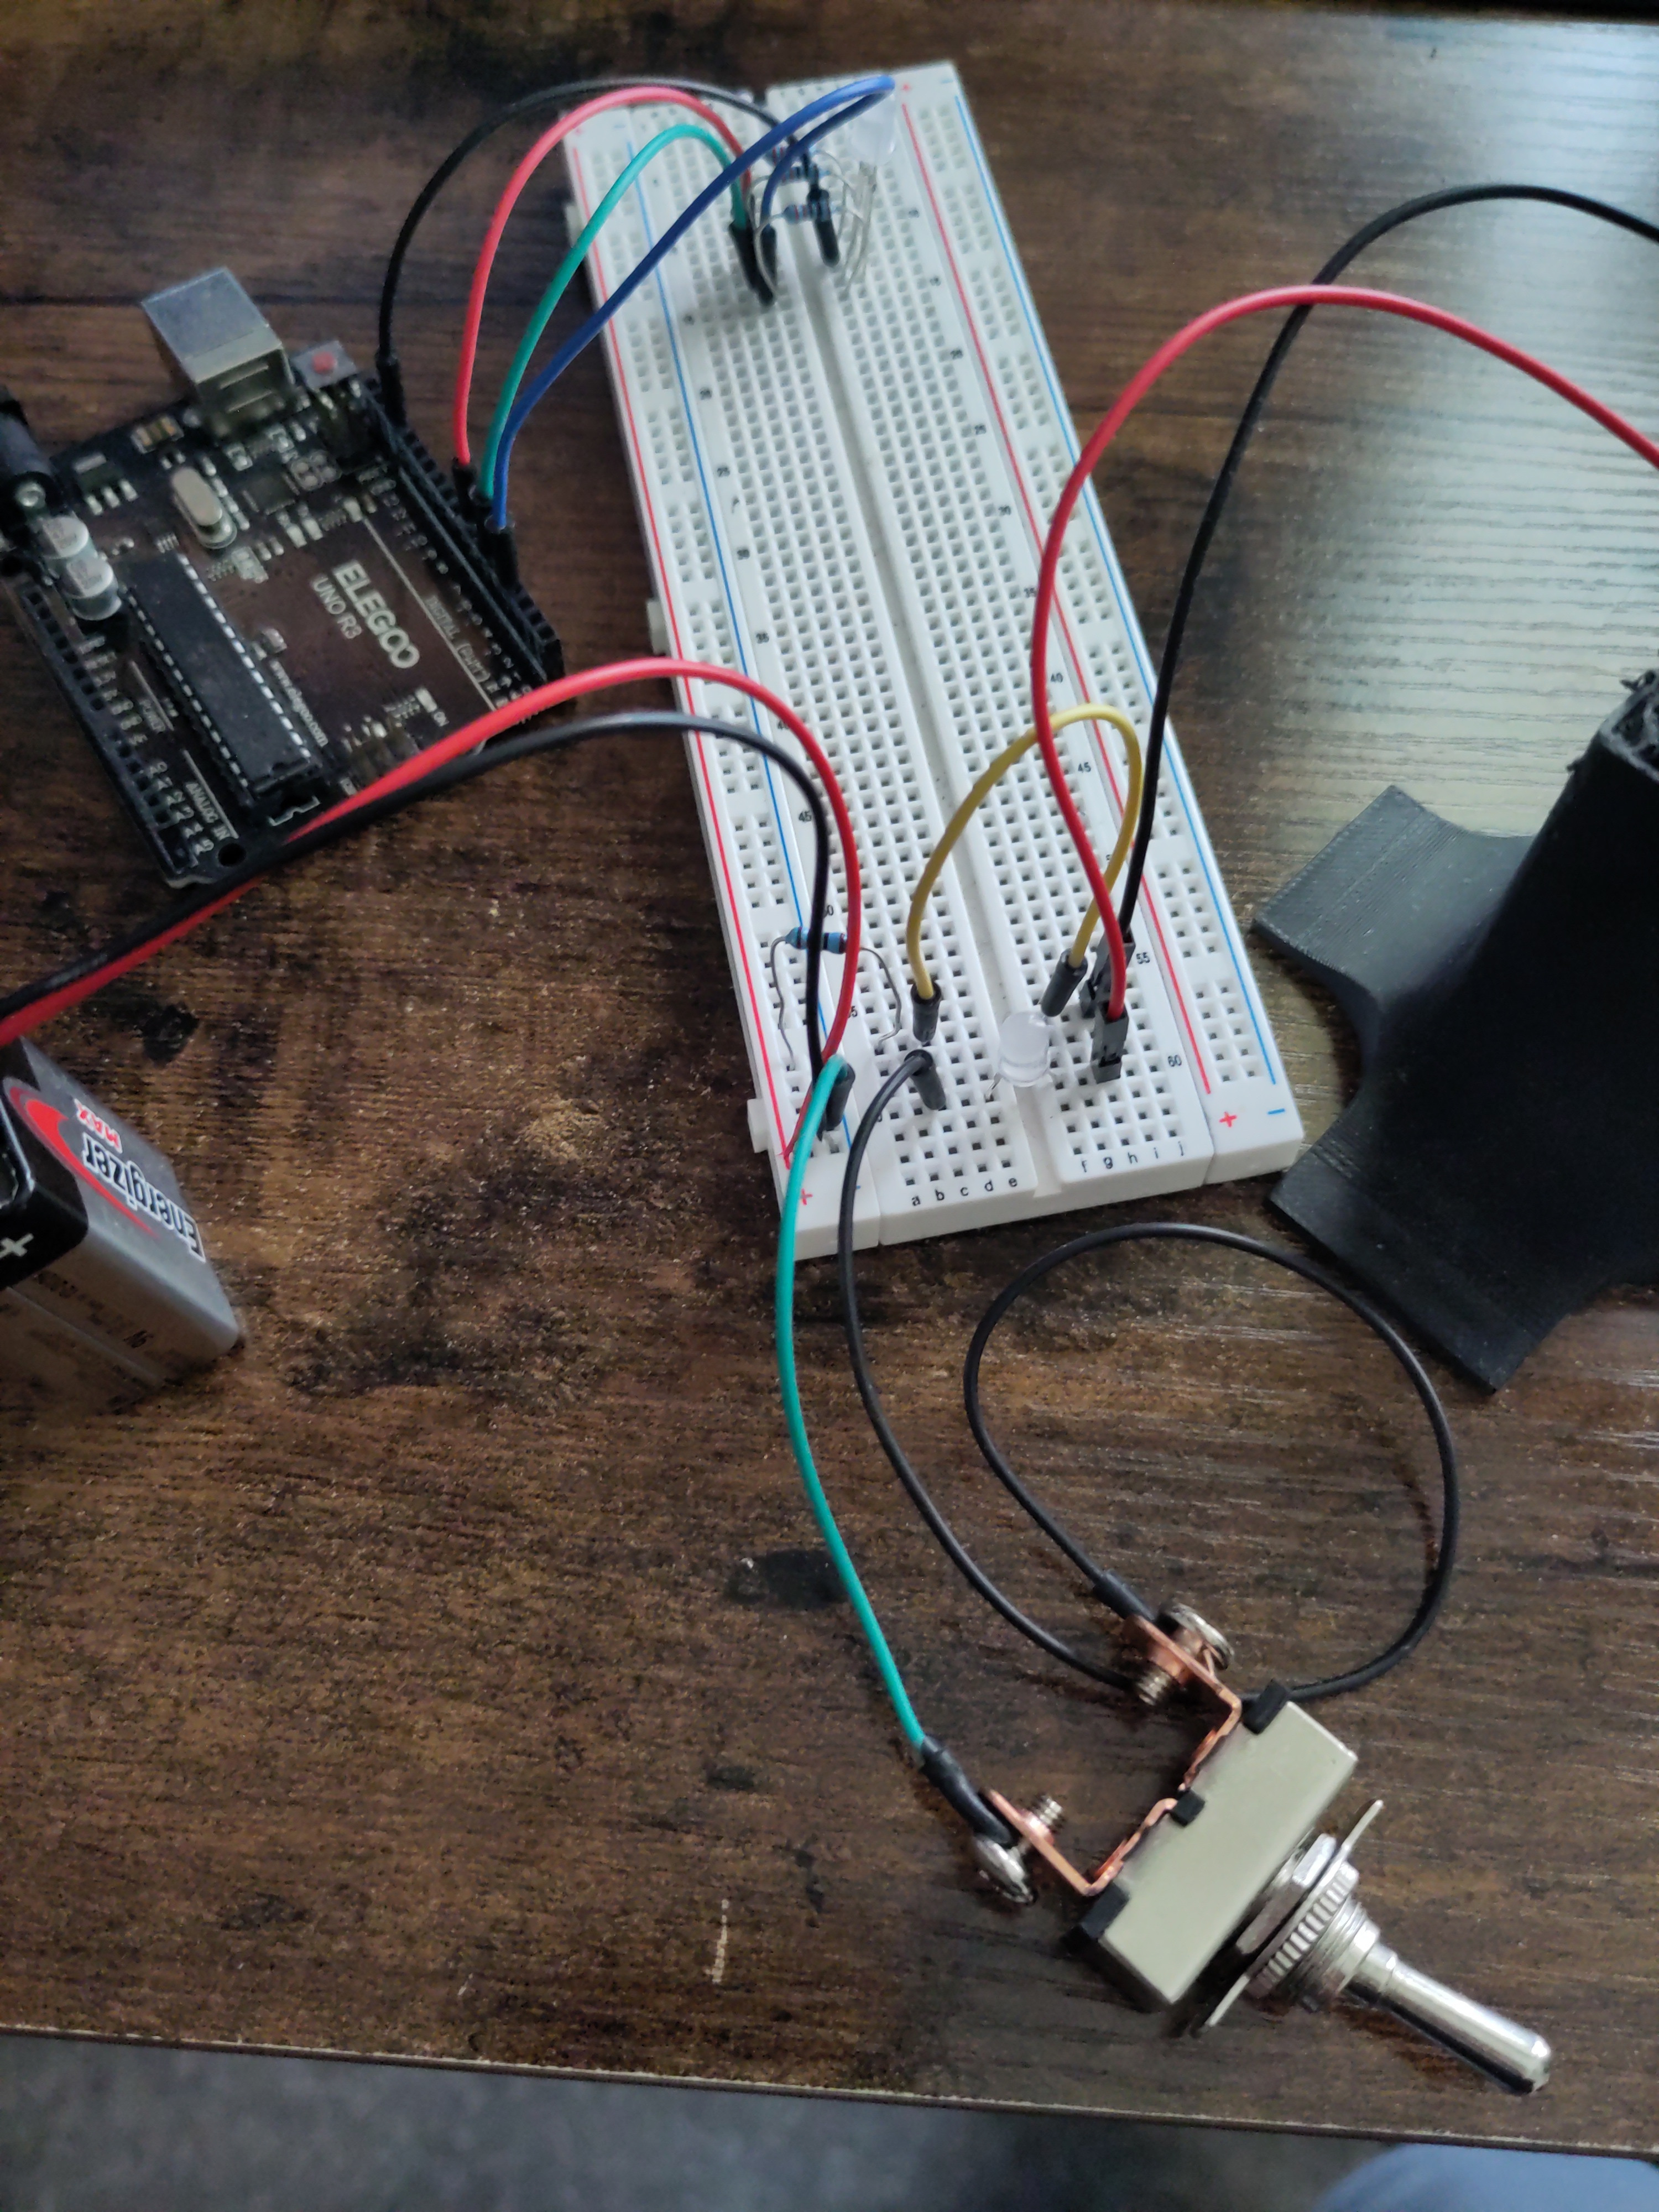
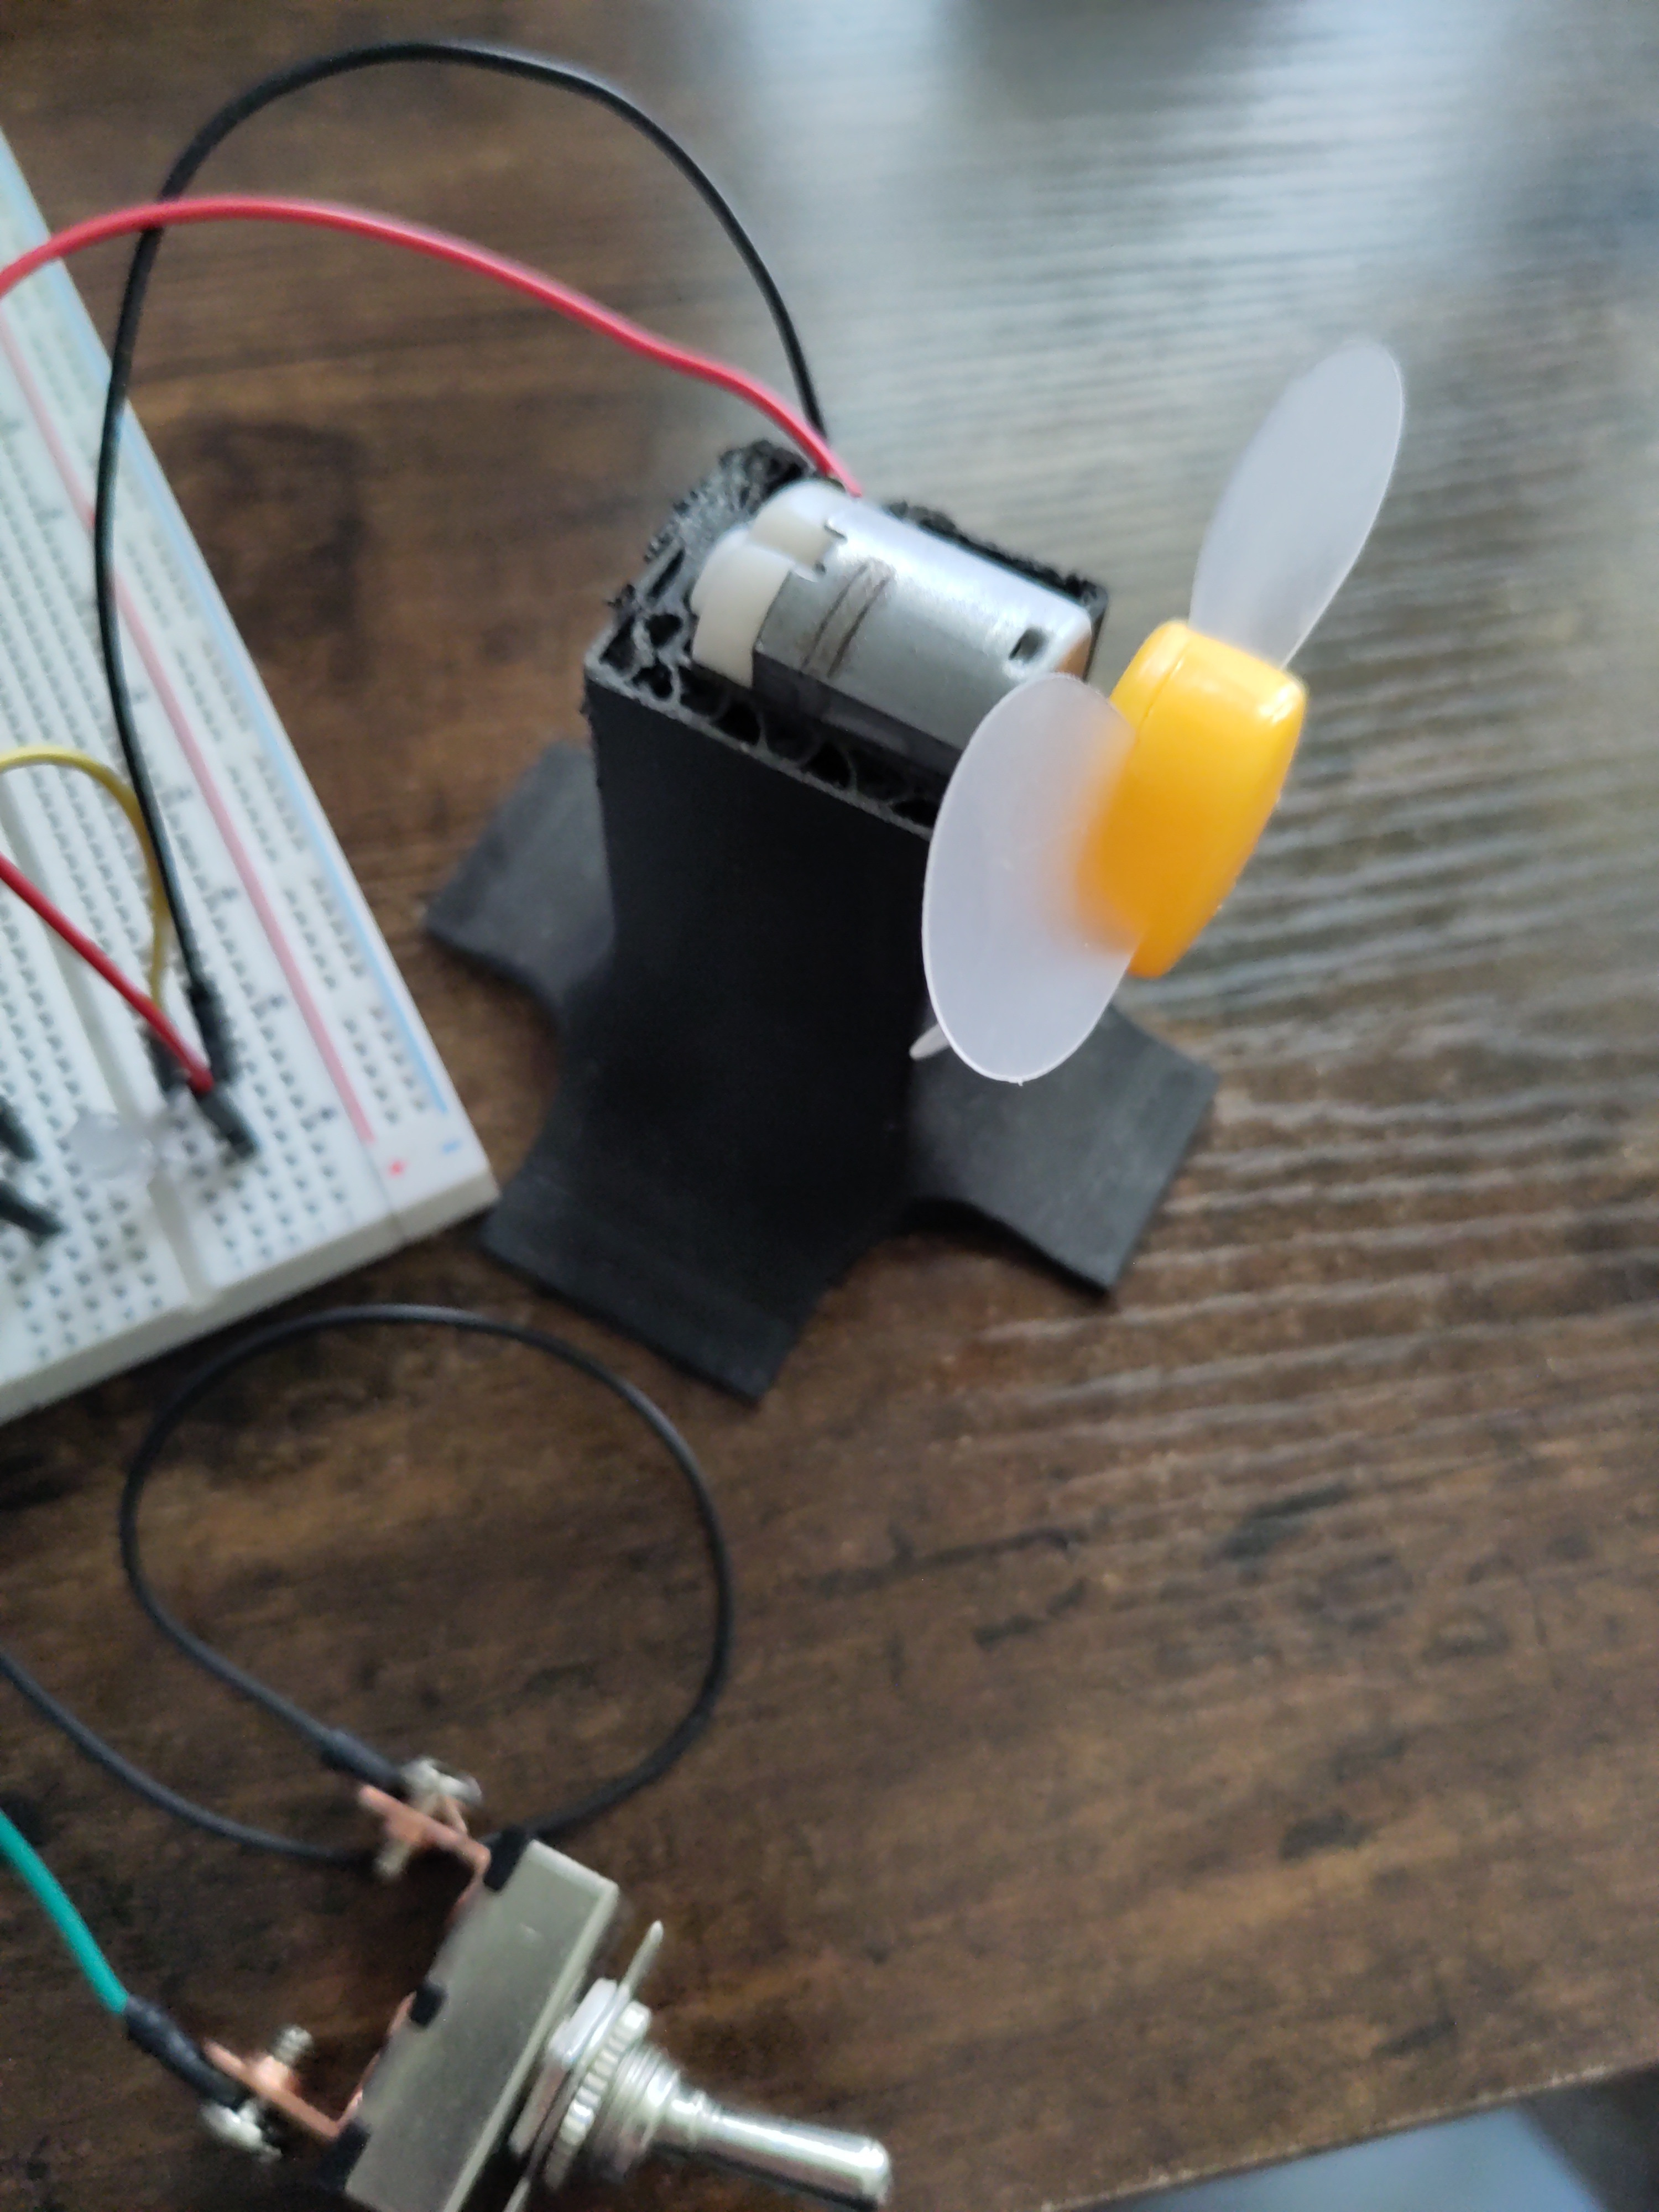
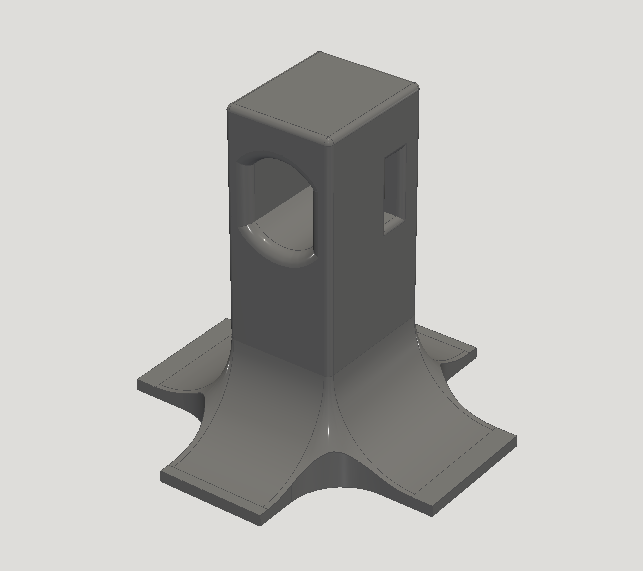
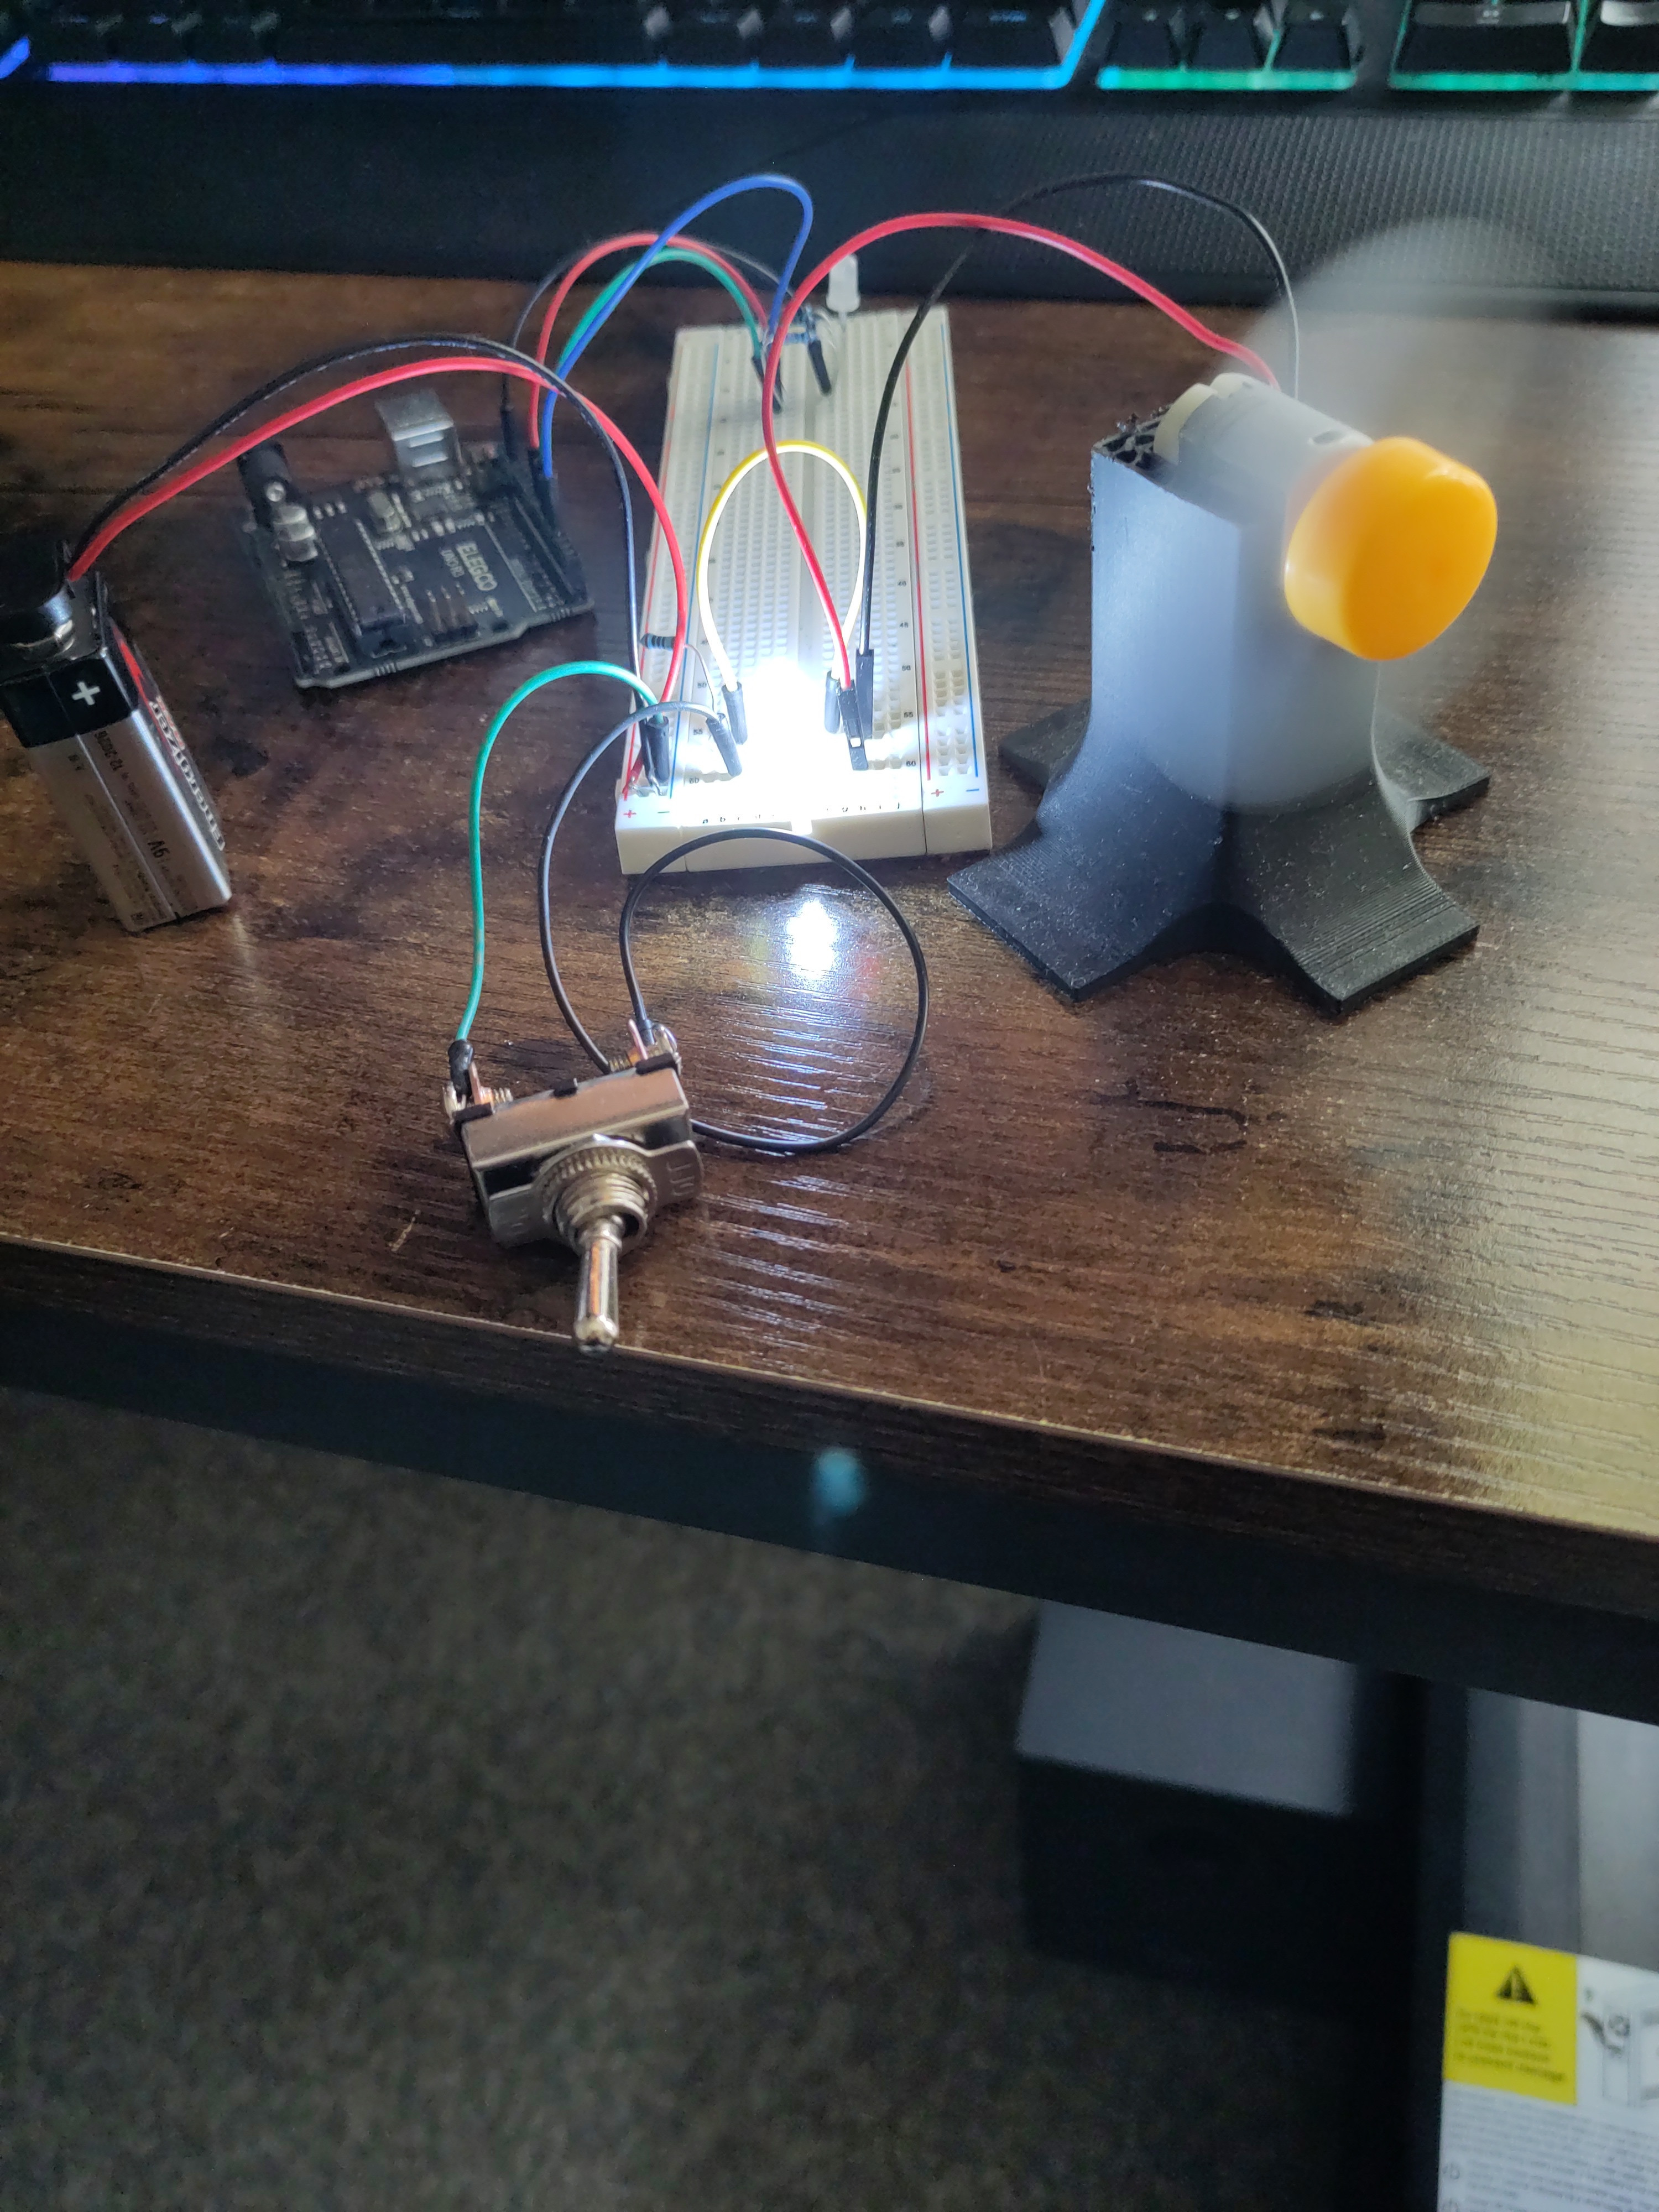
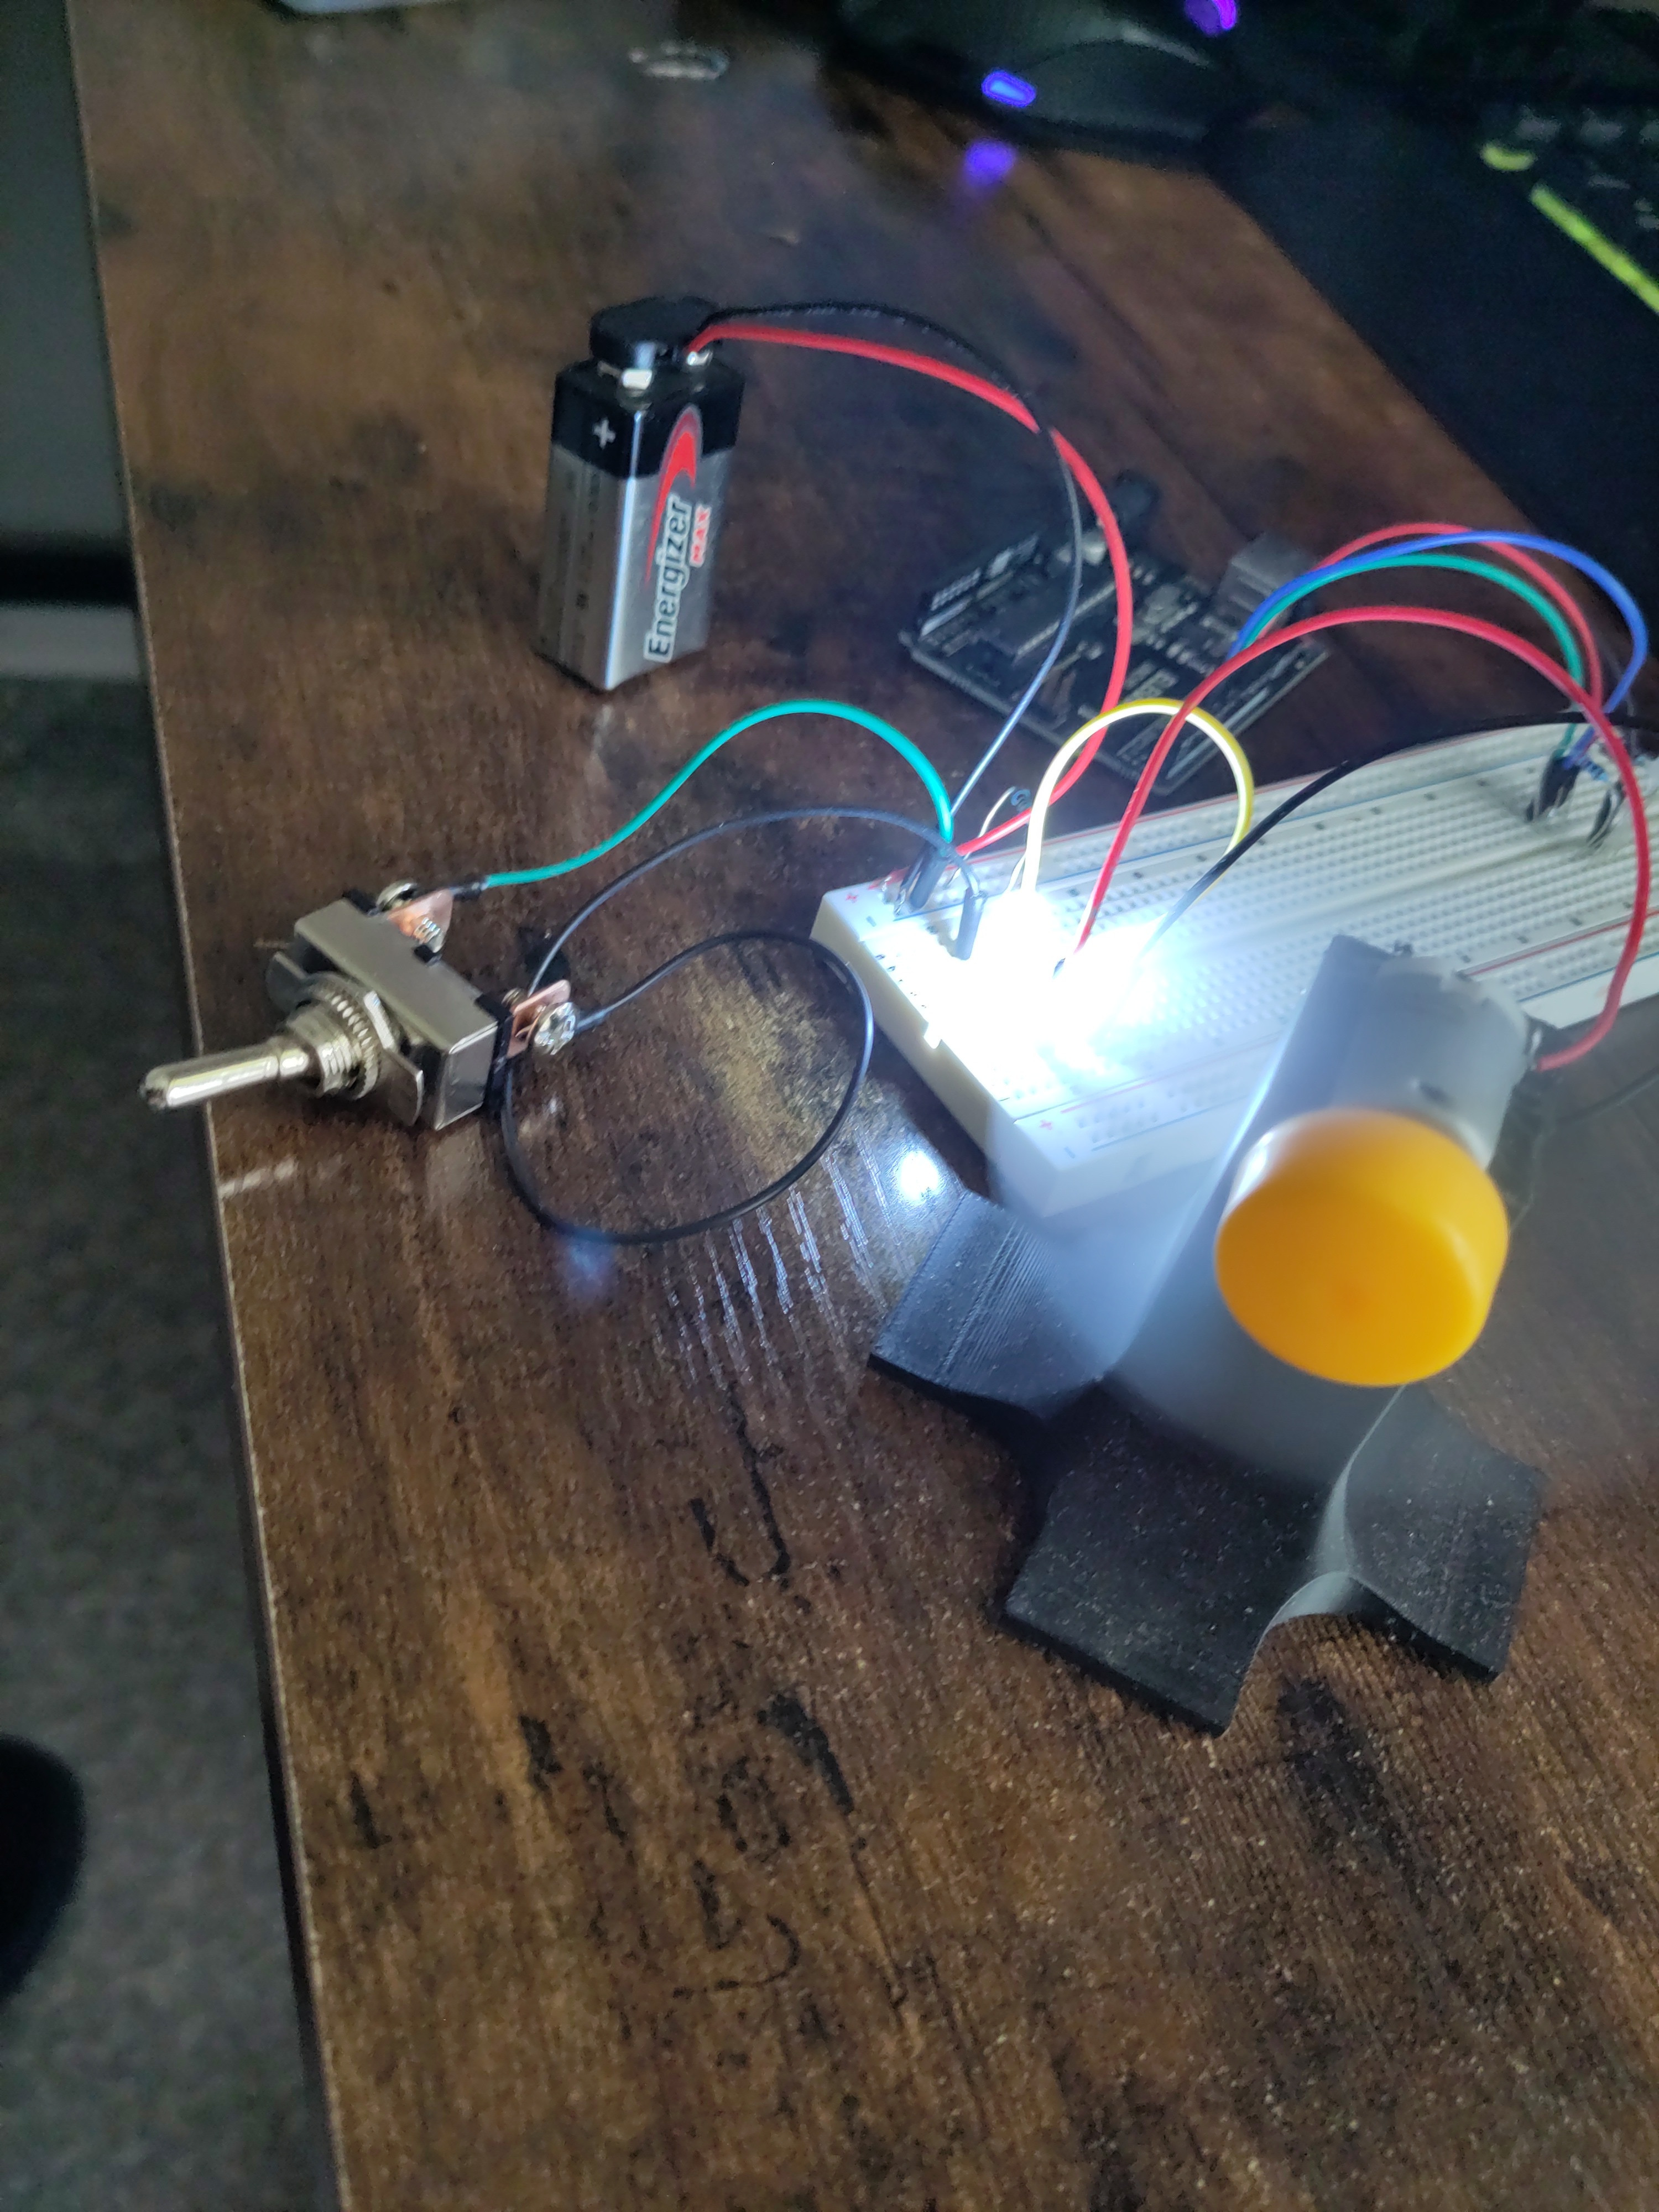
This project is going to be a persistent endeavor of increasing my familiarity of electronics, circuits and practical programming. The usage of a basic Ardiuno starter kit provide me with the necessary tools and fundamental information in conjunction to the knowledge I have already acquired from my engineering degree. This basic DC circuit, it was imaginative experiment and design with the intent of re-familiarizing myself components, principles and circuit laws such as the Kirchoff's Laws or Gauss's Law. The aim was to create a basic DC circuit with the utilization of components such as a power source, motor, various resistors, control switch and LED light. The major intent of this project is to design and build a basic DC circuit with minimal system control and eventually building a complex circuit which will be controlled by various switches. Over time, electronic components such as a micro-controller will be implemented along with other system control components. I want to become familiar with C programming language in conjunction electronics and the quantum mechanics and operation of how it all works. Subsequently, I want to design a housing apparatus for the components in which they will be seated. This all for personal tinkering and experimentation and to further compound the my skills and knowledge that I have already acquired.
Position: Test Lead
Class: MAE-4344 Capstone Senior Project
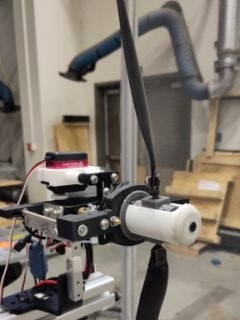
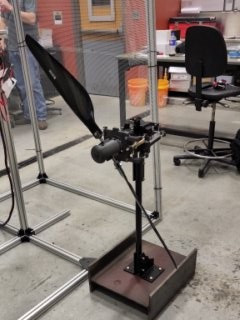
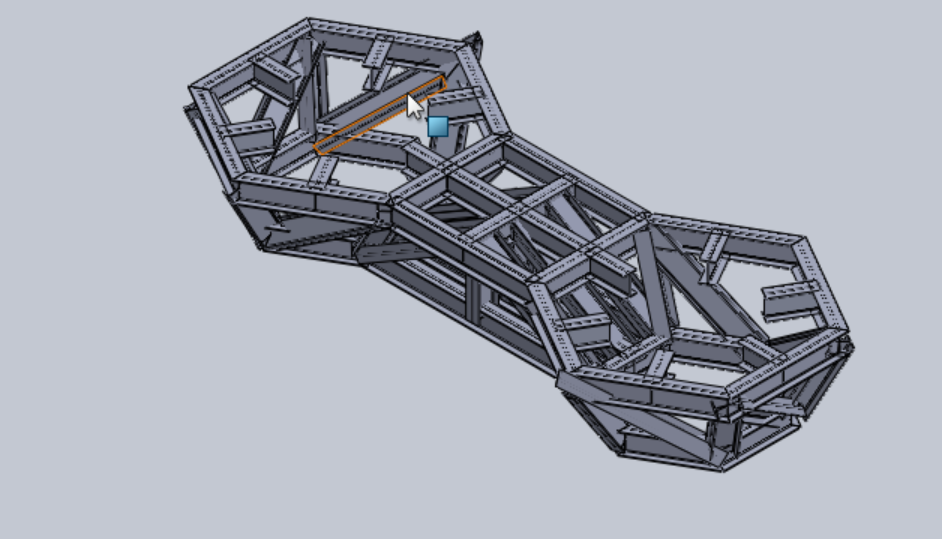
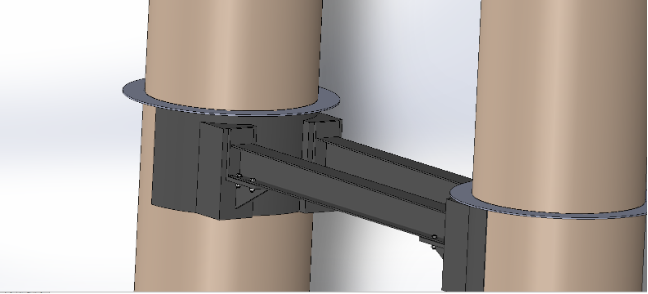
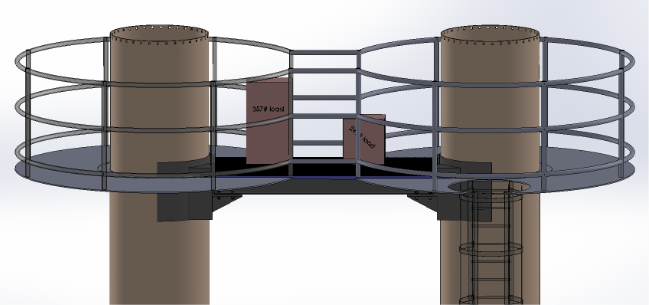
Capstone Project: Rotor Rig Test
Institution: Oklahoma State University
Timeframe: January 2025 - May 2025
This project was profoundly revolutionary in the sense of where I got the most enjoyment and utility out of the degree. During this time, I experienced and took much growth and understanding of the design process, manufacturing problems. Many ideals became contested because I attained the experience and realistic aspect of design process. Through out this project, I had the urge to volunteer for tasks and apart apart of the project as much as I could. I learned much about fabrication processes such additive manufacturing and subtractive manufacturing in conjunction. This project aspired me to acquire a few different 3d printed, and ultimately I became zealous about further my grasp on certain topics such as programming, manufacturing processes and electronics. The team I was assigned to was inspirational to say the least, I fed off of their knowledge. I am naturally inquisitive, and I wanted to play an integral part of developing this project which spiked my ambition and an attachment to the completion of it. I learned many different aspects such as tolerances and it importance. I had the opportunity to design and fabricate my own components. I had the opportunity to oversee the design and machining of certain key components. I was able to dyanmically make adjustments when machining the parts because some of the tolerances and dimensions were idealistic. When designing the components, I the design lacked certain imperatives conceptual method such as method of assembly and easing manufacturing. By vetting the process of design, fabricating the components and assembly of the multiple subsystems. I came to the realization that each design I take upon must be scrutinized and all aspects must be assessed.
Attained knowledge with 3D printing
Familiar with BambuStudios
Used Solidworks for component design, component drawings, compiled components into an functional assembly, pictorial instruction for assemblying the the Rotor Rig, Exploded Drawings, Spring Assembly fabrication drawings, Simulation, animations
Provided a conceptual design.
Helped writing the Standard Operating Procedure.
Bill of Materials
Machining and Fabrications training certification.
Machined custom components applicable to the overall design.
Helped with electrical and electronic setup(Ardiuno).
Attained knowledge for the certain use of using drill press, lathe, mill, grinder, table saw.
Met crucial team deadlines
Kept communication with team
Collaborated with team.
Attended Leadership seminars
Collaborated with team on writing imperative documents
Presented material summarized and analyzing the progression of the project to superiors.
Assisted in writing the Standards of Operation(S.O.P.)
Deal with two different interations of design
Assembled and handled complex CAD assemblies constituting between 5 different subsystems and 300+ individual components.
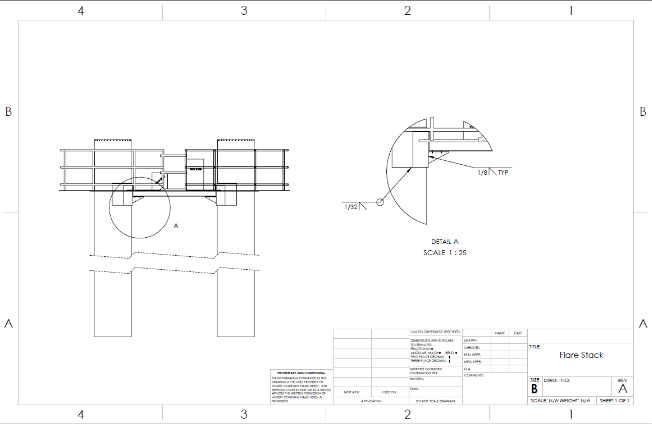
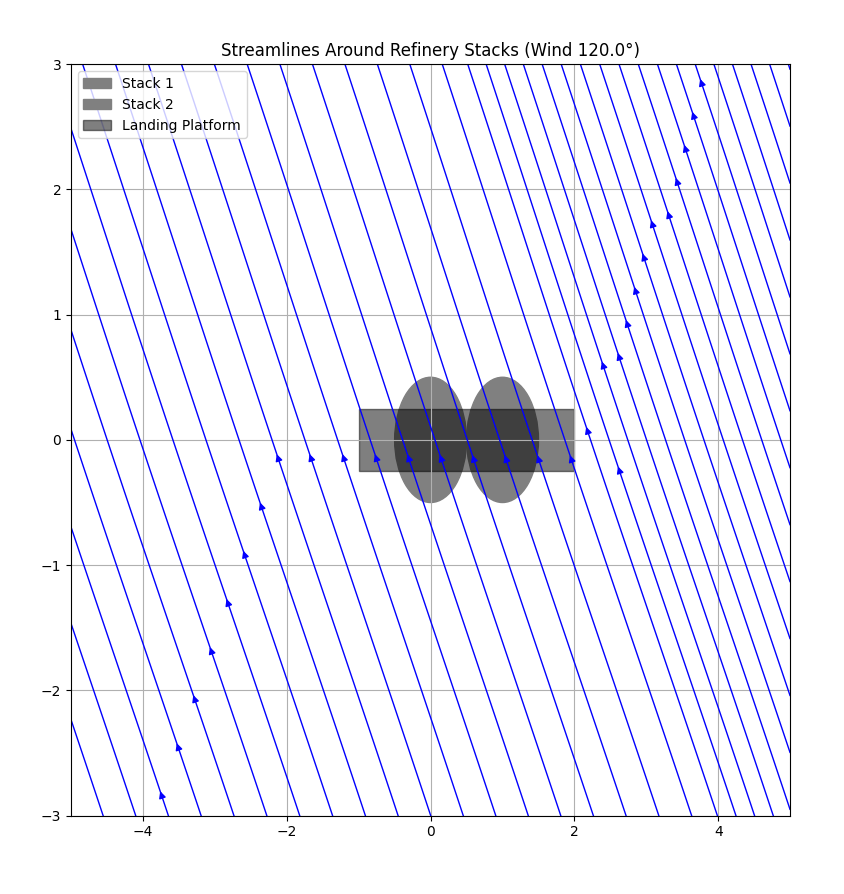
Wrote python code to calculate the aerodynamic properties and oscillations refinery stack, being able to adjust the impact at an interval of 15 degrees
Used solidworks to design a structural sounding beam for a conceptial design.
Assessment of risk.
Helped with bolt, weld and oscillation calculations.
Conducted Research.
Applied strength of materials/ dynamic/ aerodyanmic principles.
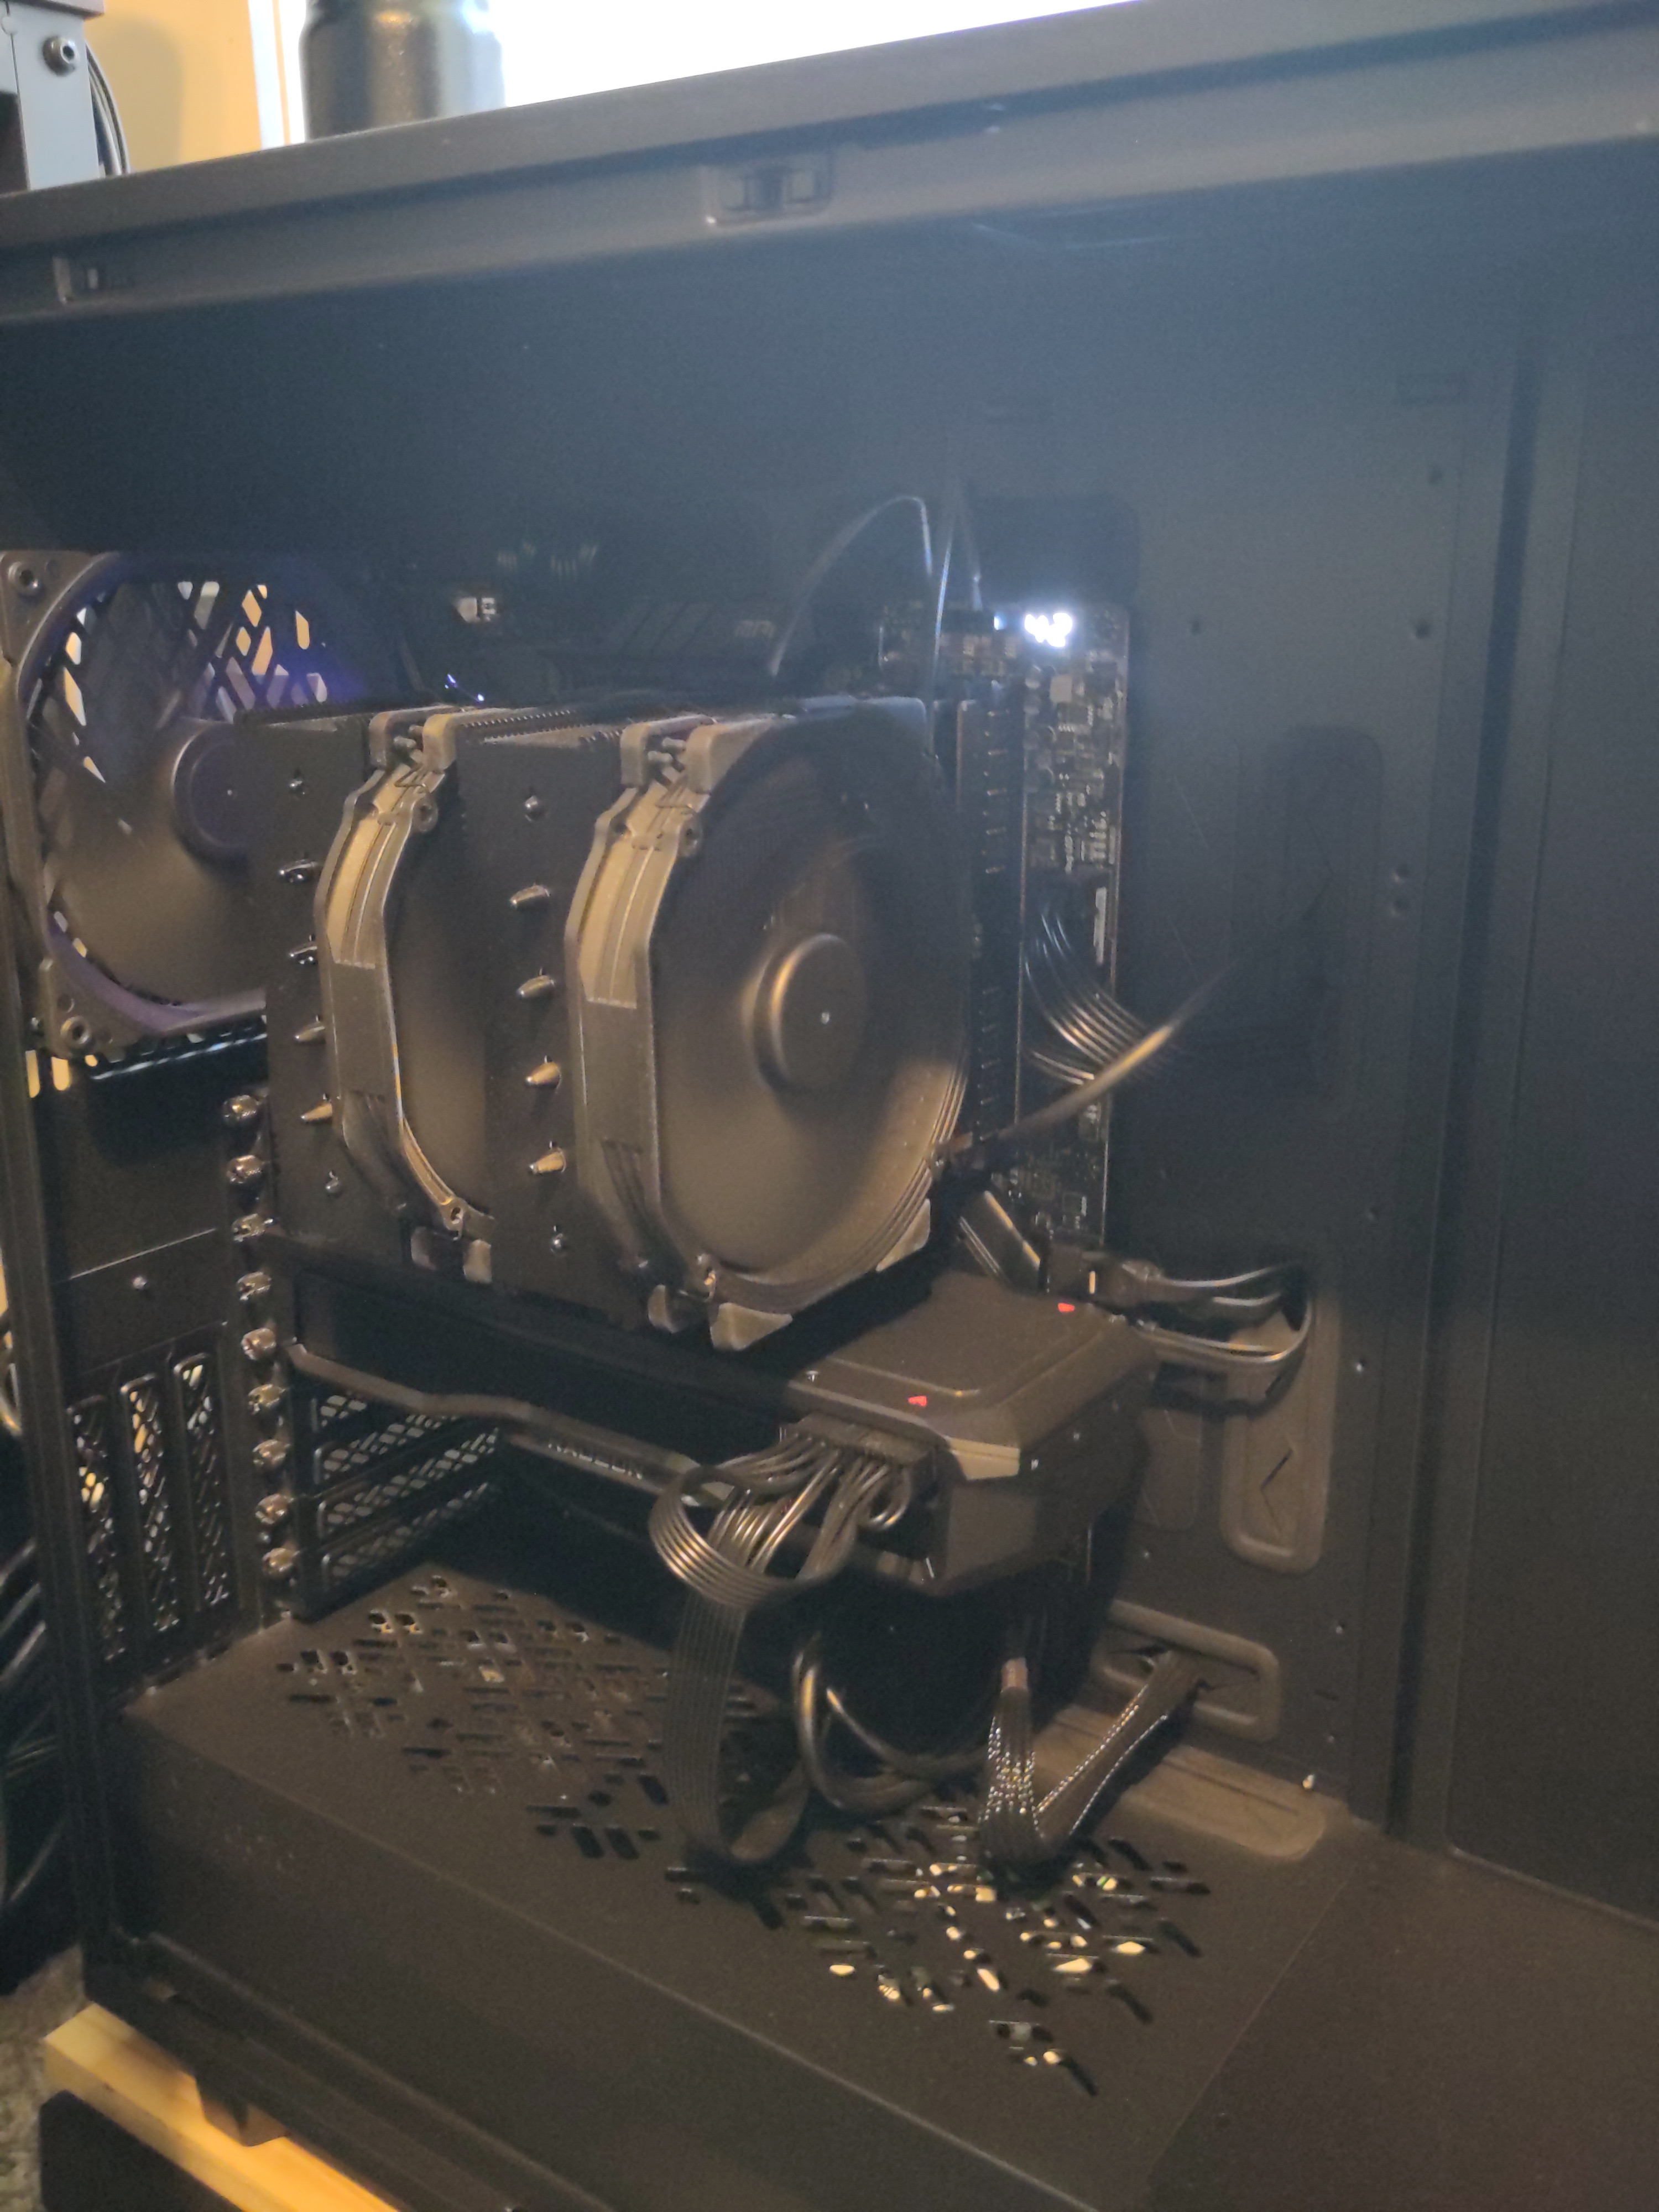
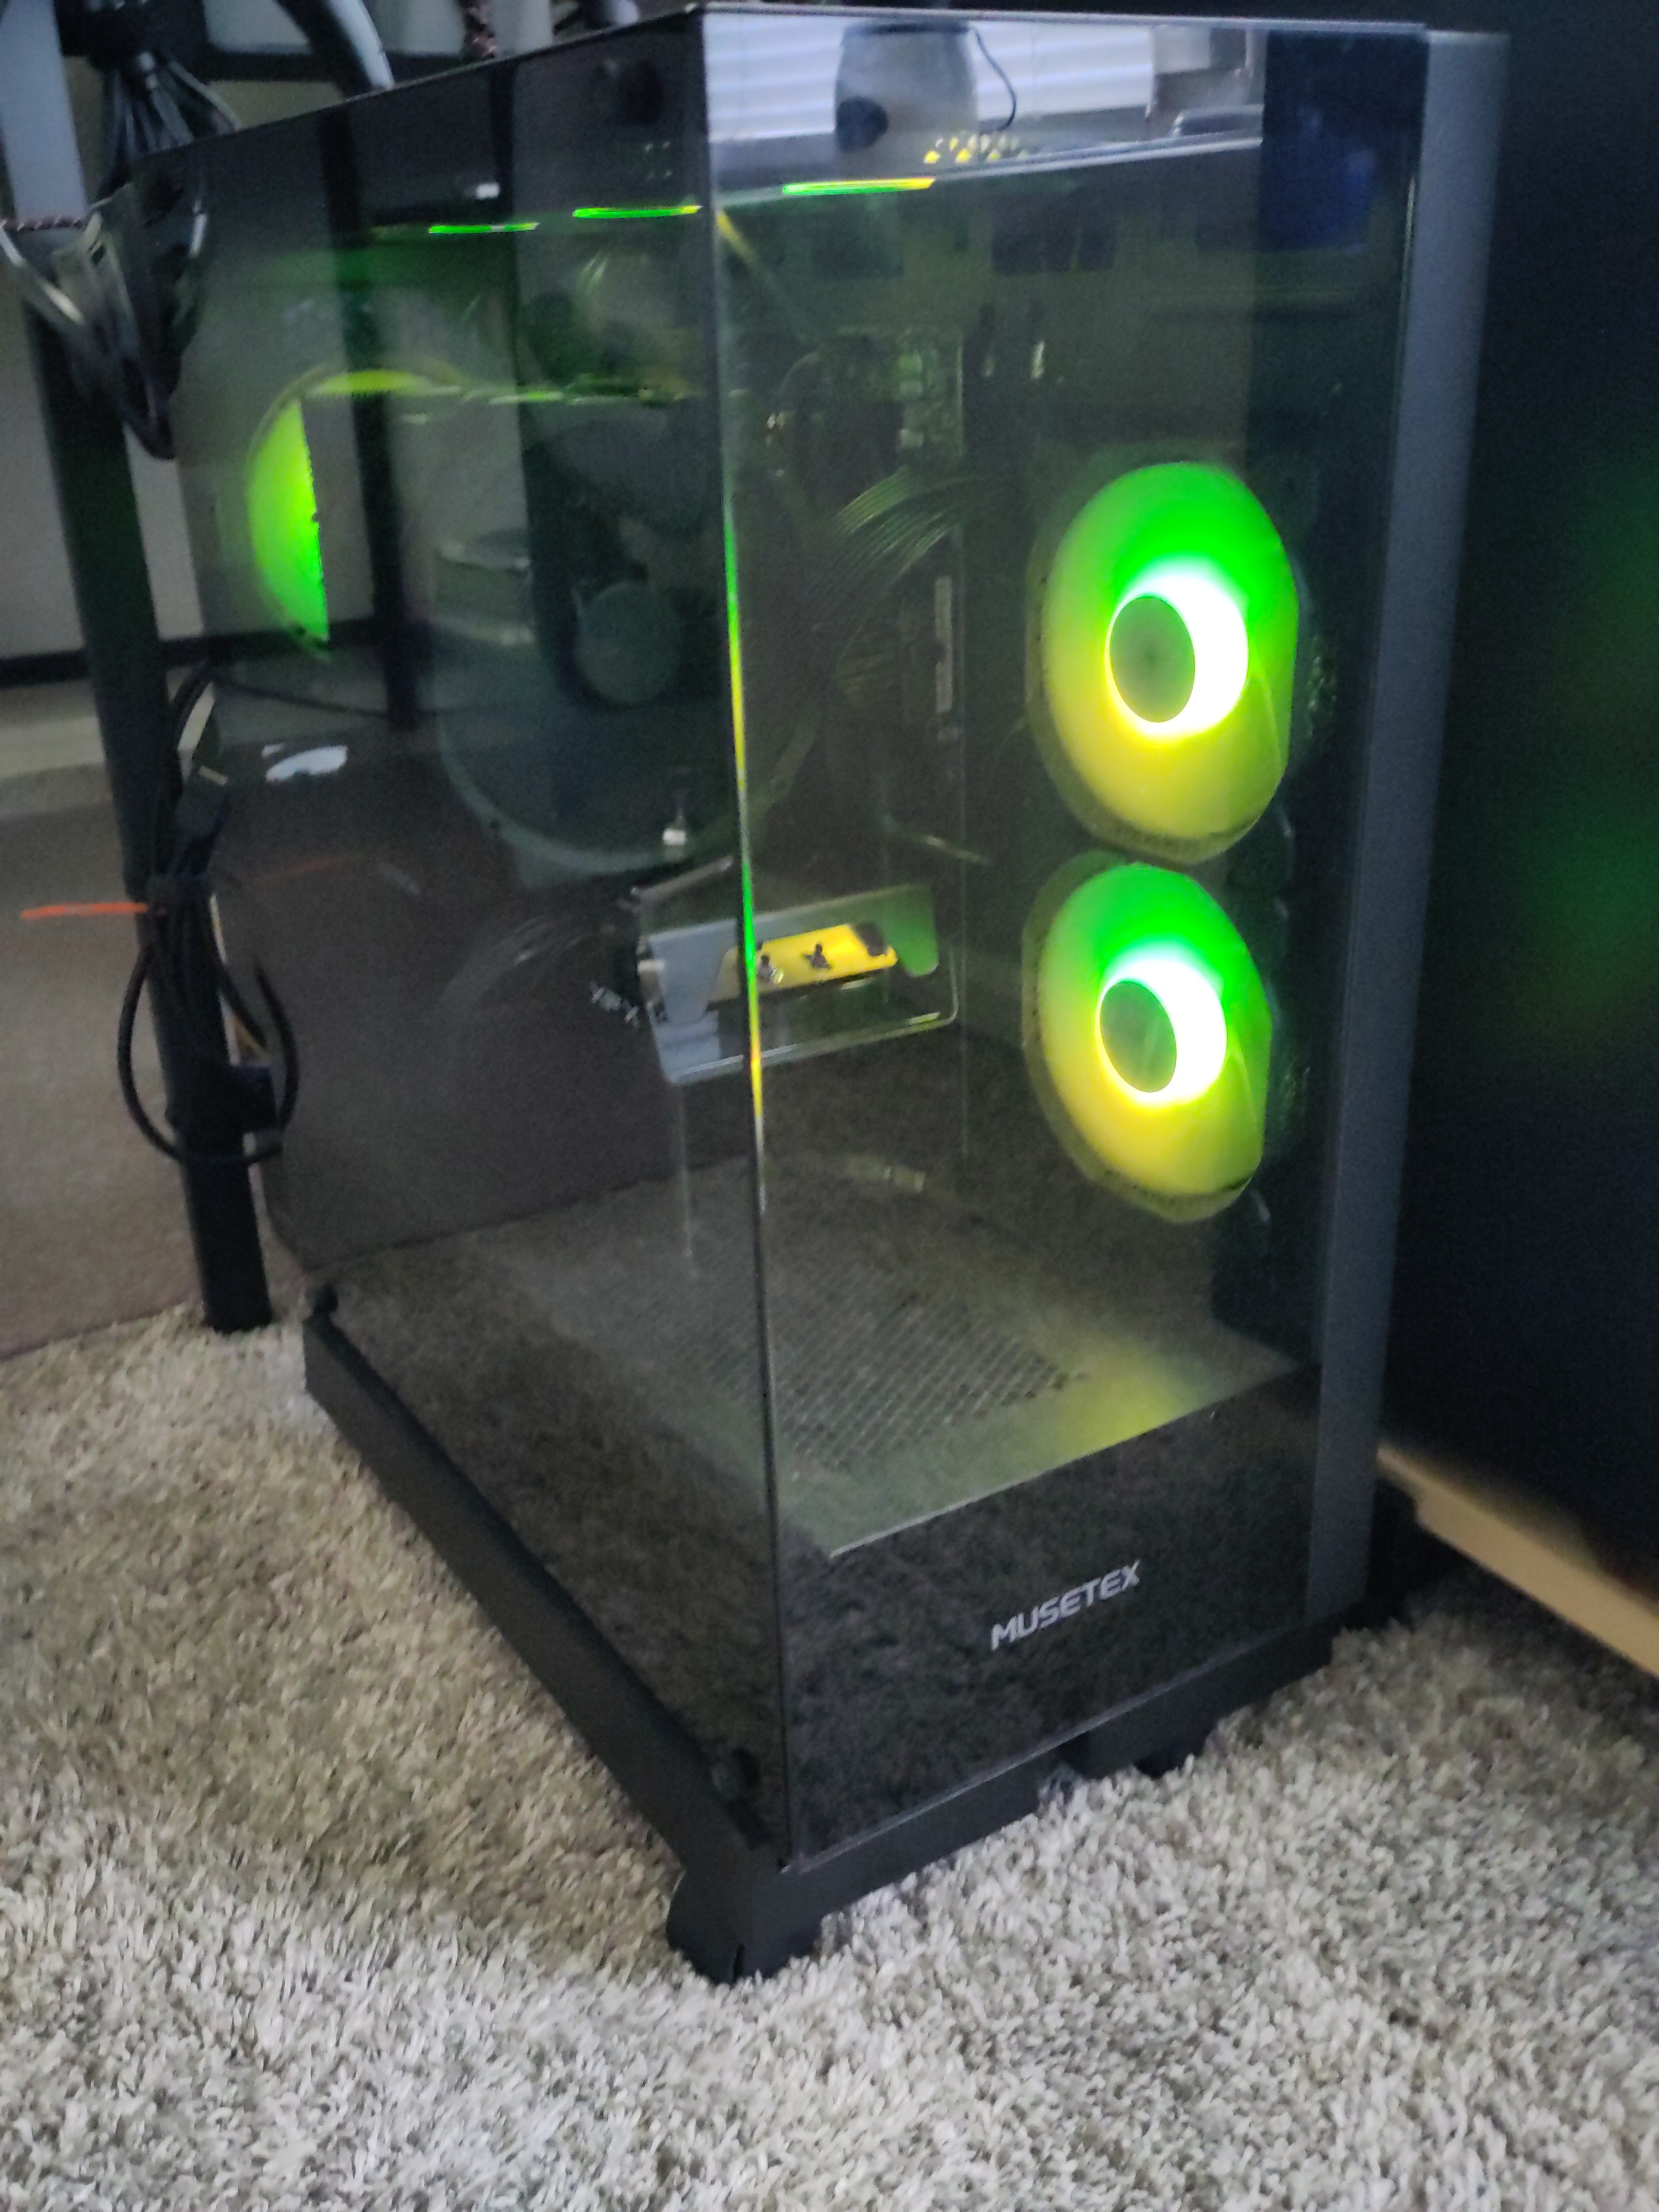
This is the most recently upgraded edition of my server/homelab. The intention hand picking the hardware components
The objective of the homelab and server build and networking project was to further expand my knowledge with computers hardware setup, software and networking setup. The homelab makes it permissible to tinker and write certain programs to optimize the functionality of the server. I have multiple services setup with my server, to aid in giving remote access to my server and being able to utilize some of its already established services such as my own cloud instance, media streaming service and CAD and 3d printing remotely. I am currently using Fedora 42 OS by Red Hat as my default Operating system across all of my devices. I been using Linux in totality for 2 years now. The transition to linux, peaked curiousity and in repercussions began to tinker and experiment. The compability layers necesistated for functionality as a daily driver became ardous. The compatibility and customization opened up many doors such as trying out other linux distributions, DE, and getting familiar and comfortable with using the terminal. It also enchanced my programming capabilities. I have learned how to use the terminal efficiently, it is the main route to take tinkering and troubleshooting. I transferred files from other devices, formatting drives, ssh, acquiring information about network and systems. Connectivity. I even installed Arch linux and had a decent idea of how to install it through the command line. I am have ran bash scripts before such as automating time for the server to turn off or auto-update script.
Components
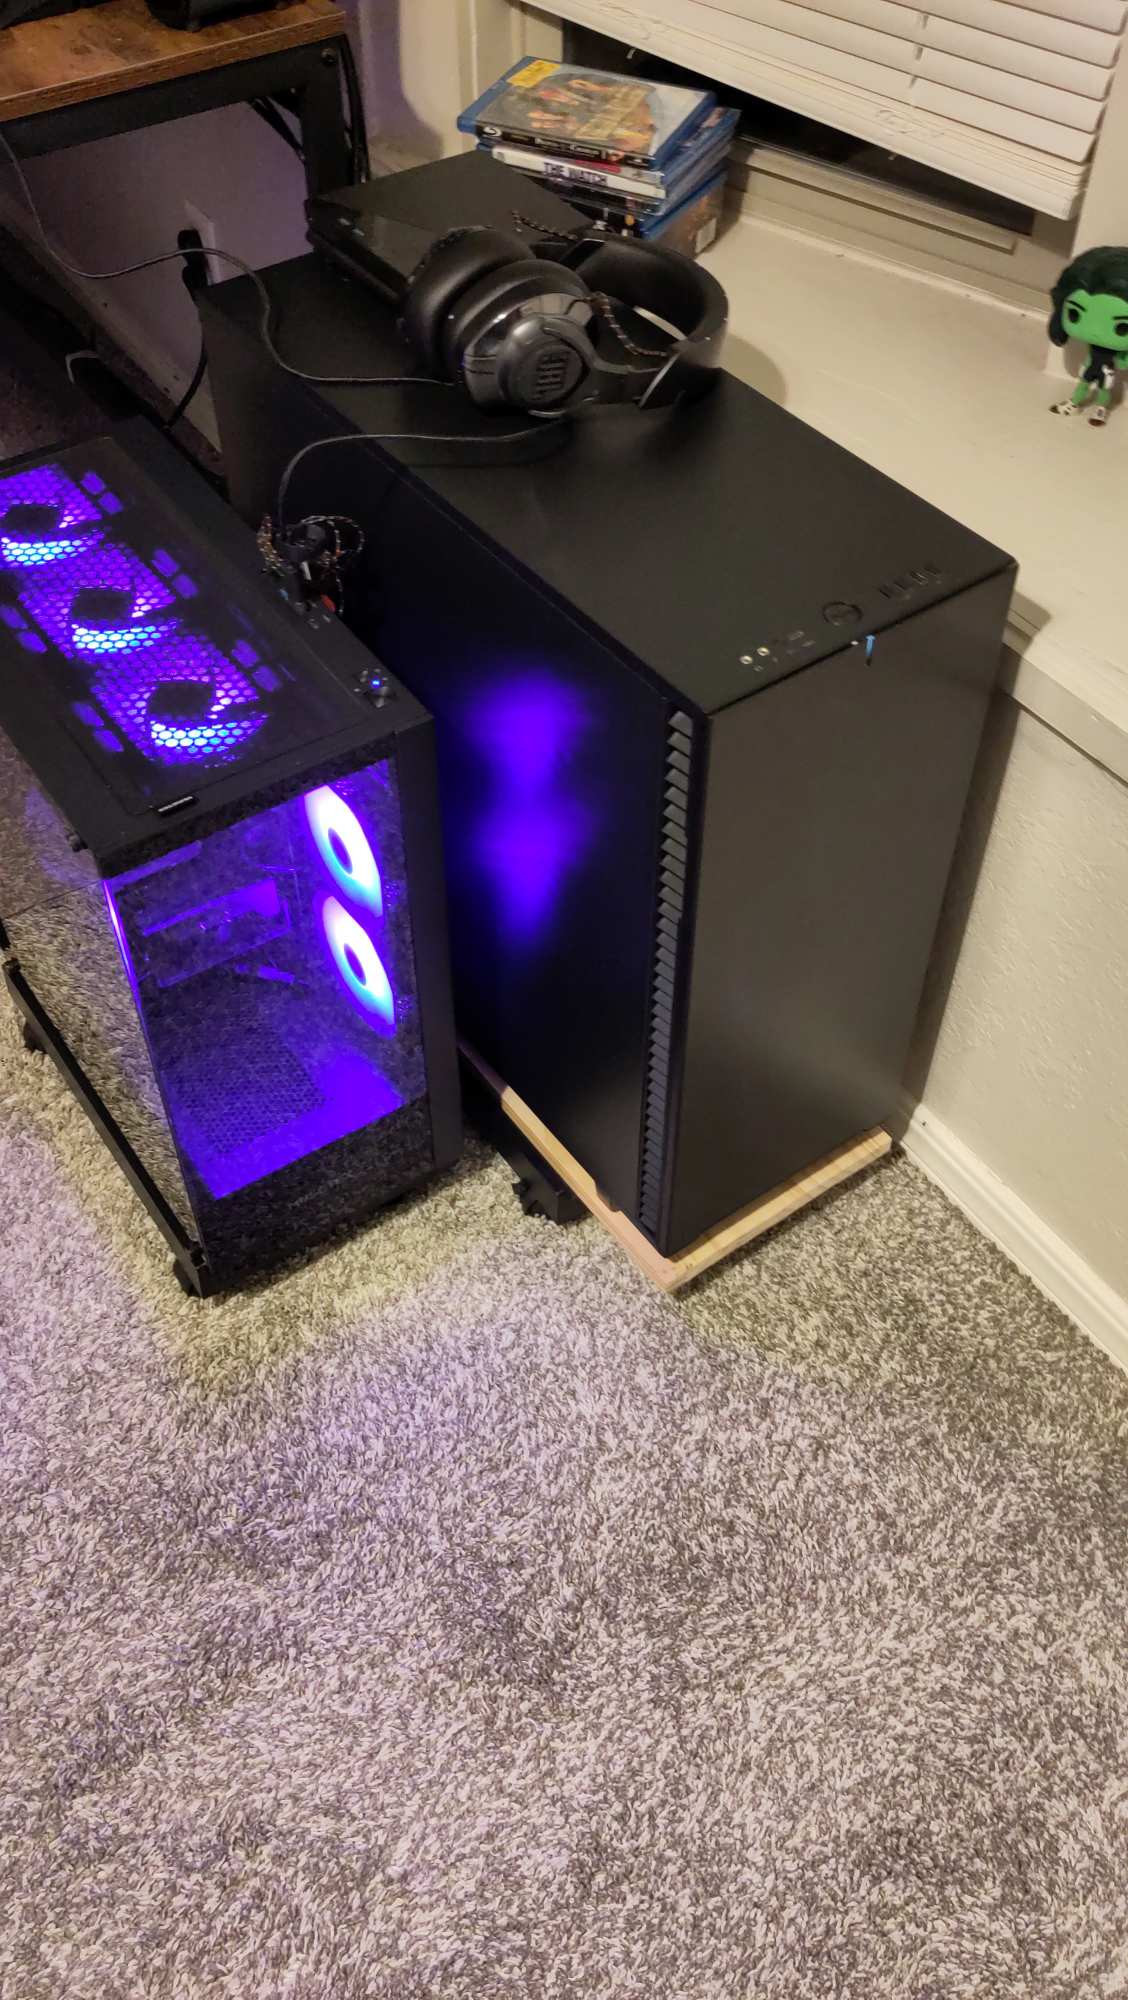
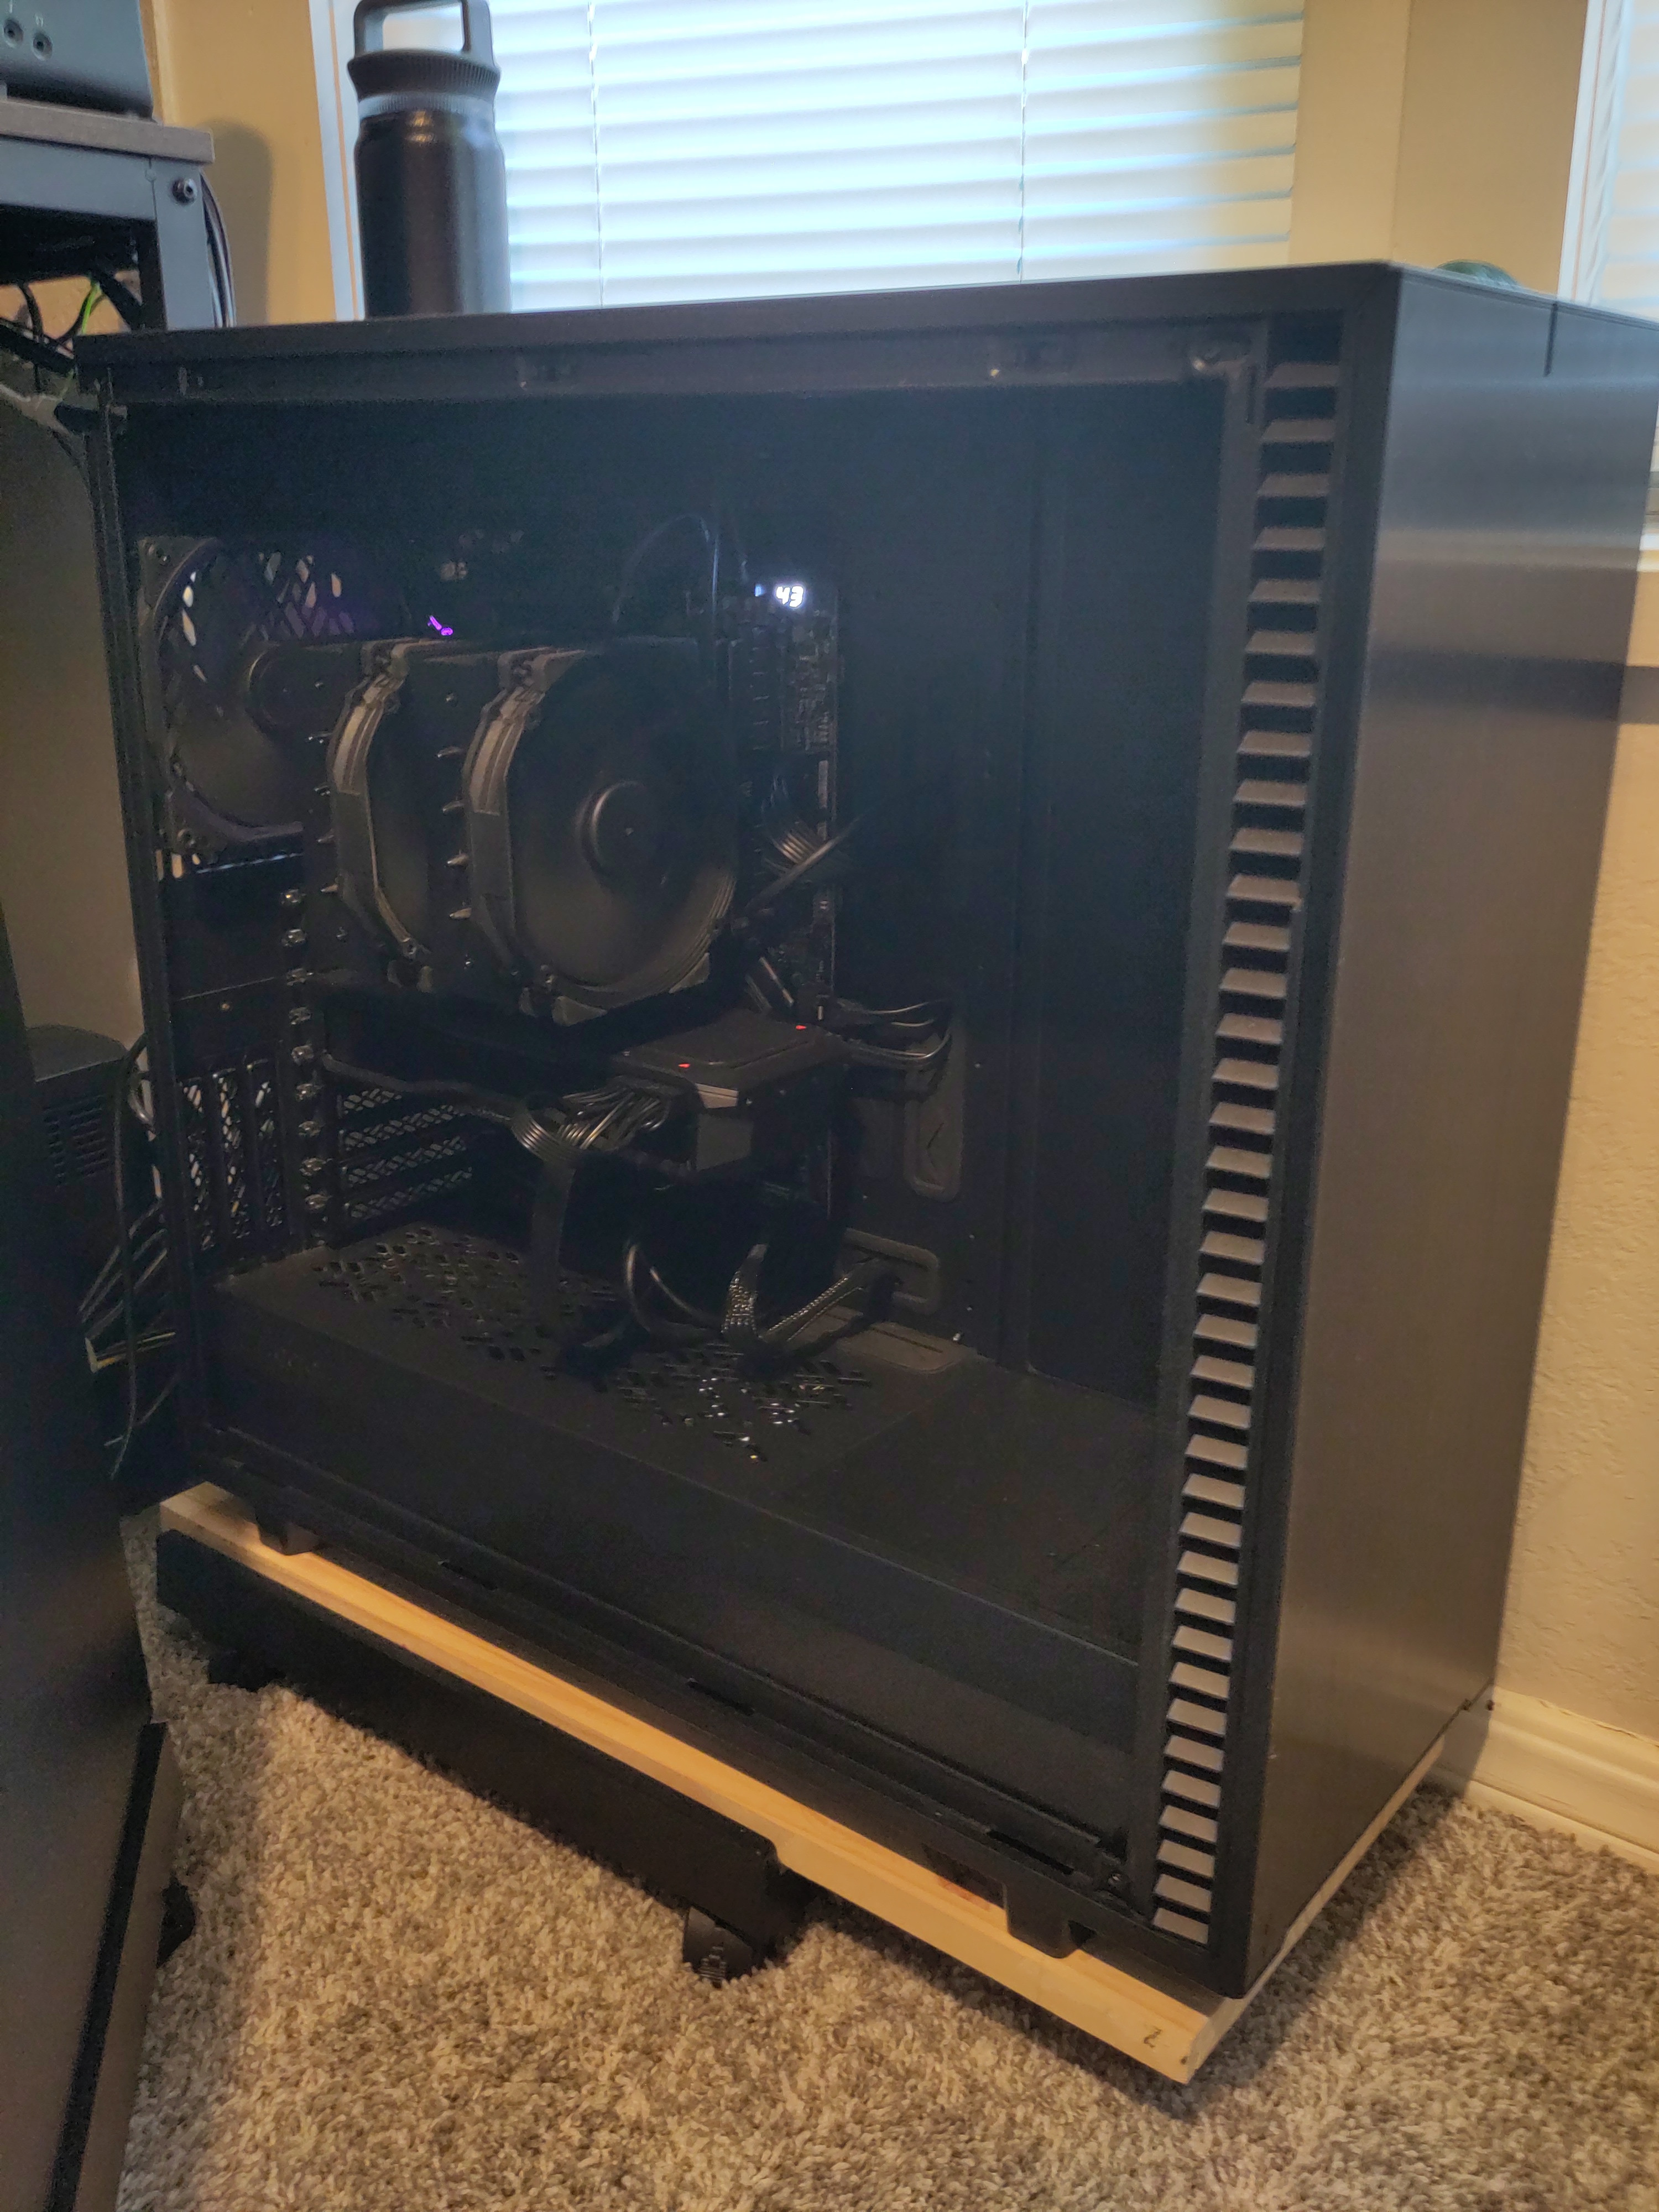
CPU: AMD Ryzen 9 9950x3D 16-core
GPU: PowerColor AMD Radeon RX 7900 XT 20 GB VRAM
Motherboard: MSI MPG X670E Carbon Wifi DDR5 AM5
RAM: Crucial 128GB DDR5 5600 MHz
Storage: 1x Samsung 990 Prob 2Tb SSD 7450 MB/s, 1x Seagate Exos X20 20TB Internal Hard Drive SATA 6Gb/s HDD 7200 RPM,3x Seagate Barracuda 12TB Internal Hard Drive SATA 6GB/s HDD 7200 RPM
PSU: MSI MAG A1000GL PCEI 5 1000W
Cooling System: Air/ Noctua NH-D15
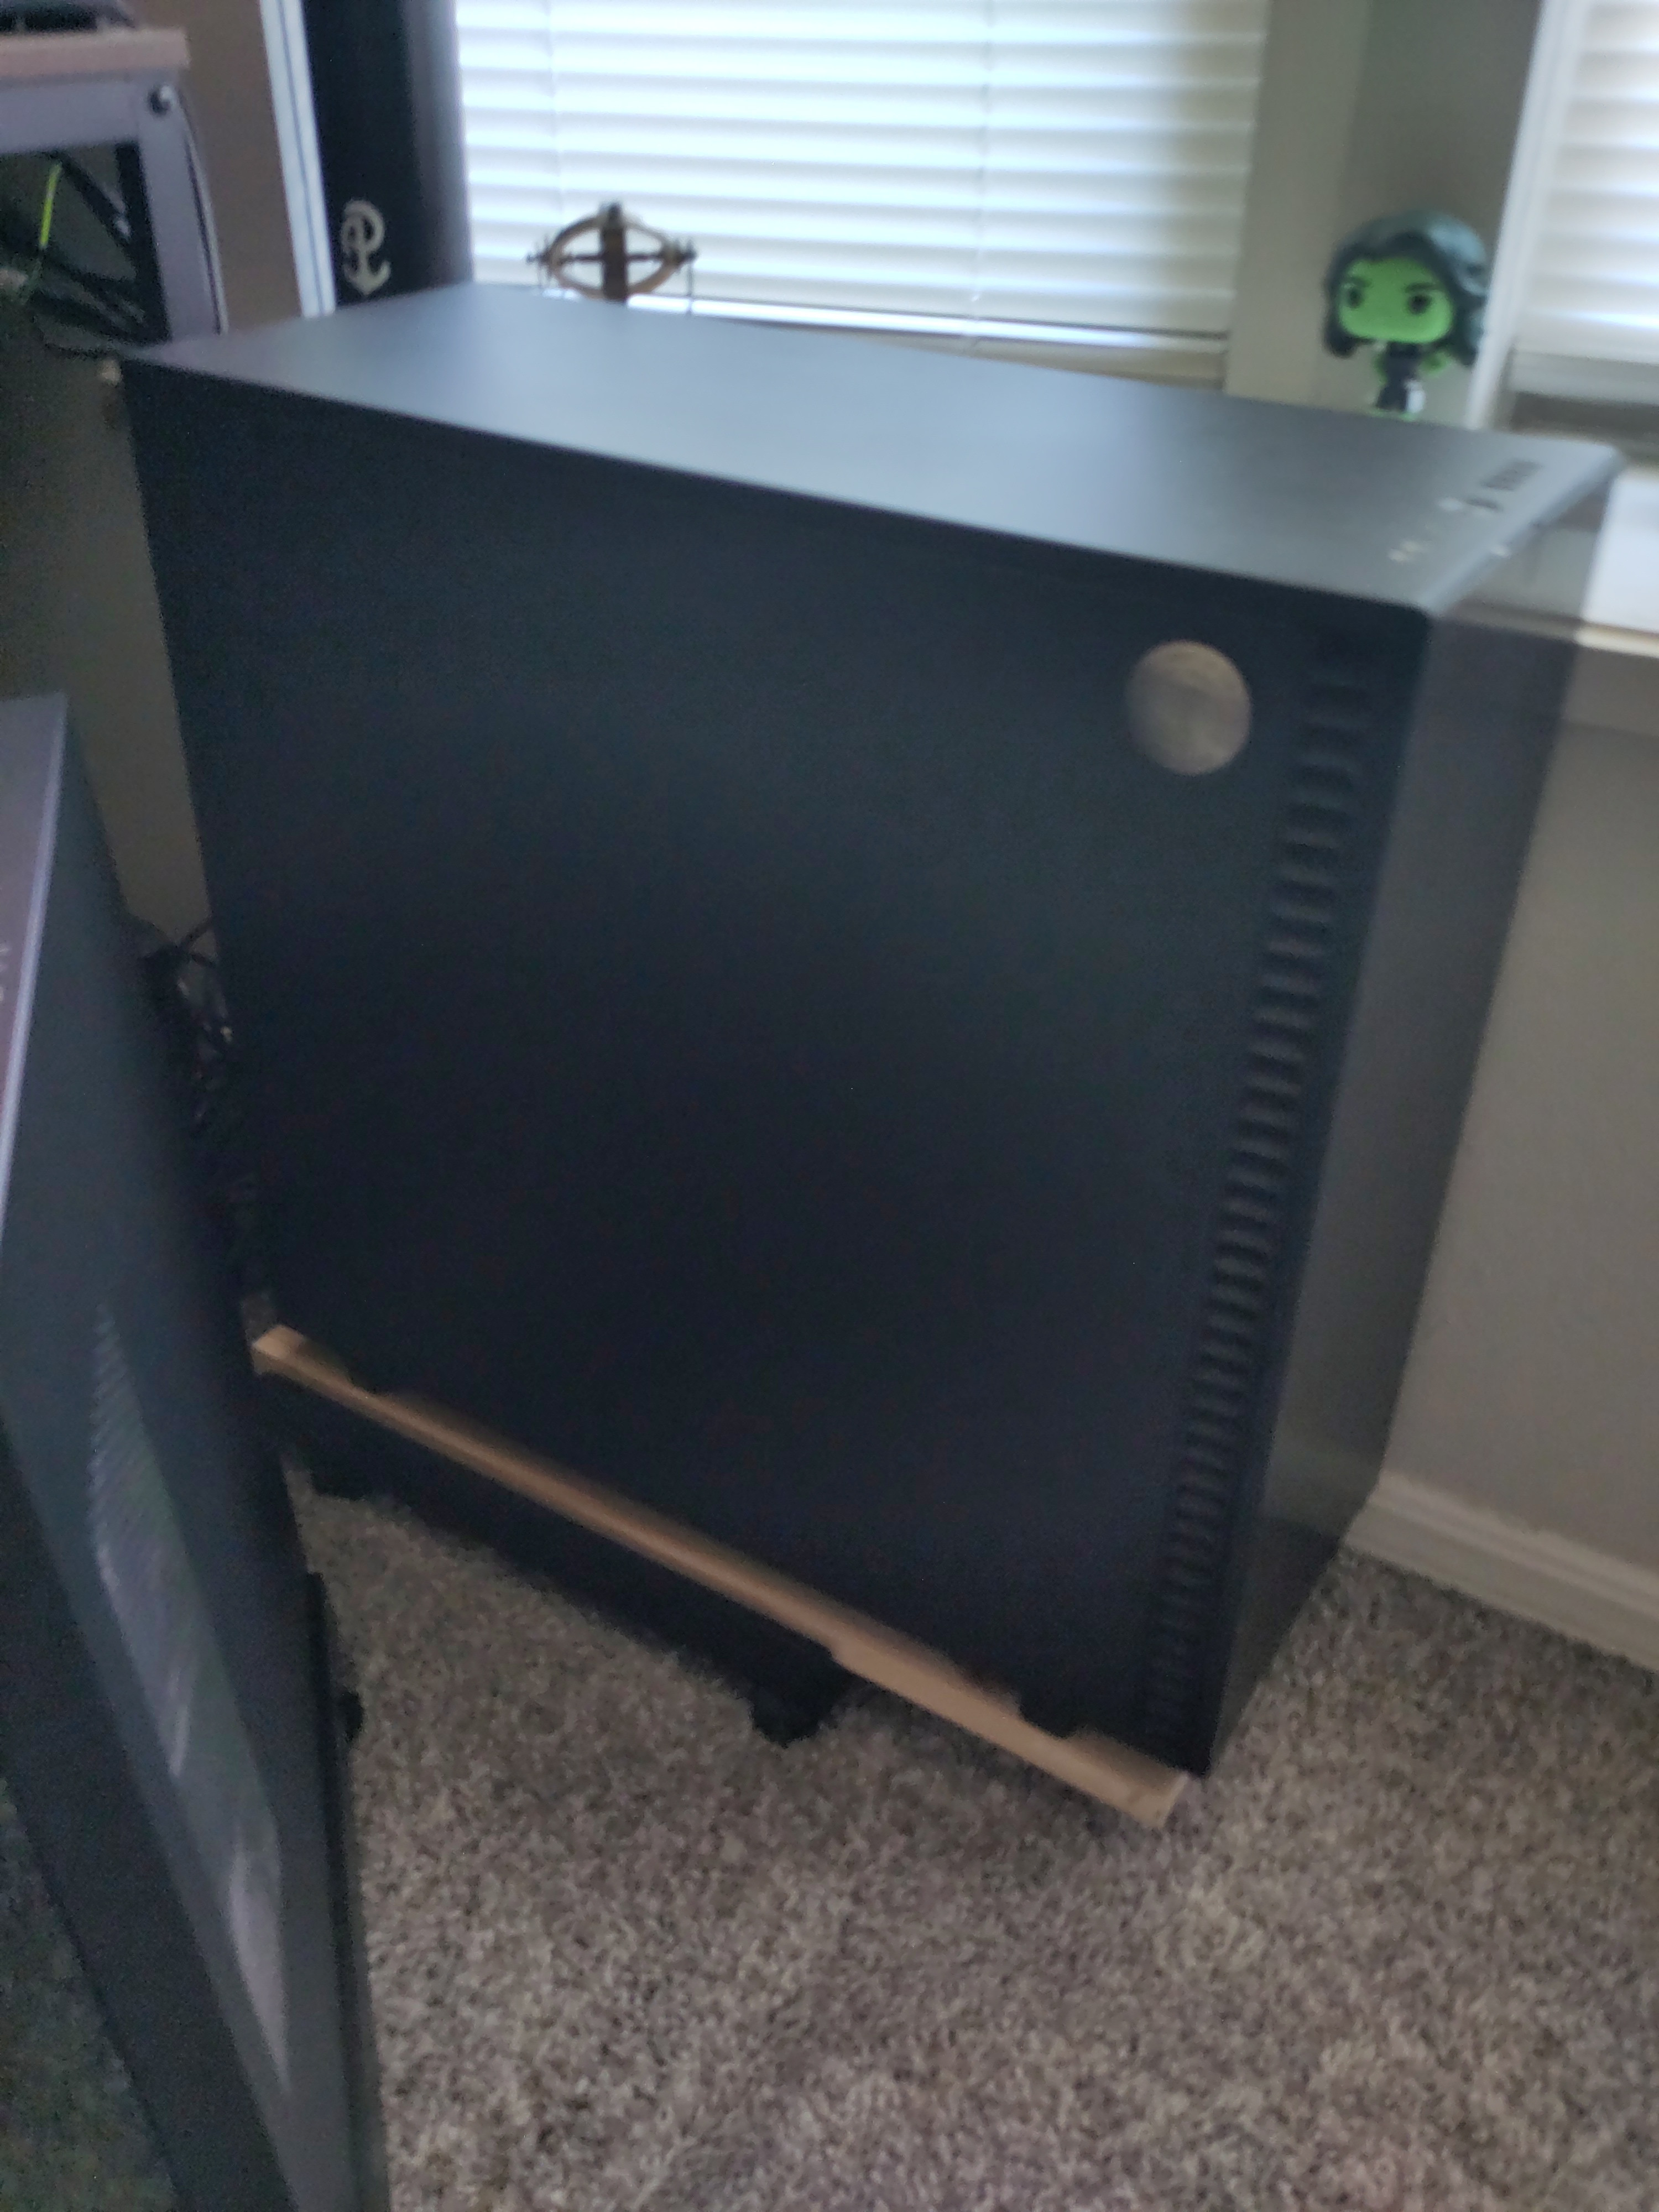
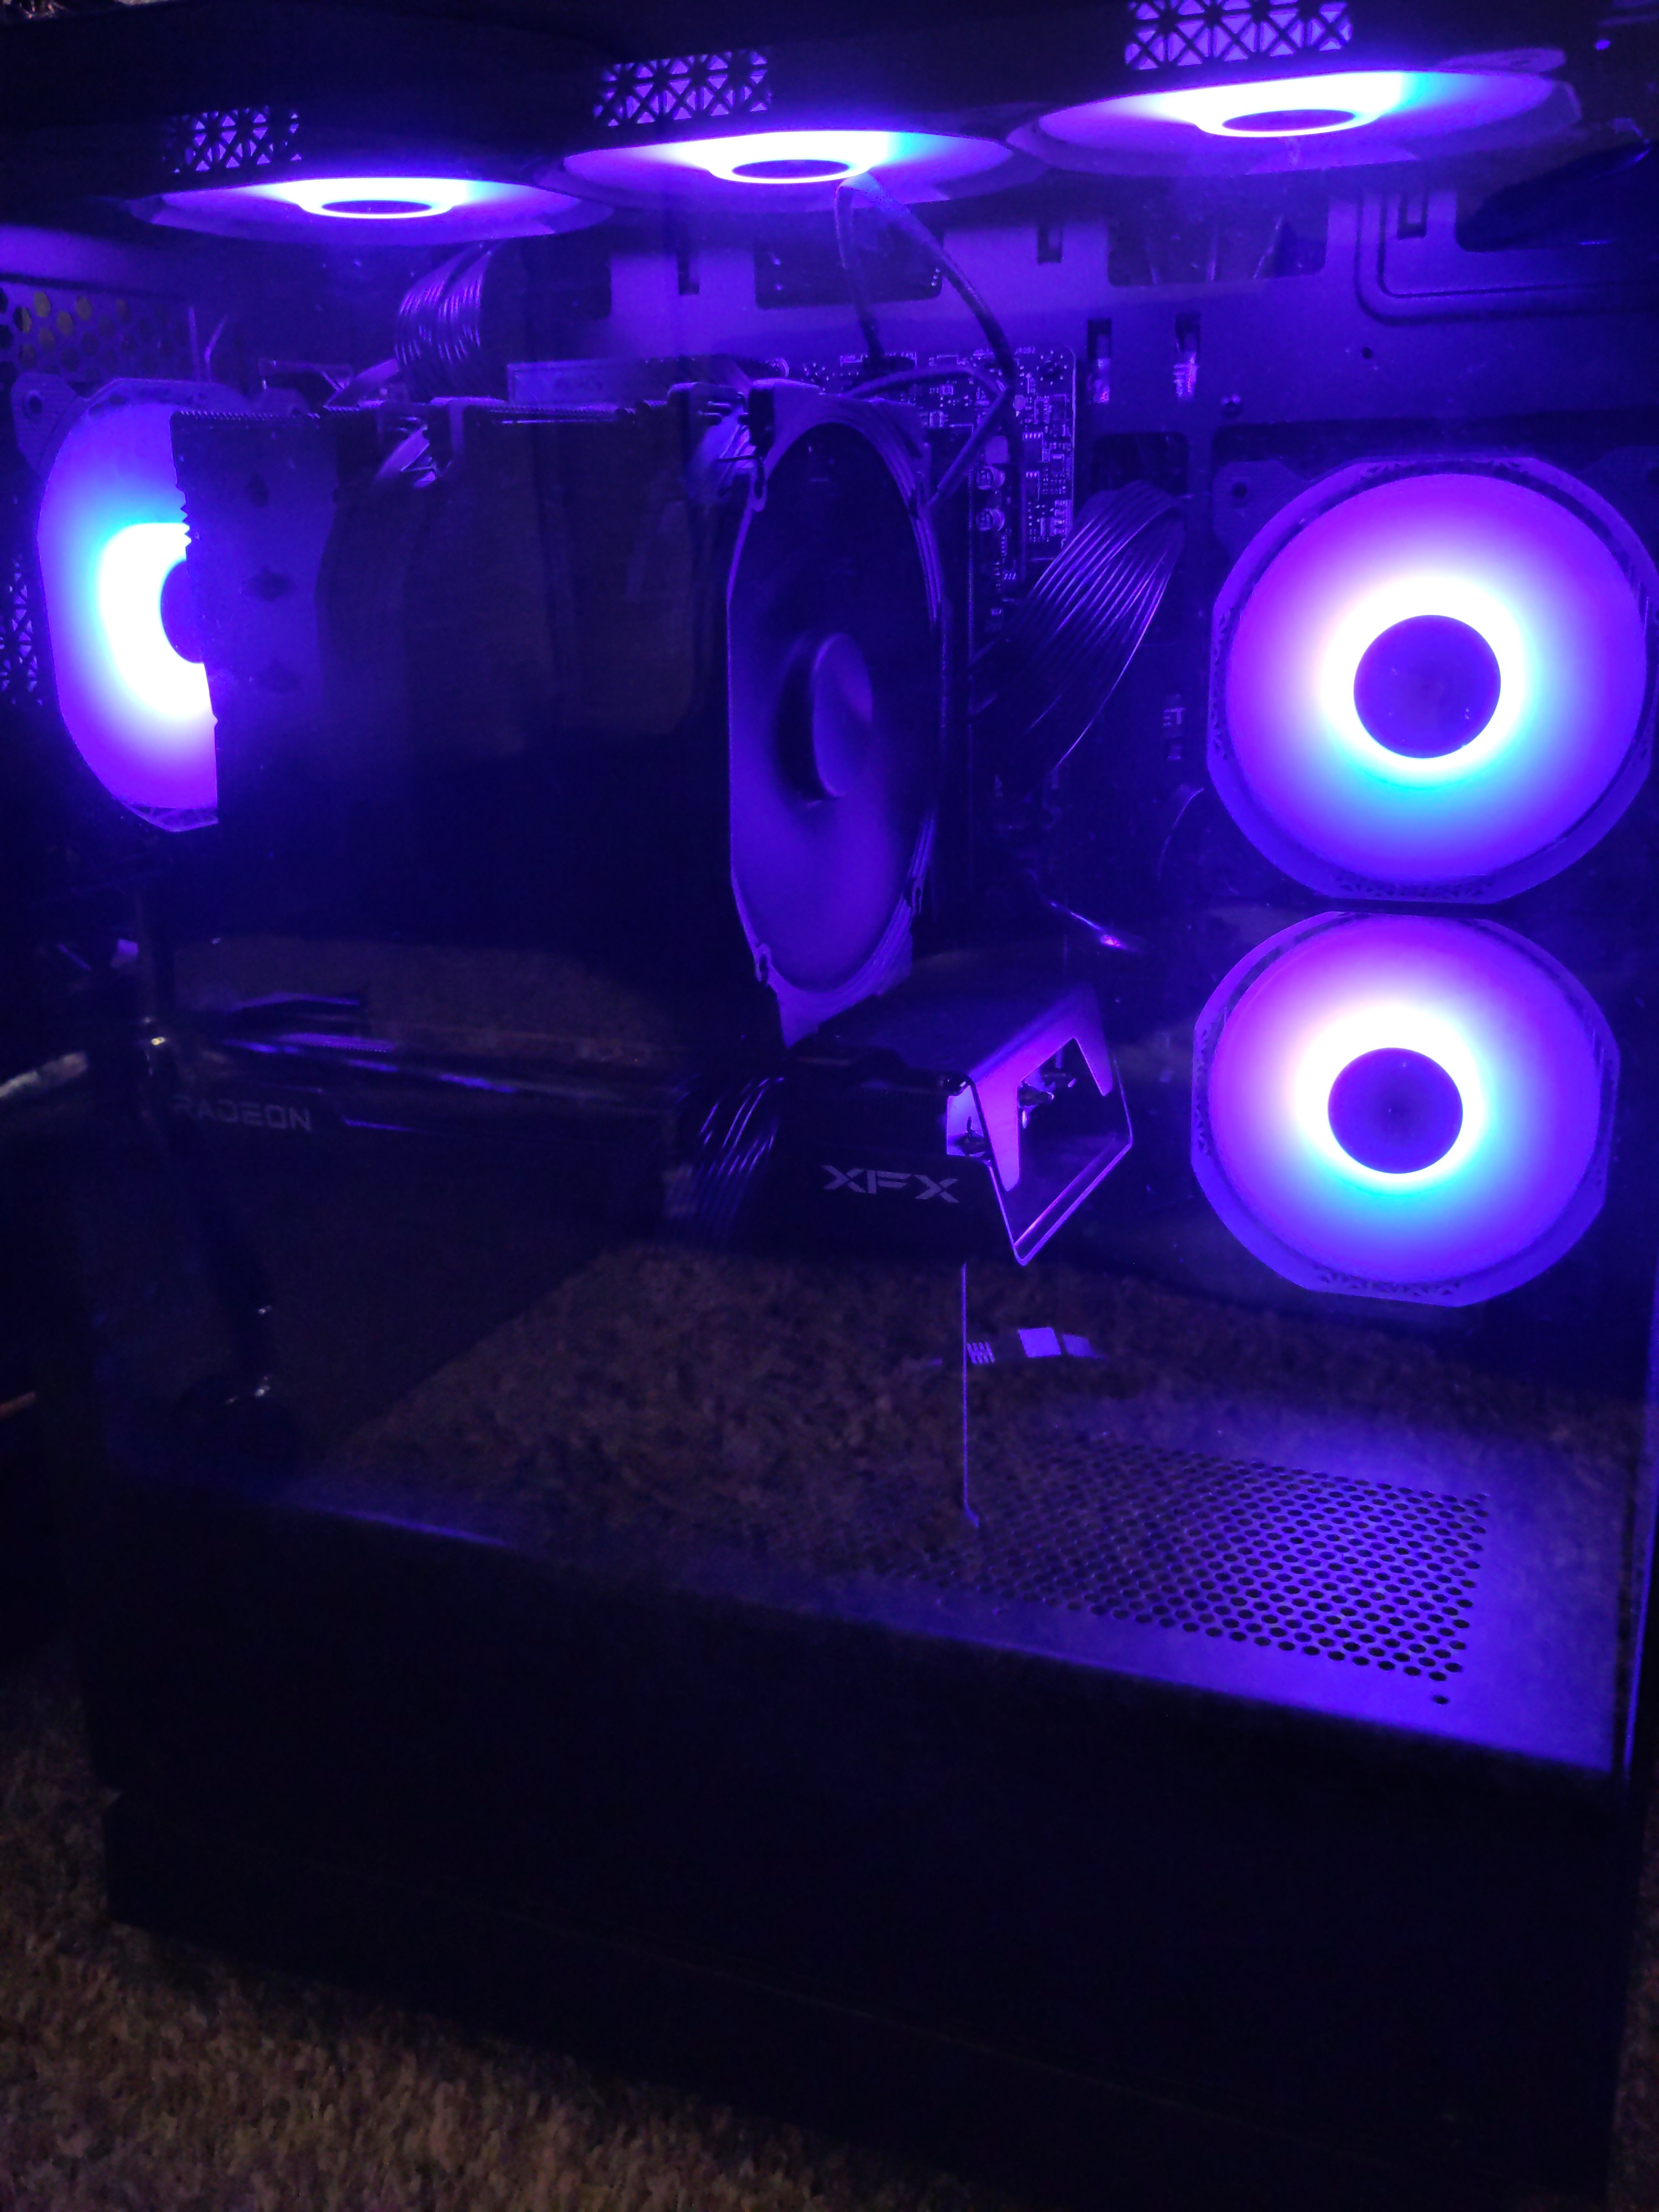
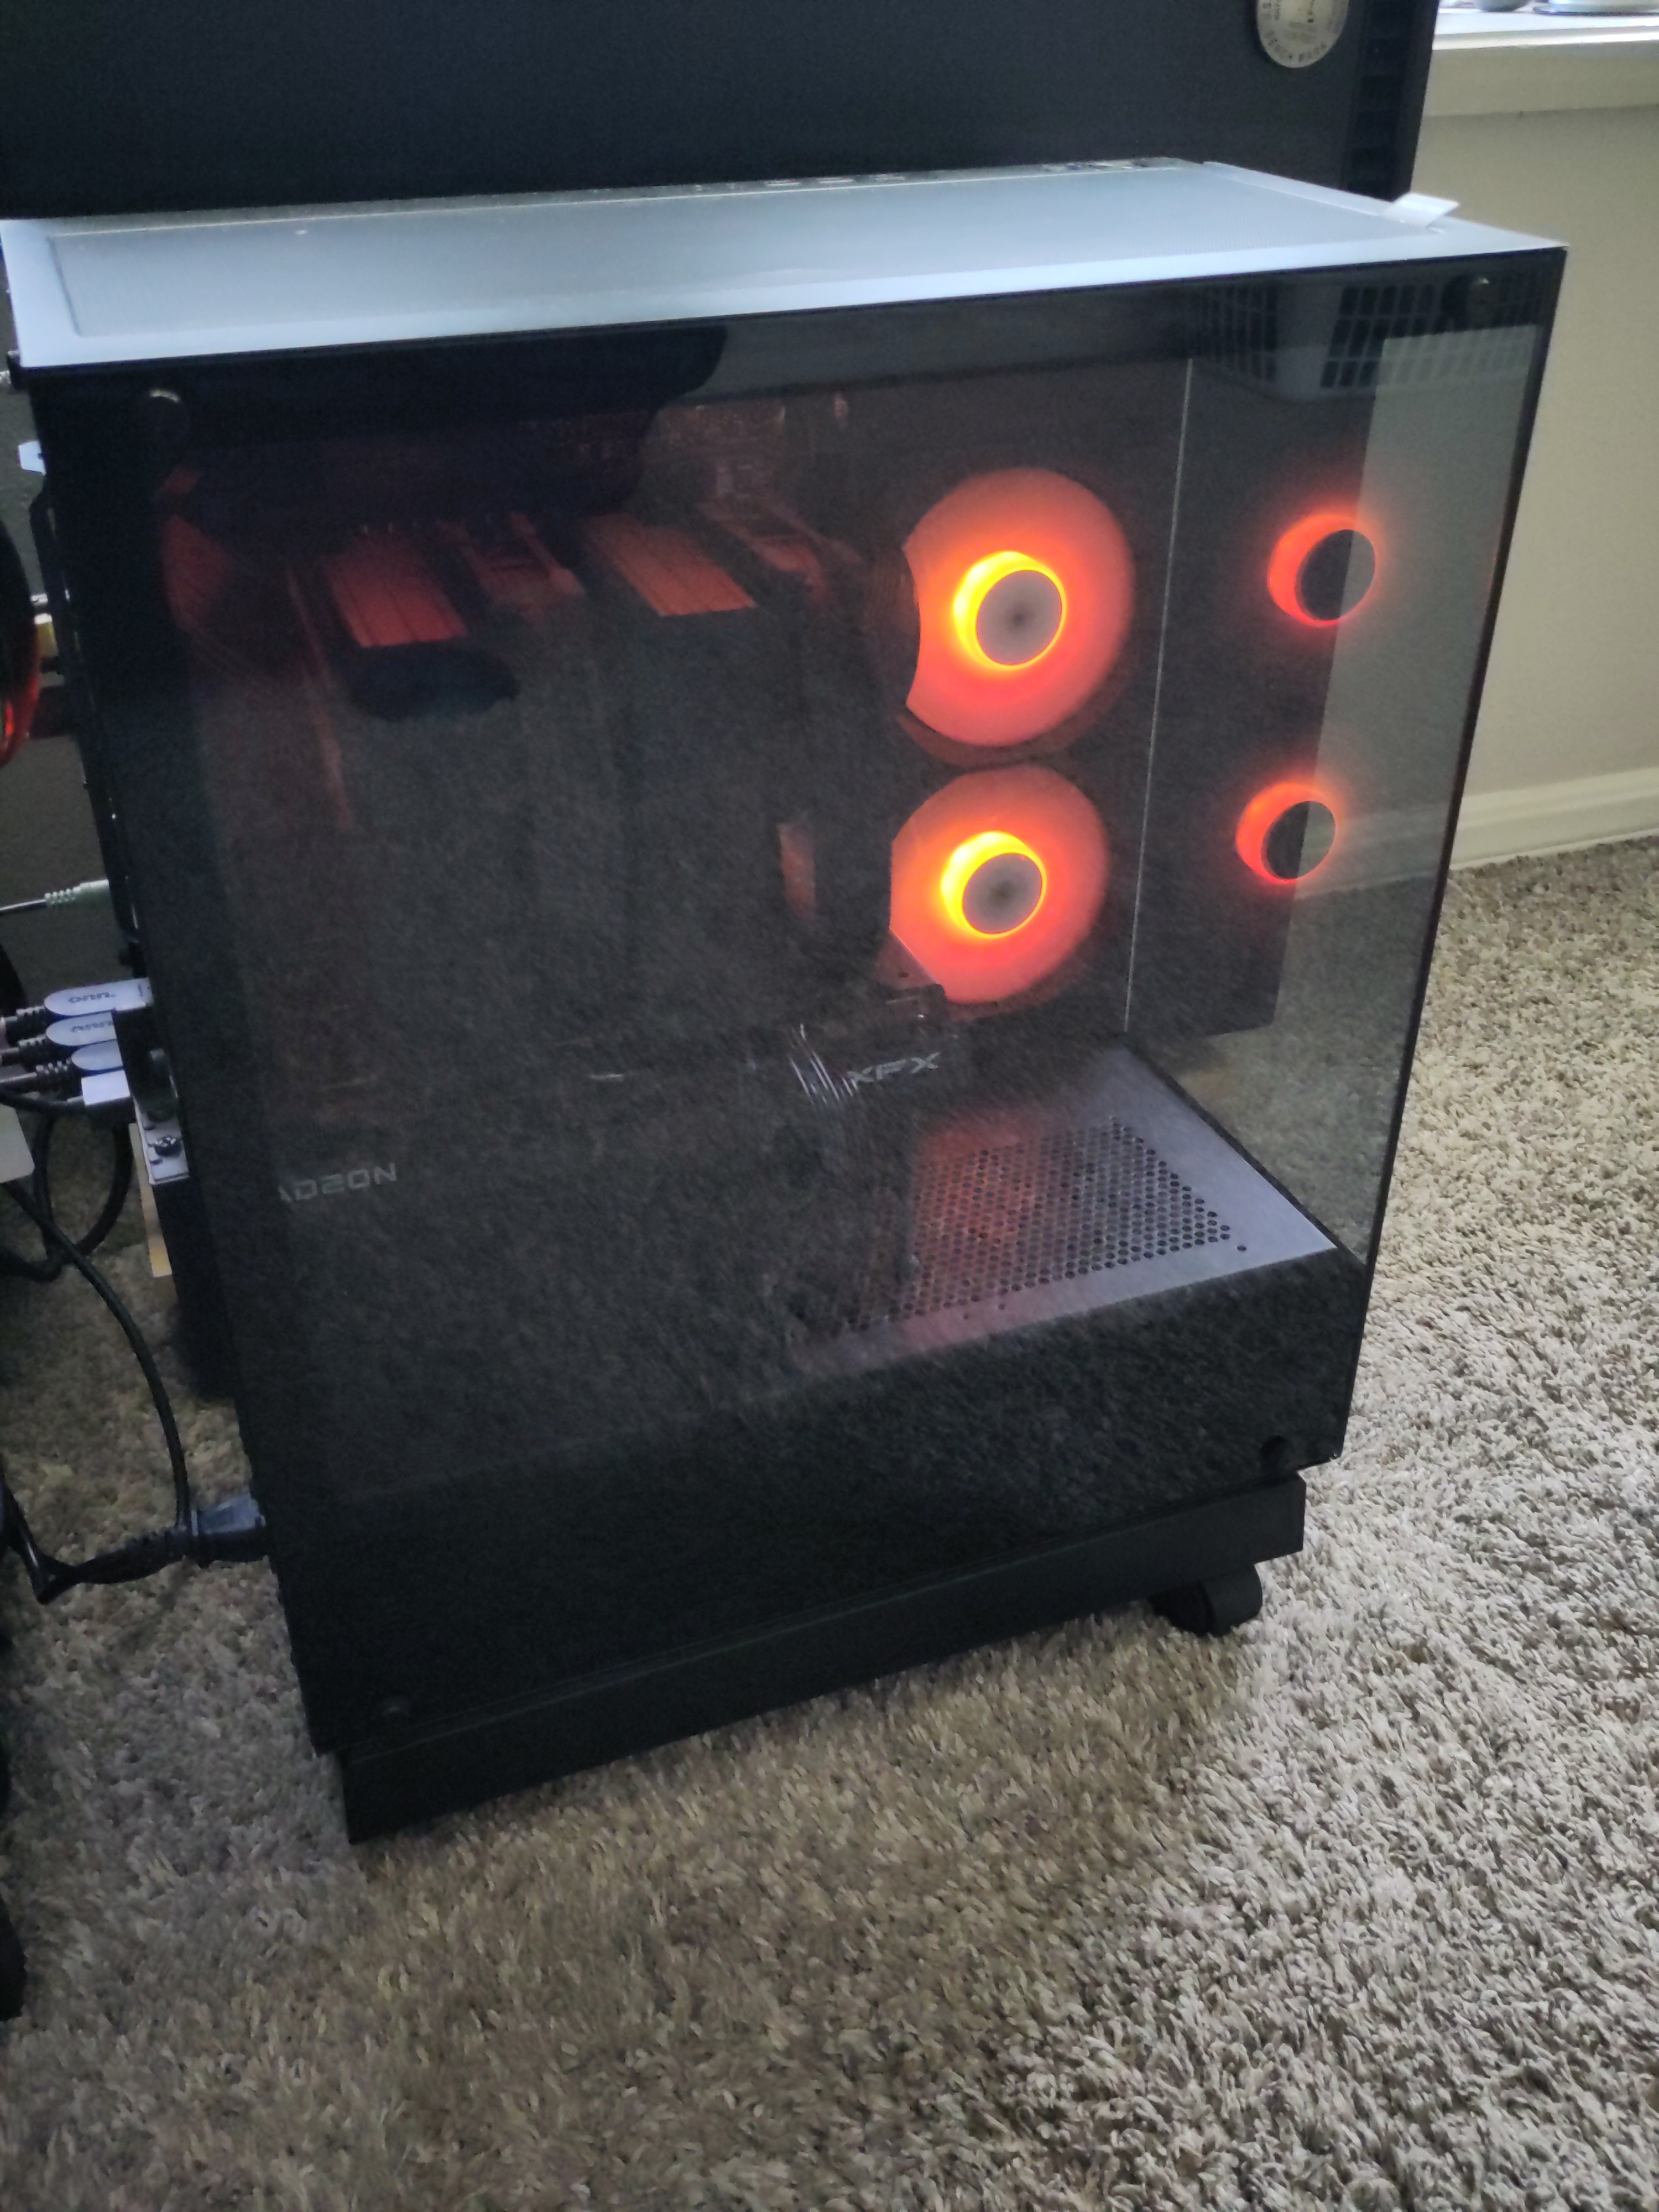
Project: Desktop Build
Project Purpose: Personal
Time frame: February 2025 - April 2025
This was the most recent desktop hardware build I performed. I had the desire to completely upgrade my desktop because certain necessities like learning and exploring virtualization, networking and other capacity means. My intent of building and researching hardware specifications and compatibilities of each component expounds upon my knowledge computers. I had strict preferences and I researched each component to the extent that I knew each component would be compatible before putting each component into PC compatibility analyzer. This was a fun project because cause me explore the inner operation of the computers hardware gain familiarity with the motherboard being able to identify certain imperative electrical connections and controllers. I took on the process of fully building my desktop to installation of an operating system to making in depth system and networking configurations.
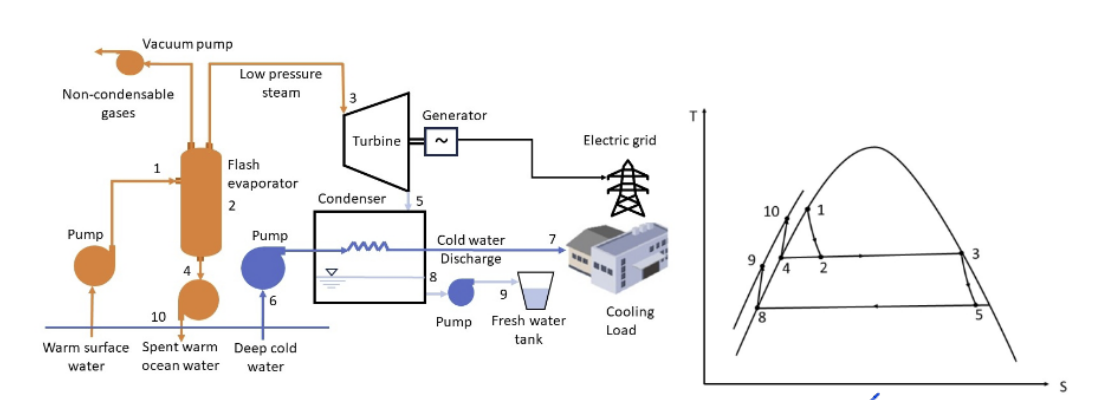
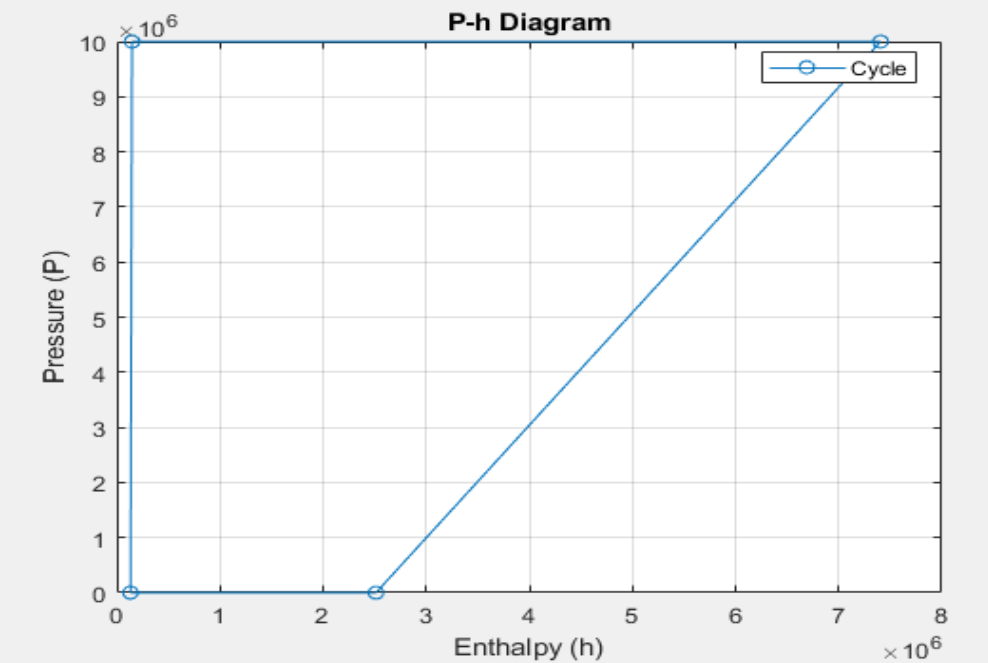
This project initially began as an collaborative project, but ultimately it came down to the aspect of submitting the report individually. This report was primarily dependent upon the code and the resultants. I wrote a 29 page report with brief analysis and concise thought pertaining to the output of the code.
Wrote a 25 page paper on the analysis of an ocean thermal energy conversion
Wrote 400 MATLAB program to make necessary calculations for the overall performance of the rig
Design of the OTEC system
Applied fundamental thermodynamic and fluid mechanics principles
The code contained several different variation with T-S Diagrams for the analyzing the outcome for a refrigerant, air or water would be a better use to condense vapor.
Had to operate in certain condition constraints
Drawn a diagram of basic Rankine cycle with sub cycles to produce desanilated water and electricity to a theoretical island.
Conducted financial analysis of when the OTEC plant would begin to turn a profit, and calculation yearly operation costs in conjunction to approximating the annual revenue from the electricity and desalinated water sold.
Conducted research on OTEC and it would be applicable.
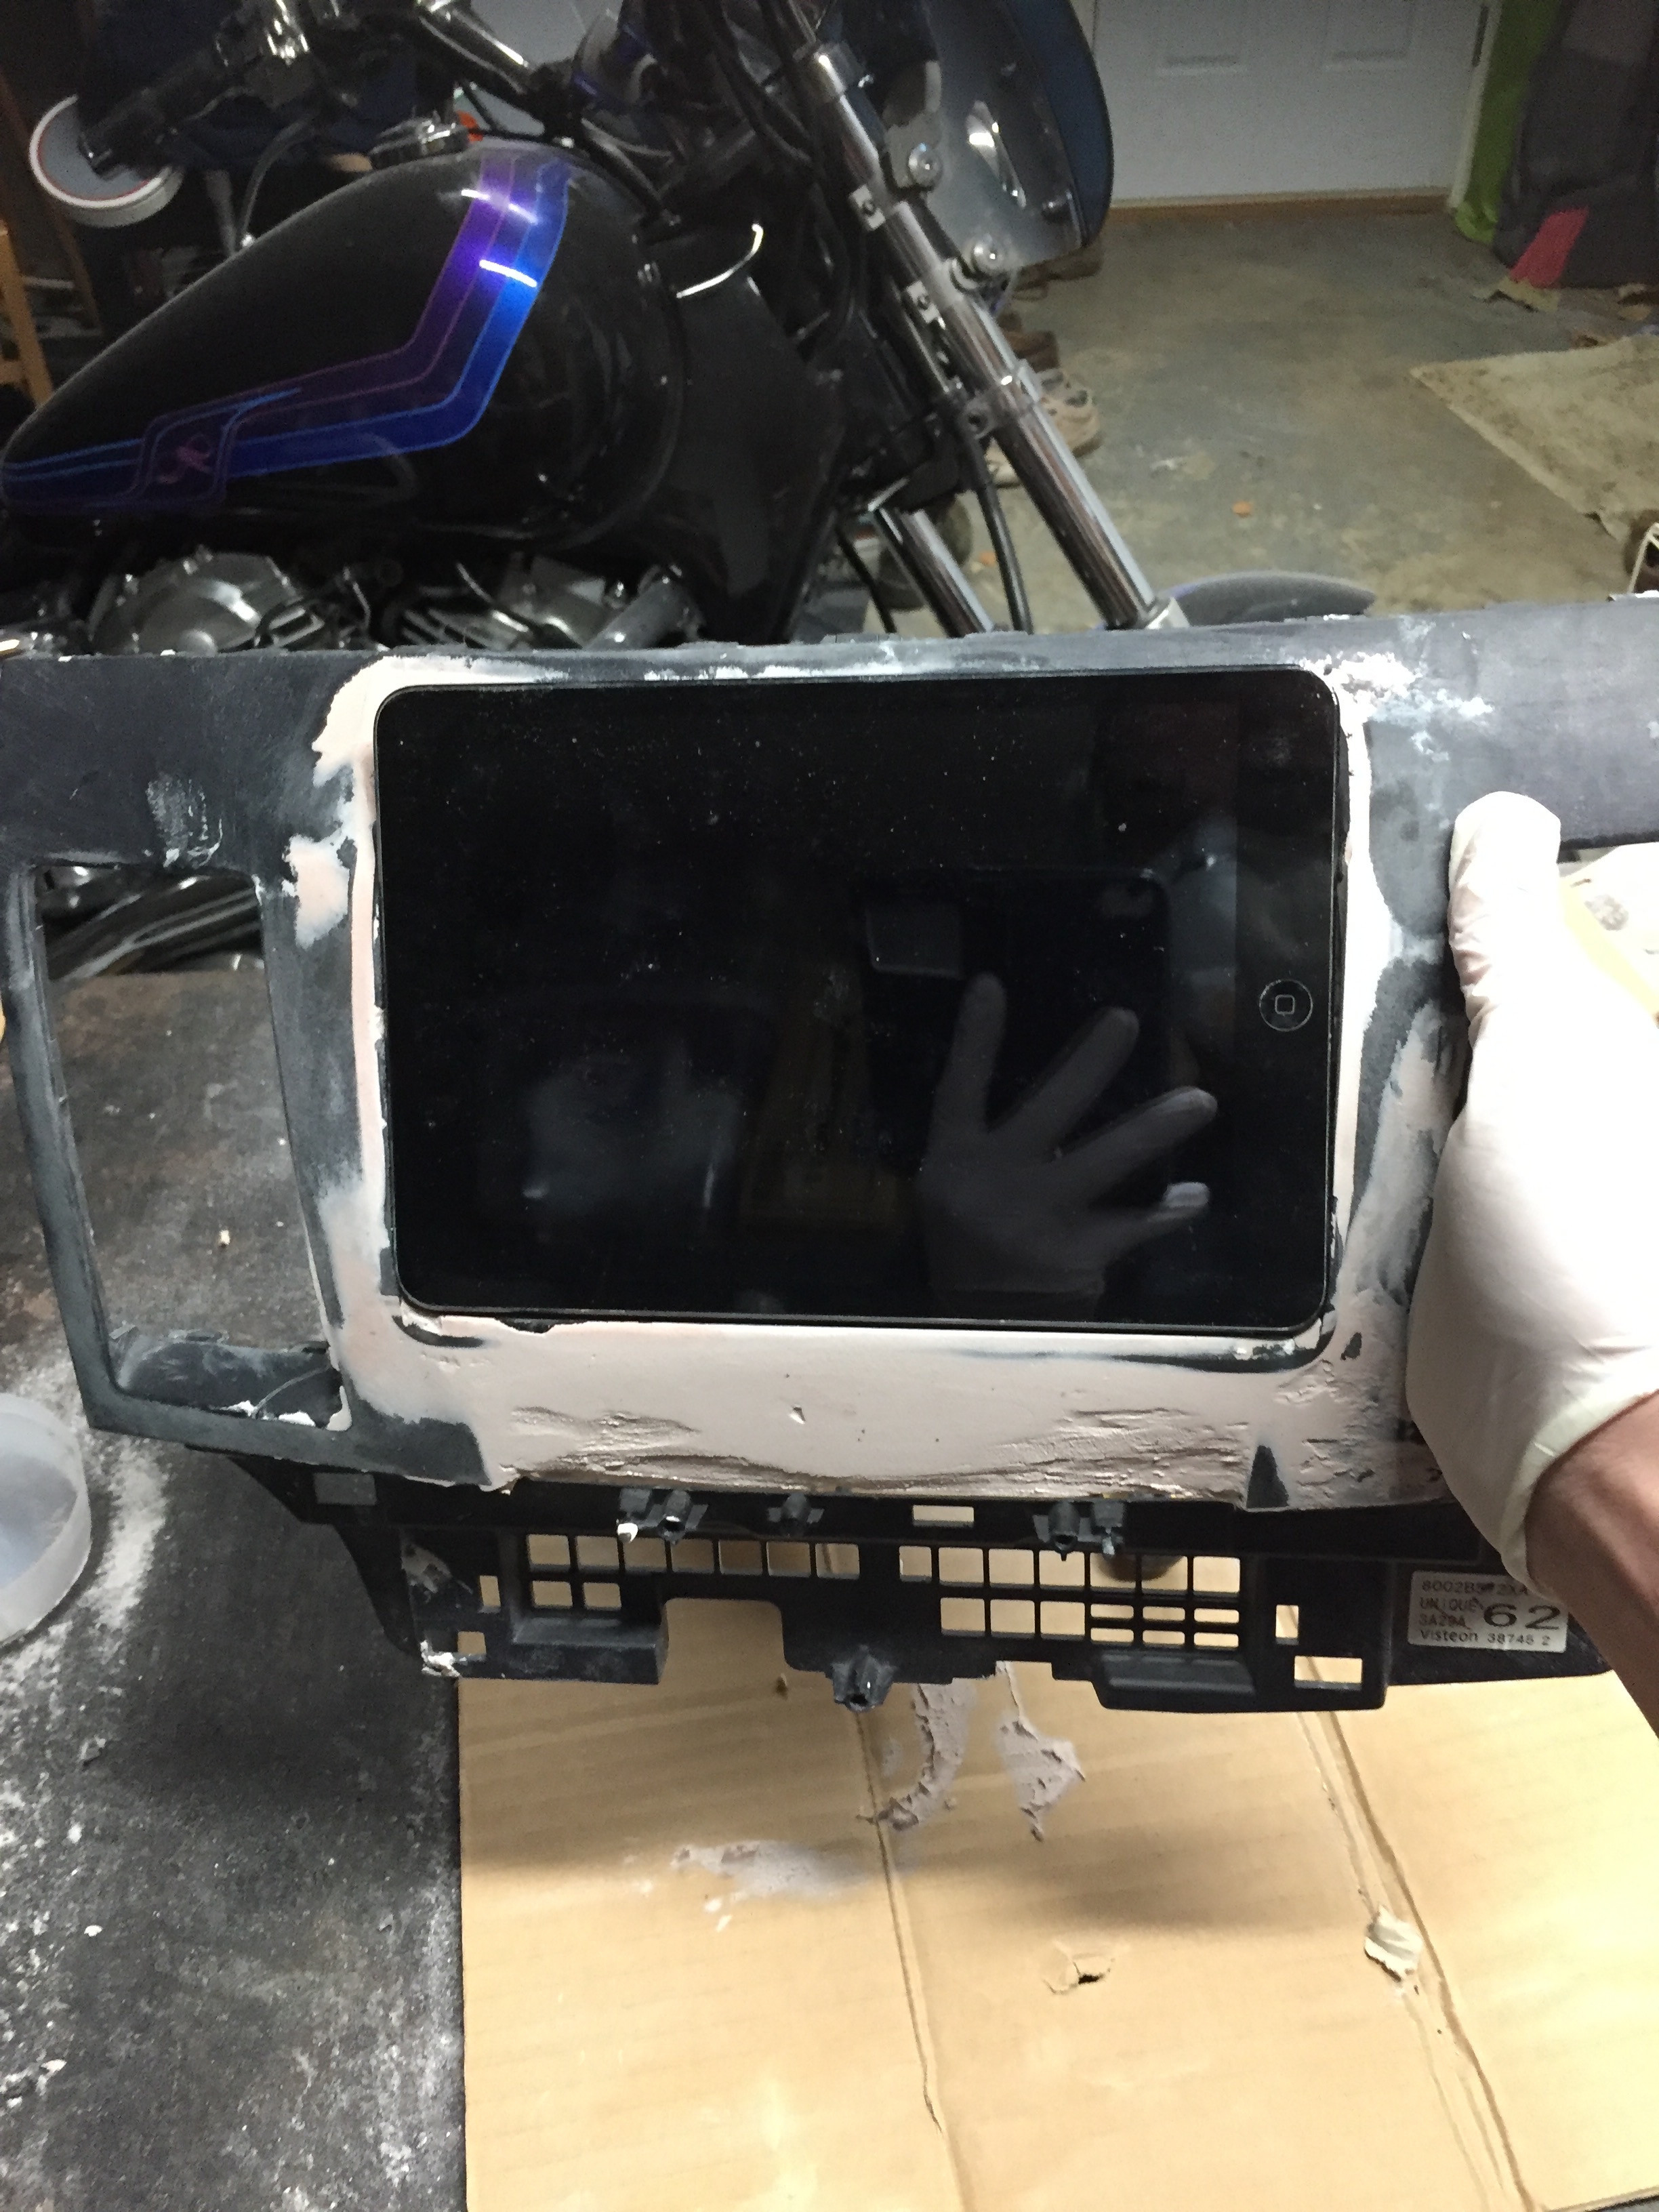
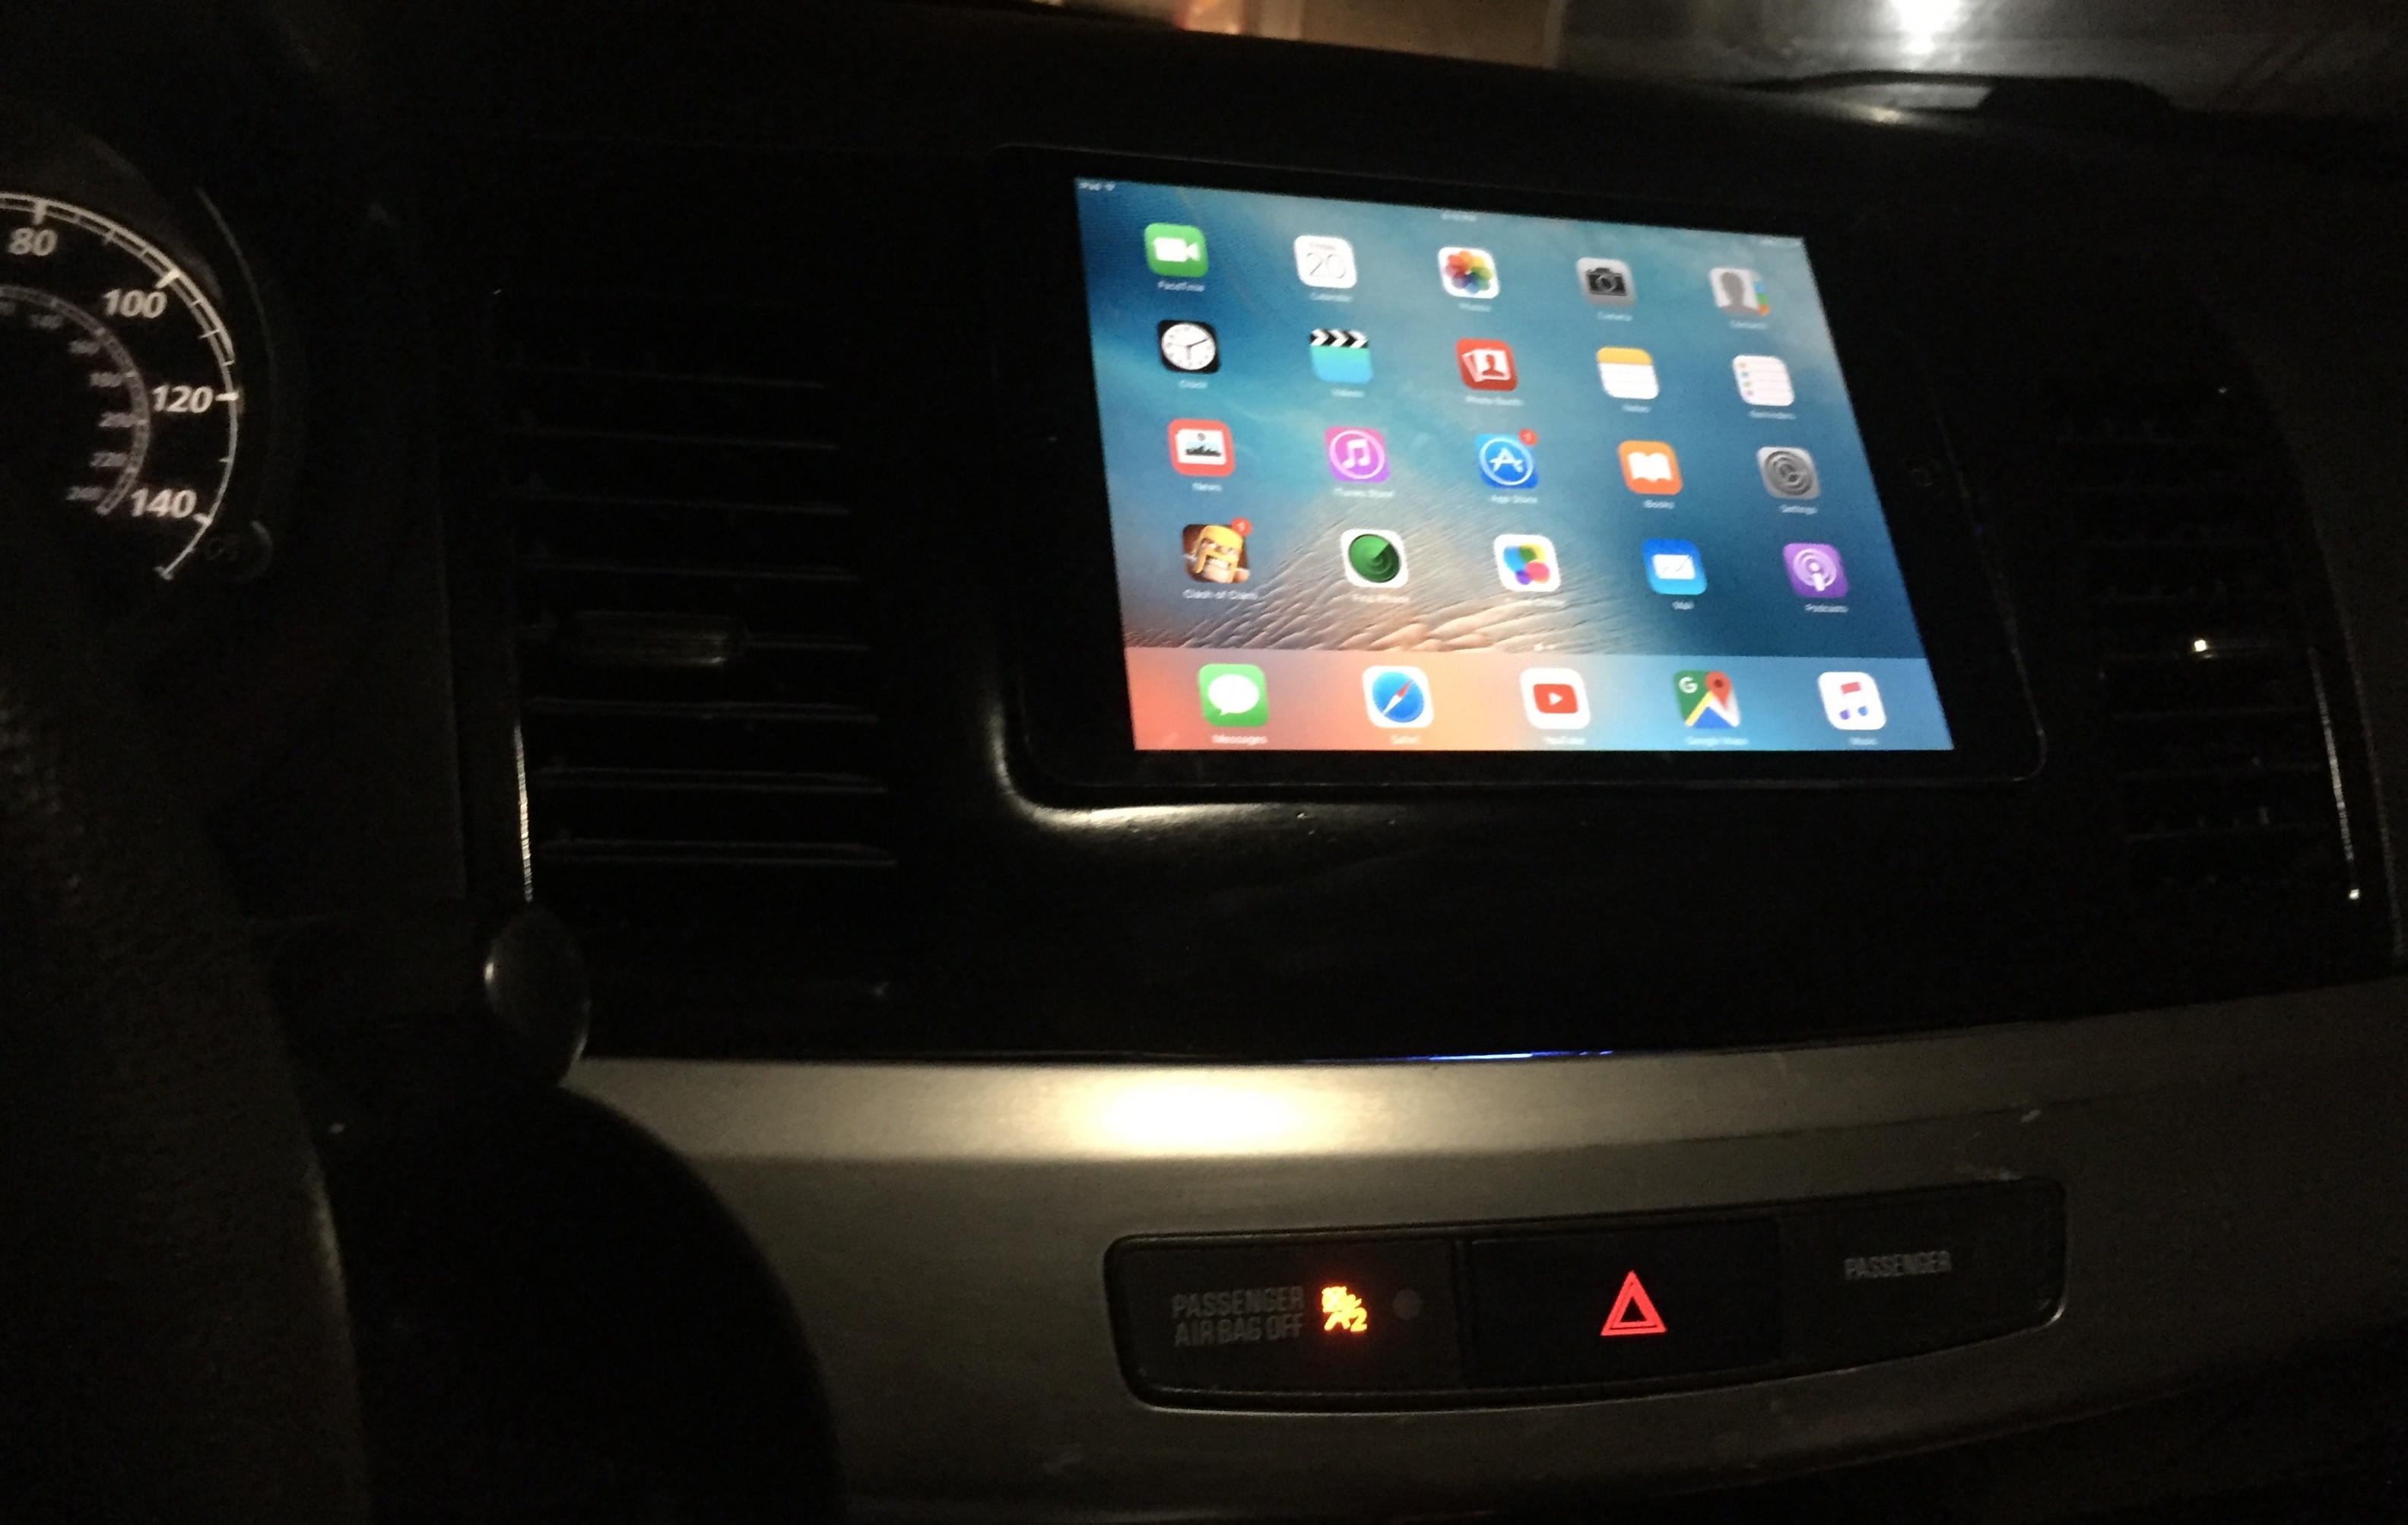
The aim of this project was to take an ipad and be the new front end of controlling my music and navigation. The radio would be pushed and secured further into the cars dash, so there would be room for eletrcial connections to connect to the ipad to the radio. The head unit was a customized project of where I took OEM Dash kit for a double din radio. I cut out a portion of it in order to sit the ipad protection cover in it. The dash kit was cut to desired dimensions to meet the ipad protection cover dimensions and it was held together with bondo. I used a magnet strip from an old keyboard accessory to hold on the ipad into place while being seated into the ipad cover. At the bottom of the ipad protection cover, I cut out a rectangle so there maybe a 90 degree lightening charger to charge the ipad from the head unit. There was a lot of bondo application, sanding and painting to the get the prototype to work. The project was a success, but problems arose where the ipad wasnt properly seating into the cover. When driving the vehicle and hitting potholes or having accessive vibrations, the ipad would fall out. The magnet wasnt strong enough to keep in place. However, the functionality of ipad worked to success, with having a wifi router in the car.